TAGLIABORDI A BATTERIA RICARICABILE FRTA 20 A1
|
|
|
- Rafaela Caminha Belo
- 6 Há anos
- Visualizações:
Transcrição


1 TAGLIABORDI A BATTERIA RICARICABILE FRTA 20 A1 TAGLIABORDI A BATTERIA RICARICABILE Traduzione delle istruzioni d uso originali APARADOR DE RELVA ELÉTRICO Tradução do manual de instruções original CORDLESS LAWN TRIMMER Translation of the original instructions AKKU-RASENTRIMMER Originalbetriebsanleitung IAN _flo_Akku-Rasentrimmer FRTA 20 A1_cover_IT_PT.indd :58
2 Prima di leggere aprire la pagina con le immagini e prendere confidenza con le diverse funzioni dell apparecchio. Antes de começar a ler abra na página com as imagens e, de seguida, familiarize-se com todas as funções do aparelho. Before reading, unfold the page containing the illustrations and familiarise yourself with all functions of the device. Klappen Sie vor dem Lesen die Seite mit den Abbildungen aus und machen Sie sich anschließend mit allen Funktionen des Gerätes vertraut. IT / MT Traduzione delle istruzioni d uso originali Pagina PT Tradução do manual de instruções original Página GB / MT Translation of the original instructions Page DE / AT / CH Originalbetriebsanleitung Seite _flo_Akku-Rasentrimmer FRTA 20 A1_cover_IT_PT.indd :58


3 a a a
4 IT MT Contenuto Introduzione... 4 Uso conforme... 4 Descrizione generale... 5 Contenuto... 5 Panoramica... 5 Descrizione del funzionamento... 5 Dati tecnici... 6 Istruzioni di sicurezza... 6 Simboli e icone... 7 Indicazioni di sicurezza generali per utensili elettrici... 8 Ulteriori avvertenze di sicurezza RISCHI RESIDUI Utilizzo corretto del caricabatterie Processo di carica Estrazione/Inserimento della batteria.15 Caricamento della batteria Batterie usate Istruzioni di montaggio Uso Accensione e spegnimento Verifica dello stato di carica della batteria Introduzione Congratulazioni per l acquisto del Suo nuovo apparecchio. Ha scelto un prodotto altamente pregiato. Questo apparecchio è stato sottoposto a un controllo di qualità durante la produzione e quindi sottoposto a un controllo finale. Quindi è garantito il funzionamento del vostro apparecchio. Le istruzioni per l uso costituiscono parte integrante di questo prodotto. Contengono indicazioni importanti per la sicurezza, l uso e lo smaltimento. Prima dell uso del prodotto, si raccomanda di familiarizzare con tutte le indicazioni di comando e di sicurezza. Usare Impostazioni sull apparecchio Avvertenze per l utilizzo Taglio del prato Taglio perpendicolare/ Taglio delle aiuole Pulizia e manutenzione Pulizia Lavori di manutenzione generali Sostituzione della lama di plastica Stoccaggio Smaltimento / Rispetto dell ambiente Garanzia Servizio di riparazione Service-Center Importatore Pezzi di ricambio/accessori Ricerca dei guasti Traduzione della dichiarazione di conformità CE originale Vista esplosa il prodotto solo come descritto e per i campi d impiego specificati. Conservare le istruzioni in un luogo sicuro e consegnare la documentazione in caso di cessione del prodotto a terzi. Uso conforme L apparecchio è idoneo per il taglio dell erba nei giardini e lungo le aiuole. Ogni altro impiego non espressamente consentito nel presente manuale, può causare danni all apparecchio e rappresentare un serio pericolo per l utente. Non utilizzare l apparecchio per tagliare siepi o arbusti. L apparecchio è destinato all utilizzo da parte di adulti. L uso 4
5 IT MT dell apparecchio ai ragazzi di età superiore a 16 anni è consentito solo sotto sorveglianza. Il produttore non si fa carico di eventuali danni causati da un uso improprio o da un azionamento errato. L apparecchio non è destinato a un uso commerciale. Un eventuale utilizzo commerciale comporta l estinzione della garanzia. Descrizione generale Contenuto L immagine dei principali componenti funzionali é riportata nella pagina ripiegabile davanti e dietro. Estrarre l apparecchio dall imballo e verificarne l integrità. - Decespugliatore a batteria - Disco di taglio con 1 vite (filettatura sinistrorsa) - Coperchio di protezione con tre viti - Impugnatura supplementare - 20 lame di plastica - Caricabatterie - Batteria - Manuale di istruzioni originale Panoramica 1 Impugnatura superiore 2 Interruttore di accensione/spegnimento 3 Blocco accensione 4 Custodia per lama di plastica (non mostrata) 5 Impugnatura supplementare 6 Impugnatura 7 Blocco per la regolazione dell impugnatura 8 Manicotto filettato per la regolazione della lunghezza 9 Tubo telescopico 10 Testa motore 11 Staffa distanziatrice (protezione per i fiori) 12 Disco di taglio 13 Lama di plastica 14 Coperchio di protezione 15 Pulsante a pressione per la regolazione dell angolo di inclinazione (non visibile) 16 Batteria 17 Tasto di sblocco batteria 18 Indicatore dello stato di carica della batteria 18a Tasto della visualizzazione del livello di carica 19 Caricabatteria 19a Spie di controllo (LED) caricabatterie 20 Barra di guida 14a Viti del coperchio di protezione 21 Supporto per impugnatura 22 Vite per impugnatura 12a Vite, disco di taglio 23 Perno, disco di taglio Descrizione del funzionamento Il decespugliatore a batteria portatile e a controllo manuale ha un sistema di lame in plastica come dispositivo di taglio. Inoltre l apparecchio è dotato di una testa del motore basculante, di un tubo telescopico in alluminio regolabile e di una staffa distanziatrice. Per proteggere l utente l apparecchio ha un dispositivo di protezione che copre il gruppo di taglio. La seguente descrizione illustra il funzionamento dei componenti. 5
6 IT MT Dati tecnici Decespugliatore a batteria...frta 20 A1 Tensione del motore U...20 V Numero di giri a vuoto min -1 Classe di protezione...iii Tipo di protezione...ip20 Tempo di funzionamento... ca. 45 min* Cerchio di taglio mm Peso (senza caricabatterie)...2,15 kg Livello di pressione acustica (L pa )... 78,6 db (A), K pa =3 db Livello di potenza acustica (L WA ) Garantito db (A) Misurato... 89,8 db (A); K WA =2,51 db Vibrazione (a h ) Impugnatura superiore... 2,65 m/s 2, K=1,5 m/s 2 Impugnatura supplementare... 3,11 m/s 2, K=1,5 m/s 2 Batteria (ioni di litio)...fap 20 A2 Numero di celle batteria... 5 Tensione nominale...20 V Capacità... 2,0 Ah Tempo di carica...circa 1 h Caricabatterie... FLG 20 A2 Consumo nominale...65 W Tensione di ingresso/ Input V~, 50 Hz Tensione di uscita/ Output...21,5 V, 2,4 A Classe di protezione... II Tipo di protezione...ip20 * Il tempo di funzionamento effettivo di una batteria in uso, completamente ricaricata, dipende dalla modalità di lavoro e dallo sforzo durante il taglio. I valori relativi alla rumorosità e alle vibrazioni sono stati determinati in base alle norme e alle disposizioni indicate nella dichiarazione di conformità. Le procedure di misurazione delle vibrazioni e dei rumori secondo EN sono state svolte con esito positivo. Il valore sulle vibrazioni emesse indicato è stato misurato seguendo una procedura di controllo regolata da norme e può essere utilizzato per il confronto di un utensile elettrico con un altro. Il valore sulle vibrazioni emesse indicato può anche essere impiegato per un calcolo approssimativo della sospensione. Avvertenza: Durante l impiego dell utensile elettrico, il valore sulle vibrazioni può scostarsi dal valore indicato, in base al modo in cui esso viene utilizzato. Cercare di limitare il più possibile l esposizione alle vibrazioni. Per attenuare l esposizione alle vibrazioni si possono ad esempio indossare guanti durante l utilizzo dell utensile e limitare l orario di lavoro. In tal senso occorre tenere conto di tutte le componenti del ciclo operativo (ad esempio i momenti in cui l apparecchio elettrico è spento e quelli in cui è accesso, ma opera senza carico). Istruzioni di sicurezza Osservare le istruzioni di sicurezza durante l uso della macchina. 6
7 IT MT Simboli e icone Simboli sull apparecchio: Attenzione! Leggere con attenzione le presenti istruzioni d uso. Indossare occhiali di protezione e cuffie di protezione. Dopo lo spegnimento il disco di taglio continua a girare per alcuni secondi. Tenere lontano mani e piedi. Non lavorare con la pioggia e non tagliare il prato umido. Rischio di lesioni a causa di parti lanciate! Tenere lontane le persone dall area di pericolo. Tenere a distanza le altre persone. Potrebbero subire lesioni a causa della proiezione di corpi estranei. Rimuovere la batteria prima dei lavori di manutenzione. Indicazione del livello di potenza acustica L WA in db Gli apparecchi elettrici non vanno smaltiti con i rifiuti domestici. Cerchio di taglio Simboli sulla batteria: Leggere con attenzione le presenti istruzioni d uso. Tasto della visualizzazione del livello di carica Non smaltire la batteria con i rifiuti domestici, nel fuoco o in acqua. Non esporre la batteria a radiazioni solari intense per un tempo prolungato e non appoggiarla sui caloriferi (max. 45 C). Consegnare la batteria in un centro di raccolta di batterie usate, dove verranno sottoposte a un corretto riciclaggio nel rispetto dell ambiente. Simboli sul caricabatterie: T3.15A 130 C Attenzione! Leggere con attenzione le presenti istruzioni d uso. Il caricabatterie è idoneo solo per l uso in luoghi chiusi. Minifusibile Classe di protezione II (Doppio isolamento) Gli apparecchi elettrici non vanno smaltiti con i rifiuti domestici. 7
8 IT MT Spie di controllo (LED) caricabatterie Simboli nelle istruzioni Simboli dei pericoli con apposite indicazioni per prevenire danni a persone o cose. Simboli di pericolo con indicazioni per prevenire danni alle persone dovuti a una scossa elettrica. Simboli dei divieti con indicazioni relative alla prevenzione di danni. Leggere attentamente prima dell uso. Simboli di avvertenza con informazioni relative ad un migliore trattamento dell apparecchio. Indicazioni di sicurezza generali per utensili elettrici ATTENZIONE! Leggere tutte le indicazioni di sicurezza e le istruzioni. La mancata osservanza delle indicazioni di sicurezza e delle istruzioni possono provocare scosse elettriche, incendi e/o lesioni gravi. Conservare tutte le indicazioni di sicurezza e le istruzioni per una consultazione futura. Il termine usato nelle indicazioni di sicurezza Utensile elettrico si riferisce a utensili elettrici azionati con tensione di rete (con cavo di rete) e a utensili elettrici azionati con accumulatori (senza cavo di rete). 1) SICUREZZA SUL POSTO DI LA- VORO a) Tenere la zona di lavoro pulita e ben illuminata. Disordine o zone di lavoro non sufficientemente illuminate possono causare infortuni. b) Non lavorare con l utensile elettrico in un ambiente a rischio di esplosioni, nel quale sono presenti liquidi, gas o polveri infiammabili. Utensili elettrici generano scintille che possono infiammare la polvere o i vapori. c) Tenere bambini e altre persone lontane durante l uso dell utensile. In caso di distrazioni si può perdere il controllo dell apparecchio. 2) SICUREZZA ELETTRICA a) La spina di allacciamento dell utensile elettrico deve essere adatto alla presa. La spina non deve essere modificata in alcun modo. Non usare un adattatore insieme a utensili elettrici collegati a massa. Spine non modificate riducono il rischio di scosse elettriche. b) Evitare il contatto del corpo con superfici collegate a massa, come anche da 8
9 IT MT tubi, termosifoni, fornelli e frigoriferi. Aumento del pericolo di scosse elettriche, quando il corpo è collegato a massa. c) Tenere gli utensili elettrici lontani dalla pioggia e dall umidità. L infiltrazione di acqua nell utensile elettrico aumenta il pericolo di scosse elettriche. d) Non usare il cavo per trasportare, appendere l utensile elettrico o per staccare la spina dalla presa. Tenere il cavo lontano da calore, olio, spigoli vivi o componenti in movimento. Cavi danneggiati o attorcigliati aumentano il rischio di una scossa elettrica. e) Quando si lavora con un utensile elettrico all aperto, usare solo prolunghe adatte anche per l esterno. L uso di una prolunga adatta per l esterno riduce il rischio di scosse elettriche. f) Se non è possibile evitare l uso dell utensile elettrico in un am biente umido, usare un interruttore di sicurezza per correnti di guasto con una corrente di accensione di 30 ma o meno. L impiego di un interruttore di sicurezza per correnti di guasto riduce il rischio di scosse elettriche. 3) SICUREZZA DELLE PERSONE a) Prestare attenzione ai propri movimenti e lavorare con l utensile elettrico usando raziocinio. Non usare un utensile elettrico, quando si è stanchi o si è sotto effetto di droghe, alcol o farmaci. Un attimo di disattenzione durante l uso dell utensile elettrico può causare lesioni gravi. b) Indossare un attrezzatura di sicurezza personale e sempre occhiali protettivi. Indossando un attrezzatura di sicurezza personale, come maschera antipolvere, scarpe di sicurezza antiscivolo, casco o protezione dell udito a seconda dell impiego dell utensile elettrico si riduce il pericolo di lesioni. c) Evitare la messa in esercizio incustodita. Assicurarsi che l utensile elettrico sia spento, prima di allacciarlo all alimentazione elettrica e/o all accumulatore, di sollevarlo o trasportarlo. Se durante il trasporto dell utensile elettrico si tiene il dito sull interruttore oppure si allaccia l apparecchio all alimentazione elettrica in condizioni accese, possono verificarsi infortuni. d) Rimuovere gli strumenti di regolazione o i cacciaviti, prima di accendere l utensile elettrico. Un utensile o un cacciavite che si trova in un componente rotante dell apparecchio, può provocare lesioni. e) Evitare una postura anormale. Garantire una posizione stabile e mantenere l equilibrio in ogni momento. In questo modo l utensile elettrico può essere controllato meglio in situazioni impreviste. 9
10 IT MT f) Indossare abbigliamento adeguato. Non indossare abiti larghi o gioielli. Tenere i capelli, l abbigliamento e i guanti lontani dalle parti in movimento. Capi di abbigliamento larghi, gioielli o capelli lunghi possono essere catturati dalle parti in movimento. g) Se è possibile montare apparecchi aspirapolvere o di raccolta della polvere, assicurarsi che questi siano collegati e vengano utilizzati in modo corretto. Il ricorso all aspirapolvere può ridurre i danni dovuti alla polvere. 4) USO E TRATTAMENTO DELL UTENSILE ELETTRICO a) Non sovraccaricare l apparecchio. Usare l utensile elettrico destinato al tipo di lavoro da svolgere. Con l utensile elettrico adatto si lavora in modo migliore e più sicuro nel campo di potenza specificato. b) Non usare utensili elettrici con l interruttore difettoso. Un utensile elettrico che non può essere acceso o spento è pericoloso e deve essere riparato. c) Staccare la spina dalla presa e/o rimuovere l accumulatore, prima di eseguire le regolazioni dell apparecchio, di sostituire gli accessori o di deporre l apparecchio. Questa misura previene l avviamento involontario dell utensile elettrico. d) Conservare gli utensili elettrici non usati fuori dalla portata di bambini. Non lasciare usare l apparecchio a persone che non hanno familiarizzato con lo stesso o che non hanno letto le istruzioni. Utensili elettrici sono pericolosi se usati da persone inesperte. e) Trattare gli utensili elettrici con cura. Controllare se le parti in movimento funzionano perfettamente e non si inceppano, se sono presenti parti spezzate o danneggiate che possono compromettere il funzionamento dell utensile elettrico. Fare riparare le parti danneggiate prima dell impiego dell apparecchio. Le cause di molti infortuni risiedono in una scarsa manutenzione degli utensili elettrici. f) Tenere gli utensili da taglio appuntiti e puliti. Utensili da taglio curati con bordi taglienti appuntiti si inceppano meno facilmente e sono più facili da maneggiare. g) Usare l utensile elettrico, gli accessori e i ricambi ecc. conformemente alle istruzioni. A tale proposito tenere in considerazione le condizioni di lavoro e l attività da svolgere. L uso di utensili elettrici per scopi diversi da quelli previsti può generare situazioni pericolose. h) Assicurarsi che le prese d aria siano pulite. i) Rimuovere l accumulatore 10
11 IT MT - ogni qualvolta l utilizzatore si allontana dalla macchina. - prima dell eliminazione dei bloccaggi. - prima di effettuare controlli, interventi di pulizia o lavori sulla macchina. - dopo aver toccato un corpo estraneo per verificare se la macchina ha riportato danni. - per una verifica tempestiva nel caso in cui la macchina inizi a vibrare eccessivamente. 5) UTILIZZARE E MANEGGIARE GLI UTENSILI A BATTERIA CON CAUTELA a) Caricare le batterie solo nei caricatori consigliati dal produttore. Un caricabatterie adatto a un dato tipo di batterie può incendiarsi se viene utilizzato con altre batterie. b) Utilizzare solo le batterie appositamente previste per gli elettroutensili. L uso di batterie diverse provoca il rischio di lesioni e il pericolo di incendio. c) Tenere le batterie non utilizzate lontano da graffette, monete, chiavi, chiodi, viti o altri oggetti di metallo di piccole dimensioni che potrebbero creare un collegamento fra i contatti. Un cortocircuito fra i contatti delle batterie causa il pericolo di ustione o incendio. d) In caso di uso improprio può fuoriuscire del liquido dalla batteria. Evitare il contatto con questo liquido. In caso di contatto accidentale risciacquare con acqua. Se il liquido penetra negli occhi consultare un medico. Il liquido fuoriuscito dalla batteria può causare irritazioni cutanee o ustioni. 6) ASSISTENZA TECNICA Fare riparare l utensile elettrico da personale specializzato qualificato e solo con ricambi originali. In questo modo si garantisce il mantenimento della sicurezza dell utensile elettrico. 7) AVVERTENZE DI SICUREZZA SPECIALI PER GLI APPARECCHI A BATTERIA a) Assicurarsi che l apparecchio sia spento prima di inserire la batteria. L inserimento di una batteria in un elettroutensile acceso può causare incidenti. b) Caricare le batterie solo in luoghi chiusi in quanto il caricabatterie è destinato solo a tale uso. c) Per ridurre il rischio di scossa elettrica, estrarre la spina del caricabatterie dalla presa prima di pulirla. d) Non esporre la batteria a radiazioni solari intense per un periodo di tempo prolungato e non appoggiarla sui caloriferi. Il calore danneggia la batteria e sussiste il pericolo di esplosione. e) Prima di ricaricare una batteria surriscaldata aspettare che si raffreddi. 11
12 IT MT f) Non aprire la batteria ed evitare danni meccanici alla batteria. Sussiste il pericolo di cortocircuito e di fuoriuscita di vapori che irritano le vie respiratorie. Andare all aria fresca e in caso di disturbi consultare un medico. g) Non utilizzare batterie ricaricabili! Ulteriori avvertenze di sicurezza FORMAZIONE Questo apparecchio non può essere utilizzato da bambini. I bambini devono essere sorvegliati per assicurarsi che non giochino con l apparecchio. La pulizia e la manutenzione non devono essere effettuate da bambini. L apparecchio non può essere utilizzato da persone con capacità fisiche, sensoriali o mentali limitata o persone con conoscenze o esperienza insufficiente. A livello locale possono essere in vigore disposizioni che stabiliscono limiti di età per l utilizzatore. Attenzione, l utente stesso è responsabile di incidenti o pericoli causati ad altre persone o del relativo possesso. Si tenga presente che non è consentito l utilizzo di questa macchina da parte di bambini e persone con capacità fisiche, sensoriali o intellettive limitate oppure con carente esperienza e/o conoscenza o di persone che non abbiano acquisito familiarità con le istruzioni per l uso. A livello locale possono essere in vigore disposizioni che stabiliscono limiti di età per l utilizzatore. Non consentire l uso della macchina a bambini o persone che non abbiano dapprima letto con attenzione le istruzioni per l uso. PREPARAZIONE Prima dell uso si deve verificare visivamente la presenza di dispositivi di protezione o rivestimenti danneggiati, assenti o montati in maniera errata. Prima di mettere in funzione la macchina e in caso di eventuali urti, controllare eventuali segni di usura o danni e fare eseguire le riparazioni necessarie. FUNZIONAMENTO La protezione per gli occhi, i pantaloni lunghi e le scarpe antinfortunistica devono essere indossati per tutto il tempo di utilizzo della macchina. L uso della macchina deve essere evitato in presenza di cattivo tempo, soprattutto in caso di rischio di fulmini. Avvertenza! Non toccare le parti pericolose in movimento prima di aver rimosso la batteria e prima che le parti pericolose in movimento si siano completamente fermate. Pericolo di lesioni ai piedi e alle mani dovute al dispositivo di taglio. Interrompere l uso della macchina in presenza di altre persone, in particolare bambini o animali domestici. 12
13 IT MT Utilizzare la macchina esclusivamente con la luce del giorno o in presenza di un adeguata illuminazione artificiale. Tenere sempre mani e piedi fuori dalla portata della lama, soprattutto quando il motore è acceso. Non installare mai lame metalliche. Non utilizzare mai la macchina in mancanza di dispositivi di sicurezza o se gli stessi sono danneggiati. Evitare una posizione del corpo anomala. Assicurare di avere una posizione salda per poter mantenere sempre l equilibrio durante i lavori in posizione sospesa. Camminare lentamente. Non correre con l apparecchio in mano. Durante il funzionamento della macchina indossare sempre scarpe resistenti e pantaloni lunghi. In caso di incidente o di un guasto durante l uso, spegnere immediatamente il dispositivo. Medicare in maniera adeguata le lesioni o consultare un medico. Per eliminare i guasti consultare il capitolo Ricerca dei guasti oppure contattare il nostro centro di assistenza. MANUTENZIONE E CONSERVAZIONE Rimuovere la batteria estraibile prima di eseguire la manutenzione o i lavori di pulizia. Si devono utilizzare esclusivamente i ricambi e gli accessori del produttore. Sottoporre regolarmente la macchina a controlli e manutenzione. Far riparare la macchina solo da un officina autorizzata. RISCHI RESIDUI Anche se questo utensile elettrico viene usato conformemente alle disposizioni, rimangono sempre rischi residui. I seguenti pericoli possono verificarsi in relazione alla tipologia costruttiva e al tipo di esecuzione di questo elettrodomestico: a) Lesioni da taglio b) Danni all udito, qualora non venga indossata un adeguata protezione dell udito. c) Danni alla salute risultanti dalle oscillazioni mano-braccio, quando l apparecchio viene usato per un periodo prolungato o non viene condotto o manutenuto conformemente alle disposizioni. Avvertenza! Questo utensile elettrico genera un campo magnetico durante il funzionamento. In determinate condizioni questo campo può compromettere gli impianti medici attivi o passivi. Per ridurre il pericolo di lesioni gravi o letali, consigliamo alle persone con impianti medici di consultare il medico e il produttore dell impianto medico prima di azionare la macchina. 13
14 IT MT Utilizzo corretto del caricabatterie L uso di questo apparecchio da parte di bambini a partire dagli 8 anni e di persone con capacità fisiche, sensoriali o mentali ridotte o prive di esperienza e conoscenza è consentito solo sotto vigilanza oppure a condizione che tali persone siano state istruite in merito a un uso sicuro dell apparecchio e siano in grado di comprenderne i pericoli. Non consentire ai bambini di giocare con l apparecchio. La pulizia e la manutenzione non vanno effettuate da bambini non sorvegliati. È necessario sorvegliare i bambini per accertarsi che non giochino con l apparecchio. Per caricare la batteria utilizzare esclusivamente il caricabatterie in dotazione. Pericolo di incendi ed esplosioni. Prima di ogni utilizzo controllare il caricabatterie, il cavo e il connettore e affidarne la riparazione a personale qualificato che utilizzi solo pezzi di ricambio originali. Non utilizzare un caricabatterie difettoso e non aprirlo di propria iniziativa. In tal modo si garantisce il mantenimento della sicurezza dell apparecchio. Assicurarsi che la tensione di rete coincida con i dati riportati sulla targhetta del caricabatterie. Pericolo di scossa elettrica. Staccare il caricabatterie dalla rete prima di chiudere o aprire i collegamenti con l elettroutensile. Tenere pulito il caricabatterie e non esporlo a umidità e pioggia. Non utilizzare mai il caricabatterie all aperto. Sporco e infiltrazioni d acqua aumentano il rischio di scossa elettrica. Il caricabatterie può essere utilizzato solo con le rispettive batterie originali. La ricarica di batterie diverse provoca il rischio di lesioni e il pericolo di incendio. Evitare danni meccanici al caricabatterie. Possono causare cortocircuiti interni. Il caricabatterie non può essere azionato su una base infiammabile (ad es. carta, tessuti). Pericolo d incendio a causa del surriscaldamento generato durante la carica. Se il cavo di allacciamento di questo apparecchio è danneggiato, deve essere sostituito dal produttore o dal suo servizio clienti o da una persona qualificata per evitare pericoli. Non usare il caricabatterie per ricaricare batterie non ricaricabili. L apparecchio potrebbe danneggiarsi. Processo di carica Non esporre la batteria a condizioni estreme come calore e urti. Pericolo di lesioni per la fuoriuscita della soluzione elettrolitica! In caso di contat- 14
15 IT MT to con gli occhi o con la pelle risciacquare i punti interessati con acqua o con un neutralizzante e consultare un medico. Ricaricare la batteria solo in luoghi asciutti. La superficie esterna della batteria deve essere pulita e asciutta prima di collegare il caricabatterie. Pericolo di lesioni da scossa elettrica. Prima ricarica della batteria. Non ricaricare la batteria più volte di seguito per tempi brevi. Ricaricare solo con il caricabatterie originale allegato. Se nonostante la ricarica la durata di funzionamento è nettamente ridotta vuol dire che la batteria è esaurita e deve essere sostituita. Utilizzare solo la batteria di ricambio originale che può essere acquistata tramite il servizio clienti. Attenersi in ogni caso alle avvertenze di sicurezza nell ultima versione e alle disposizioni e avvertenze in materia di protezione dell ambiente. Sono esclusi dalla garanzia i difetti dovuti a uso improprio. Estrazione/Inserimento della batteria 1. Per estrarre la batteria (16) dall apparecchio, premere il tasto di sblocco (17) della batteria ed estrarla. 2. Per inserire la batteria (16) nell apparecchio, spingerla al suo interno agendo lungo la barra di guida (20). Si dovrà udire lo scatto in posizione. Inserire la batteria solo quando l apparecchio è completamente montato. Caricamento della batteria Caricare la batteria ( 16) quando è accesa ormai solo la spia a LED rossa dello stato di carica ( 18). Il tempo di carica è di circa 1 ora. 1. All occorrenza rimuovere la batteria (16) dall apparecchio. 2. Infilare la batteria (16) nel vano del caricabatterie (19). 3. Collegare il caricabatterie (19) a una presa elettrica. Il LED rosso dell indicazione carica (19a) sul caricabatterie (19) si accende fino a quando la batteria (16) carica. Se il LED verde sul caricabatterie (19) si accende, la batteria (16) viene caricata. 4. Quando la batteria è completamente carica, staccare il caricabatterie (19) dalla presa. 5. Staccare la batteria (16) dal caricabatterie (19). Batterie usate Se nonostante la ricarica la durata di funzionamento è nettamente ridotta vuol dire che la batteria è esaurita e deve essere sostituita. Utilizzare solo la batteria di ricambio disponibile attraverso il servizio clienti. Attenersi sempre alle avvertenze di sicurezza nell ultima versione e alle disposizioni e avvertenze in materia di protezione dell ambiente (vedere Smaltimento/Protezione dell ambiente ). 15
16 IT MT Istruzioni di montaggio Prima del montaggio rimuovere la batteria dall apparecchio. Inserire la batteria solo quando l apparecchio è completamente montato. Pericolo di lesioni! Montaggio del coperchio di protezione: 1. Posizionare il coperchio di protezione (14) sulla testa del motore (10) e avvitarlo saldamente con 3 viti a croce (14a). Montaggio del gruppo di taglio: 2. Posizionare il disco di taglio (12) sull asse. È presente solo una posizione di montaggio. Avvitare il disco di taglio (12) con l asse. Rispettare la filettatura sinistrorsa. Verificare la sede salda della vite (12a). Collocare la lama di plastica (13) sul perno (23) del disco di taglio (12) e tirarla verso l esterno fino a farla innestare. Le lame di plastica sostitutive sono collocate nella custodia ( 4) sull impugnatura supplementare ( 5). Montaggio dell impugnatura supplementare: 3. Allentare e rimuovere la vite premontata (22) dell impugnatura supplementare (5). 4. Allontanare reciprocamente le estremità dell impugnatura supplementare (5) e farle scorrere sul supporto per impugnatura Uso (21). La custodia per le lame di plastica (4) è rivolta verso l alto. 5. Avvitare l impugnatura supplementare (5) con la vite per impugnatura (22). Inserimento batteria: 6. Per inserire la batteria (16) nell apparecchio, spingerla al suo interno agendo lungo la barra di guida(20). Si dovrà udire lo scatto in posizione. Attenzione, pericolo di lesioni! Non usare l apparecchio senza il coperchio di protezione. Durante l utilizzo dell apparecchio indossare indumenti idonei, occhiali e cuffie di protezione. Prima di ogni utilizzo, assicurarsi che l apparecchio sia funzionante. L interruttore di accensione/spegnimento e il blocco accensione non possono essere bloccati. Dopo aver rilasciato l interruttore devono spegnere il motore. In presenza di un interruttore danneggiato non è consentito l uso dell apparecchio. Rispettare la protezione antirumore e le disposizioni locali. Accensione e spegnimento Assumere una posizione stabile e impugnare saldamente l apparecchio con entrambe le mani, mantenendolo a distanza dal corpo. Prima di accenderlo, assicu- 16
17 IT MT rarsi che l apparecchio non sia a contatto con altri oggetti. 1. Accertarsi che la batteria (16) sia inserita (cfr. Istruzioni di montaggio - Inserimento batteria ). 2. Per l accensione azionare con il pollice il blocco accensione (3) e premere poi l interruttore di accensione/spegnimento (2). Rilasciare poi il blocco accensione. 3. Per spegnere, rilasciare l interruttore di accensione/spegnimento (2). Non è possibile una commutazione permanente. Dopo lo spegnimento dell apparecchio, il gruppo di taglio continua a girare per un breve tempo. Attendere che il il gruppo di taglio sia completamente fermo. Non toccare la lama in movimento e non frenarla. Pericolo di lesioni! Verifica dello stato di carica della batteria L indicatore dello stato di carica ( 18) segnala lo stato di carica della batteria ( 16). Premere il tasto dell indicazione carica ( 18a) sulla batteria. Lo stato di carica della batteria viene segnalato mediante l accensione della rispettiva spia a LED. 3 LED accesi: Batteria caricata 2 LED accesi: Batteria parzialmente caricata 1 LED acceso: La batteria deve essere caricata Caricare la batteria ( 16) quando è accesa ormai solo la spia a LED rossa dello stato di carica ( 18). Impostazioni sull apparecchio Regolazione dell impugnatura supplementare: È possibile portare l impugnatura supplementare in diverse posizioni. Impostare l impugnatura in modo che il disco di taglio nella posizione di lavoro sia leggermente inclinato in avanti. Allentare la vite per impugnatura (22) e regolare l impugnatura supplementare (5) nella posizione desiderata. Stringere nuovamente la vite per impugnatura. Regolazione dell altezza: il tubo telescopico vi aiuta a regolare l apparecchio in base alla vostra altezza.. Allentare il manicotto filettato (8). Portare il tubo telescopico (9) alla lunghezza desiderata e riavvitare saldamente il manicotto filettato. Regolazione dell angolo di taglio: Con l angolo di taglio modificato si possono tagliare anche punti di difficile accesso, ad es. sotto panchine e sporgenze. Premere il pulsante (15) sull alloggiamento del motore e inclinare il tubo telescopico (9). Sono possibili 7 posizioni (vedere anche Avvertenze per l utilizzo ). Regolazione dell impugnatura: L impugnatura può essere ruotata di 90 e 180 (vedere anche Avvertenze per l utilizzo ). 17
18 IT MT Far scorrere il blocco (7) verso il basso e ruotare l impugnatura (6) , fino a farla innestare nella posizione desiderata. Regolazione della staffa distanziatrice (protezione per i fiori): la staffa distanziatrice mantiene distanti dal gruppo di taglio piante e arbusti da non tagliare. Far scorrere in avanti la staffa distanziatrice (11). Se la staffa distanziatrice non è necessaria, farla scorrere indietro nella posizione di parcheggio. Avvertenze per l utilizzo Attenzione, pericolo di lesioni! Non tagliare mai erba umida o bagnata. Prima di avviare l apparecchio accertarsi che il disco di taglio non sia in contatto con pietre, detriti o altri corpi estranei. Accendere l apparecchio prima di avvicinarlo all erba da tagliare. Evitare di sforzare l apparecchio durante il lavoro. Evitare il contatto con ostacoli fissi (pietre, mura, staccionate, ecc.). La lama di plastica si usurerebbe velocemente. Evitare di far funzionare l apparecchio in caso di maltempo, in particolare in caso di pericolo di fulmini. Taglio del prato Tagliare il prato facendo ruotare l apparecchio a destra e a sinistra. Tagliare lentamente e durante il taglio tenere l apparecchio inclinato in avanti di circa 30. Tagliare l erba lunga a strati dall alto verso il basso. Taglio perpendicolare/ Taglio delle aiuole Quando il disco di taglio viene mosso in senso perpendicolare occorre lavorare con particolare attenzione e cautela. Mantenere una distanza adeguata dal gruppo di taglio per evitare infortuni. Impostazioni per il taglio perpendicolare: Per tagliare cespugli e pendii ripidi muovere lentamente l apparecchio verso destra e sinistra. Impugnatura: 180 (vedere ) Angolo di taglio: 0 (vedere ) Staffa distanziatrice in posizione di parcheggio Impostazioni per il taglio delle aiuole: Per tagliare le aiuole guidare lentamente l apparecchio lungo le aiuole. Impugnatura: 90 (vedere ) Angolo di taglio: 90 (vedere ) Staffa distanziatrice in posizione di parcheggio 18
19 IT MT Pulizia e manutenzione Avvertenza! Pericolo di ferite causate da parti mobili pericolose! Per i lavori di riparazione e manutenzione non descritti nelle presenti istruzioni chiedere l intervento del nostro Centro Assistenza. Usare solo componenti originali. Disattivare l apparecchio e, prima di iniziare qualsiasi lavoro, rimuovere la batteria dall apparecchio stesso. Eseguire i seguenti lavori di pulizia e manutenzione regolarmente. In questo modo può essere garantito un utilizzo duraturo e affidabile. Pulizia Tenere l apparecchio al riparo da spruzzi e non immergerlo in acqua. Pericolo di scossa elettrica. Garantire una costante pulizia delle fessure di aerazione, dell alloggiamento del motore e delle impugnature dell apparecchio. A tale scopo utilizzare un panno umido o una spazzola. Non utilizzare detergenti o solventi. In caso contrario si rischierebbe di danneggiare irreparabilmente l apparecchio. Dopo ogni taglio rimuovere erba e terra dal coperchio di protezione e dal gruppo di taglio. Per una pulizia a fondo del gruppo di taglio rimuovere la lama di plastica ( 13) (vedere Sostituzione della lama di plastica ) e pulire il perno ( 23) con una lama affilata. Lavori di manutenzione generali Prima di ogni utilizzo verificare l assenza di difetti visibili sull apparecchio, ad es. componenti non fissati, usurati o danneggiati. Verificare che le viti del disco di taglio siano saldamente fissate. Controllare le coperture e i dispositivi di protezione per verificare l eventuale presenza di danni e la sede corretta. All occorrenza sostituire le parti danneggiate. Sostituzione della lama di plastica 1. Far scorrere la lama di plastica (13) all interno e spingerla dal perno (23) sul disco di taglio (12). 2. Collocare la nuova lama di plastica (13) sul perno (23) e tirarla verso l esterno fino a farla innestare. Stoccaggio Riporre l apparecchio in un luogo asciutto, al riparo dalla polvere e fuori dalla portata dei bambini. Non appoggiare l apparecchio sul coperchio di protezione. Agganciarlo preferibilmente dall impugnatura superiore in modo che il coperchio di protezione non tocchi altri oggetti. Sussiste il pericolo che il coperchio di protezione si deformi cambiando quindi dimensioni e caratteristiche di sicurezza. 19
20 IT MT Rimuovere la batteria dall apparecchio prima di un periodo di immagazzinamento prolungato (p. es. durante il periodo invernale). Immagazzinare la batteria solo in stato di carica parziale. Lo stato di carica durante un periodo di immagazzinamento prolungato deve corrispondere al 40-60% (due spie a LED dell indicatore dello stato di carica accese). Controllare durante una fase di immagazzinamento prolungato circa ogni 3 mesi lo stato di carica della batterie e ricaricarla all occorrenza. Immagazzinare la batteria a una temperatura compresa tra 10 C e 25 C. evitare durante l immagazzinamento condizioni di freddo o caldo estremo, in modo tale che la batteria non perda potenza. Smaltimento / Rispetto dell ambiente Rimuovere la batteria dall apparecchio e smaltire l apparecchio, la batteria, gli accessori e l imballo in modo da garantirne il corretto riciclaggio nel rispetto dell ambiente. Gli apparecchi elettrici non vanno smaltiti con i rifiuti domestici. Non smaltire la batteria con i rifiuti domestici, nel fuoco (pericolo di esplosione) o in acqua. In caso di fuoriuscita di fumi o liquidi tossici, le batterie danneggiate possono essere nocive per l ambiente e per la salute delle persone. Consegnare l apparecchio e il caricabatterie a un centro di riciclaggio. I componenti in plastica e metallo usati possono essere raccolti in modo differenziato in base alla tipologia ed essere conferiti in un apposito centro di riciclaggio. Contattare in tal caso il nostro Centro Assistenza. Smaltire le batterie scariche. Consigliamo di coprire i poli con nastro adesivo per proteggere da un cortocircuito. Non aprire la batteria. Smaltire le batterie conformemente alle disposizioni locali. Consegnare la batteria in un centro di raccolta di batterie usate, dove verranno sottoposte a un corretto riciclaggio nel rispetto dell ambiente. Per informazioni in merito rivolgersi al servizio di raccolta locale o al nostro Centro Assistenza. Ci occupiamo gratuitamente dello smaltimento dei vostri apparecchi difettosi. Conferire i materiali tagliati nel compostaggio e non smaltirli nel cassonetto dei rifiuti. Garanzia Gentile cliente, Su questo apparecchio Le viene concessa una garanzia di 3 anni a partire dalla data di acquisto. In caso di difetti di questo prodotto può avanzare diritti legali nei confronti del venditore del prodotto. Tali diritti legali non vengono limitati dalla nostra garanzia qui di seguito rappresentata. Condizioni di garanzia Il termine di garanzia inizia con la data di acquisto. La preghiamo di conservare in un luogo sicuro lo scontrino fiscale originale. Questo documento viene richiesto come prova d acquisto. Qualora subentrasse un difetto di materiale o di fabbricazione entro tre anni a partire dalla data di acquisto di questo prodotto, il prodotto verrà riparato o sostituito a nostra discrezione - gra- 20
21 IT MT tuitamente da noi. Questa prestazione di garanzia presuppone che venga presentato entro il termine di tre anni l apparecchio difettoso e la prova d acquisto (scontrino fiscale) e descritto brevemente per iscritto in che cosa consiste il difetto e quando si è verificato. Se il difetto è coperto dalla nostra garanzia, riceverà il prodotto riparato oppure un prodotto nuovo. Con la riparazione o la sostituzione del prodotto non inizia un nuovo periodo di garanzia. Tempo di garanzia e diritti legali per vizi della cosa Il periodo di garanzia non viene prolungato. Questo vale anche per parti sostituite e riparate. Difetti e vizi presenti già al momento dell acquisto devono essere segnalati immediatamente dopo la rimozione dall imballaggio. Riparazioni che accorrono dopo il periodo di garanzia sono a pagamento. Volume di garanzia L apparecchio è stato prodotto accuratamente secondo severe direttive di qualità e controllato con coscienza prima della consegna. La prestazione di garanzia vale per difetti di materiale o di fabbricazione. Questa garanzia non si estende ai componenti del prodotto che sono soggetti a normale usura e che quindi possono essere visti come parti di usura (ad es coltello o di taglio disco di plastica) oppure per danneggiamenti delleparti fragili (ad esempio, la batteria, il caricatore, la piastra di taglio, la custodia protettiva, lo switch). Questa garanzia decade se il prodotto è stato danneggiato, non usato correttamente o non manutenuto. Per un uso correttodel prodotto devono essere osservate tutte le indicazioni riportate nelle istruzioni perl uso. Destinazioni d uso e azioni sconsigliate nelle istruzioni d uso o dalle quali si viene avvertiti, sono tassativamente da evitare. Il prodotto è destinato solo per i privati e non per uso commerciale. In caso di uso improprio, esercizio della forza e interventi non effettuati dalla nostra filiale di assistenza tecnica autorizzata, decade la garanzia. Svolgimento in caso di garanzia Per garantire una rapida elaborazione della Sua pratica, La preghiamo di seguire le seguenti indicazioni: Per tutte le richieste tenere a portata di mano lo scontrino fiscale e il codice di identificazione (IAN ) come prova d acquisto. I codici articolo sono riportati sulla targhetta del tipo. Nel caso in cui si dovessero verificare difetti funzionali o altri vizi, La preghiamo di contattare telefonicamente o per . Riceverà ulteriori informazioni sullo svolgimento del Suo reclamo. Un prodotto rilevato come difettoso può essere inviato con porto franco all indirizzo di assistenza comunicato, previa consultazione del nostro servizio di assistenza tecnica, allegando la prova d acquisto (scontrini fiscali) e l indicazione, in che cosa consiste il difetto e quando si è verificato. Per evitare problemi di accettazione e costi aggiuntivi, usare tassativamente solo l indirizzo che Le è stato comunicato. Assicurarsi che la spedizione non avvenga in porto assegnato, con merce ingombrante, corriere espresso o altro carico speciale. Spedire l apparecchio inclusi tutti gli accessori forniti insieme al momento dell acquisto e garantire un imballaggio di trasporto sufficientemente sicuro. 21
22 IT MT Servizio di riparazione Riparazioni non soggette alla garanzia possono essere effettuate dietro fattura dalla nostra filiale di assistenza tecnica previo preventivo gratuito da parte della stessa. Possiamo lavorare solo apparecchi che vengono spediti sufficientemente imballati e affrancati. Attenzione: Spedire l apparecchio alla nostra filiale in condizioni pulite e con l indicazione del difetto. Apparecchi spediti in porto assegnato - con merce ingombrante, corriere espresso o altro carico speciale - non vengono accettati. Lo smaltimento degli apparecchi difettosi spediti viene effettuato da noi gratuitamente. Service-Center IT MT Assistenza Italia Tel.: grizzly@lidl.it IAN Assistenza Malta Tel.: grizzly@lidl.com.mt IAN Importatore Non dimenticare che il seguente indirizzo non è un indirizzo di assistenza tecnica. Contattare prima di tutto il centro di assistenza tecnica sopra nominato. Grizzly Tools GmbH & Co. KG Stockstädter Straße Großostheim Germany Pezzi di ricambio/accessori 22 È possibile ordinare pezzi di ricambio e accessori all indirizzo Se non si dispone di una connessione Internet, contattare telefonicamente il centro di assistenza (vedere Service-Center a pag. 22). Tenere a portata di mano i numeri d ordine riportati in basso. Lame di plastica (pacco da 20) Batteria Caricabatterie
23 IT MT Ricerca dei guasti In caso di incidente o di un malfunzionamento rimuovere subito la batteria dall apparecchio! La mancata osservazione può provocare ferimenti di taglio. Problema Possibile causa Soluzione L apparecchio non si accende L apparecchio funziona con interruzioni. Forti vibrazioni Forti rumori Taglio non preciso Batteria ( Batteria ( 16) scarica 16) non inserita Ricaricare la batteria ( 16) (vedere Processo di carica ) Inserire la batteria ( 16) (vedere Processo di carica ) Interruttore di accensione / spegnimento ( 2) difettoso Riparazione al centro assistenza Motore difettoso Contatto difettoso interno Interruttore di accensione / spegnimento ( 2) difettoso Lama di plastica ( 13) rotta Gruppo di taglio sporco Motore difettoso Lama di plastica ( Gruppo di taglio sporco 13) rotta La batteria ( 16) non è completamente carica Riparazione al centro assistenza Sostituire la lama di plastica ( 13) (vedere Pulizia e manutenzione ) Pulire il gruppo di taglio (vedere Pulizia e manutenzione ) Riparazione al centro assistenza Sostituire la lama di plastica ( 13) (vedere Pulizia e manutenzione ) Pulire il gruppo di taglio (vedere Pulizia e manutenzione ) Ricaricare la batteria ( 16) (vedere Processo di carica ) 23
24 PT Índice Introdução Utilização correta Descrição geral Material fornecido Vista geral Descrição do funcionamento Dados técnicos Indicações de segurança Símbolos e pictogramas Símbolos que aparecem no manual de instruções Indicações gerais de segurança para equipamentos eléctricos Outras instruções de segurança Tratamento adequado do carregador de bateria PERIGOS RESIDUAIS Processo de carregamento Retirar / colocar bateria Carregar bateria Baterias descarregadas Instruções de montagem Operação Ligar e desligar Verificar o estado de carga da bateria Configurações no aparelho Instruções de trabalho Cortar relva Corte vertical/ Aparar bordas do relvado Limpeza e manutenção Limpeza Trabalhos gerais de manutenção Substituir lâmina de plástico Armazenamento Eliminação/ Proteção do ambiente Busca de erros Peças sobressalentes/acessórios.41 Garantia Serviço de reparação Service-Center Importador Tradução do original da Declaração de conformidade CE Vista em corte Introdução Parabéns pela compra do seu novo aparelho. Com a sua compra, decidiu-se por um produto de alta qualidade. Este aparelho foi testado durante a produção em relação à qualidade e submetido a uma inspeção final. A funcionalidade do seu aparelho está desta forma garantida. O manual de instruções é uma parte integrante deste artigo. Ele contém indicações importantes referentes à segurança, utilização e eliminação. Familiarize-se com todas as indicações de utilização e de segurança do artigo. Utilize este artigo da forma que é descrita e apenas para as finalidades indicadas. Guarde bem o manual e, se transmitir o artigo a terceiros, entregue também todos os respetivos documentos. Utilização correta O aparelho é adequado apenas para o corte de relva em jardins e ao longo de bordas de canteiros. Qualquer outra utilização que não seja expressamente per- 24
25 PT mitida nestas instruções pode resultar em danos para o aparelho e representar um grave perigo para o utilizador. Não utilize o aparelho para cortar sebes ou arbustos. O aparelho deve ser usado apenas por adultos. Jovens acima dos 16 anos podem usar o aparelho apenas sob supervisão. O fabricante não se responsabiliza por danos causados numa utilização não conforme com os fins previstos ou operação incorreta. Este aparelho não é adequado para uso comercial. A garantia expira em caso de uso comercial. Descrição geral Pode encontrar a ilustração das partes de funcionamento mais importantes no desdobrável dianteiro e traseiro. Material fornecido Desembale o aparelho e verifique se está completo: - Aparador de relva a bateria - Disco de corte com 1 parafuso (rosca esquerda) - Capa protetora com três parafusos - Punho suplementar - 20 lâminas de plástico - Carregador - Bateria - Manual de Instruções Vista geral 1 Punho superior 2 Interruptor de ligar/desligar 3 Bloqueio de ativação 4 Caixa de armazenamento para lâmina de plástico (não visível) 5 Punho suplementar 6 Parte do punho 7 Barra para ajuste da parte do punho 8 Cápsula de rosca para ajuste do comprimento 9 Tubo telescópico 10 Cabeça do motor 11 Arco distanciador (proteção de flores) 12 Disco de corte 13 Lâmina de plástico 14 Capa protetora 15 Botão de pressão para ajuste do ângulo de inclinação (não visível) 16 Bateria 17 Botão de desbloqueio da bateria 18 Indicador de nível de carga da bateria 18a Botão da indicação do nível de carga 19 Carregador 19a Indicadores de controlo (LED) do carregador 20 Calha guia 14a Capa protetora dos parafusos 21 Encaixe do punho 22 Parafuso do punho 12a Parafuso, disco de corte 23 Pino, disco de corte Descrição do funcionamento O aparador de relva a bateria, de mão e portátil possui um sistema de lâmina de plástico como dispositivo de corte. Além disso, o aparelho está equipado com uma cabeça do motor giratória, um tubo telescópico de alumínio ajustável e um arco distanciador. 25
26 PT Para proteger o utilizador, o aparelho é fornecido com um dispositivo de proteção, que cobre o dispositivo de corte. Pode consultar a função dos elementos de comando nas seguintes descrições. Dados técnicos Aparador elétrico...frta 20 A1 Tensão do motor U V Número de rotações em... ponto morto n min-1 Classe de proteção...iii Tipo de proteção...ip20 Tempo de funcionamento... aprox. 45 min* Círculo de corte mm Peso (sem carregador)...2,15 kg Nível de pressão sonora (L pa )... 78,6 db (A), K pa =3 db Nível de potência sonora (L WA ) Garantido db (A) Pausado... 89,8 db (A); K WA =2,51 db Vibração (ah)... Punho superior...2,65 m/s 2, K=1,5 m/s 2 Punho adicional...3,11 m/s 2, K=1,5 m/s 2 Bateria (Li-Ion)... FAP 20 A2 Quantidade de células da bateria... 5 Tensão nominal V Capacidade... 2,0 Ah Tempo de carregamento... cerca de 1 h Carregador... FLG 20 A2 Entrada nominal...65 W Tensão de entrada/ Input V~, 50 Hz Tensão de saída/ Output... 21,5 V ; 2,4 A Classe de proteção... II Tipo de proteção...ip20 * O tempo efetivo de funcionamento de uma bateria totalmente carregada sob carga depende do método de trabalho e da utilização durante o corte. Os valores de ruído e vibração foram determinados de acordo com as normas e determinações existentes na declaração de conformidade. Os métodos de ensaio de vibração e de ruído, de acordo com a norma EN foram concluídos com êxito. O valor de emissão de vibrações foi medido de acordo com um processo de verificação normalizado e pode, em comparação com ferramentas elétricas, ser usado com outro. O valor de emissão de vibrações pode ser usado como estimativa introdutória da suspensão. Aviso: O valor de emissão de vibração pode divergir do valor de indicação durante a utilização efetiva da ferramenta elétrica, dependendo do modo em que a ferramenta elétrica é utilizada. Tente manter o esforço, devido a vibrações, o mais reduzido possível. Medidas exemplares para redução do esforço vibratório são o uso de luvas, durante a utilização da ferramenta, e a limitação do tempo de trabalho. Para tal, devem ser consideradas todas as partes do ciclo de operação (por exemplo, as horas em que a ferramenta elétrica está desligada e quando está ligada mas se encontra em funcionamento sem carga). Indicações de segurança Durante a utilização da máquina, devem ser respeitadas as instruções de segurança. 26
27 PT Símbolos e pictogramas Pictogramas no aparelho: Atenção! Leia integralmente e de forma atenta as instruções de utilização. Utilize proteção ocular e auditiva. Depois de desligar, o disco de corte ainda gira durante alguns segundos. Manter mãos e pés afastados. Não exponha o aparelho à humidade. Não trabalhe com chuva e não corte relva molhada. Mantenha outras pessoas afastadas. Você poderia ser ferido por detritos arremessados pelo aparelho. Perigo de ferimentos devido a peças ejectadas! Manter as pessoas espectadoras afastadas da área de perigo. Remova a bateria antes de realizar quaisquer trabalhos de manutenção. Indicação do nível de potência sonora L em db Círculo de corte Os equipamentos elétricos não devem ser eliminados no lixo doméstico. Pictogramas na bateria: Leia integralmente as instruções de utilização. Botão da indicação do nível de carga Não deite a bateria no lixo doméstico, no lume ou na água. Não exponha a bateria a radiação solar intensa por um período prolongado, nem a coloque em cima de aquecedores. (máx. 45 C). Entregue as baterias num Ponto Eletrão, onde são adicionadas a uma reciclagem ecológica. Pictogramas no aparelho: T3.15A 130 C Atenção! Leia integralmente e de forma atenta as instruções de utilização. O carregador é adequado apenas para uso em ambientes internos. Proteção do aparelho Classe de proteção II (Isolamento duplo) 27
28 PT Indicadores de controlo (LED) do carregador Os equipamentos elétricos não devem ser eliminados no lixo doméstico. Símbolos que aparecem no manual de instruções Sinais de perigo para a prevenção de danos físicos ou de danos materiais. Sinal de perigo com indicações relativas à prevenção contra danos pessoais devido a um choque elétrico. Sinais ordenativos para a prevenção contra danos. Antes de utilizar, ler com atenção! Sinais indicativos com informações de como trabalhar melhor com o aparelho. Indicações gerais de segurança para equipamentos eléctricos ADVERTÊNCIA! Ler todas as indicações de segurança e as instruções. A inobservância das indicações de segurança e das instruções pode causar choques eléctricos, incêndios e/ou ferimentos graves Guardar todas as indicações de segurança e as instruções para referência futura. O conceito equipamento eléctrico utilizado nas indicações de segurança refere-se aos equipamentos eléctricos alimentados a partir da rede eléctrica (com cabo de ligação à rede) e aos equipamentos eléctricos que funcionam com acumuladores (sem cabo de ligação à rede). 1) SEGURANÇA NO LOCAL DE TRABALHO a) Manter a zona em que trabalha limpa e bem iluminada. Locais de trabalho desorganizados e mal iluminados podem ser causa de acidentes. b) Não trabalhar com o equipamento eléctrico em zonas sujeitas à explosão onde se encontram líquidos, gases ou pós inflamáveis. Os equipamentos eléctricos originam faíscas que podem inflamar o pó ou os vapores. c) Durante a utilização do equipamento eléctrico, manter crianças e outras pessoas afastadas. Ao distrair-se, poderá perder o controlo sobre o aparelho. 2) SEGURANÇA ELÉCTRICA a) A ficha de ligação à rede do equipamento eléctrico tem de ser apropriada à tomada. A ficha não deve ser alterada de maneira nenhuma. Não utilizar nenhuma ficha adaptadora junto 28
29 PT com equipamentos eléctricos protegidos por ligação à terra. Fichas não alteradas e tomadas apropriadas diminuem o risco de choques eléctricos. b) Evitar o contacto do corpo com superfícies ligadas à terra, como canos, aquecedores, fornos ou frigoríficos. Existe um risco maior de choque eléctrico se o seu corpo estiver em contacto com a terra. c) Manter os equipamentos eléctricos afastados da chuva e da humidade. A penetração de água num equipamento eléctrico aumenta o risco de choques eléctricos. d) Não utilizar o cabo de ligação à rede para carregar ou pendurar o equipamento eléctrico, nem para desligar a ficha da rede eléctrica. Manter o cabo afastado do calor, óleo, bordas cortantes ou partes móveis do aparelho. Cabos danificados ou emaranhados aumentam o risco de choques eléctricos. e) Aquando da execução de serviços ao ar livre com um equipamento eléctrico, utilizar unicamente cabos de extensão apropriados para uso em zonas externas. A utilização de cabos apropriados para uso externo diminui o risco de choques eléctricos. f) Se o equipamento eléctrico tiver de ser colocado em operação em ambientes húmidos, utilizar um disjuntor de corrente de avaria com uma corrente de activação de 30 ma ou inferior. A utilização de um disjuntor de corrente de avaria diminui o risco de choques eléctricos. 3) SEGURANÇA DAS PESSOAS a) Trabalhar sempre atento, concentrar- se no que está a fazer e ter sempre bom senso ao utilizar um equipamento eléctrico. Não utilizar nenhum equipamento eléctrico se estiver cansado ou sob a influência de drogas, álcool ou medicamentos. Um momento de descuido durante o uso do equipamento eléctrico pode causar ferimentos graves. b) Usar equipamentos de protecção individual e usar sempre óculos de protecção. O uso de equipamentos de protecção individual, como máscara contra pós, calçados de segurança antiderrapantes, capacete de protecção ou protector de ouvidos, de acordo com o tipo e a aplicação do equipamento eléctrico, diminui o risco de lesões. c) Evitar uma colocação em funcionamento acidental. Certificar-se de que o equipamento eléctrico se encontra desligado antes de ligá-lo à alimentação de rede e/ou pôr o acumulador, antes de pegá-lo ou de transportá-lo. Poderá haver acidentes ao transportar o equipamento eléctrico e premir o interruptor com o dedo ou 29
30 PT se ele for accionado quando estiver ligado à rede de alimentação eléctrica. d) Antes de ligar o equipamento eléctrico, remover as ferramentas de ajuste ou as chaves de parafuso. Uma ferramenta ou uma chave que se encontre numa parte móvel do aparelho pode causar ferimentos. e) Evitar manter o corpo numa posição incorrecta. Cuidar para manter-se numa posição segura e manter sempre o equilíbrio. Assim poderá controlar melhor o equipamento eléctrico em situações inesperadas. f) Usar roupas apropriadas. Não utilizar roupas largas nem jóias. Manter os cabelos, as roupas e as luvas afastadas das partes móveis. Roupas frouxas, jóias ou cabelos longos podem ser apanhados pelas partes móveis. g) Se for possível instalar dispositivos de aspiração de pó ou de recolha, certifique-se, que estes estão ligados e que são utilizados corretamente. A aspiração do pó pode reduzir os riscos causados pelo pó. 4) UTILIZAÇÃO E TRATAMENTO DA FERRAMENTA ELÉTRICA a) Não sobrecarregar o aparelho. Utilizar o equipamento eléctrico apropriado à execução do trabalho. Com o equipamento eléctrico apropriado, trabalhará melhor e com mais segurança no intervalo de potência indicado. b) Não utilizar nenhum equipamento eléctrico cujo interruptor esteja avariado. Um equipamento eléctrico que não possa mais ser ligado ou desligado é perigoso e tem de ser reparado. c) Retirar a ficha da tomada e/ou remover o acumulador antes de executar ajustes no aparelho, de substituir acessórios ou de guardar o aparelho. Esta medida de precaução evita o accionamento acidental do equipamento eléctrico. d) Guardar os equipamentos eléctricos não utilizados fora do alcance das crianças. Não permitir a utilização do aparelho por pessoas que não estejam familiarizadas com ele ou que não tenham lido estas indicações. Equipamentos eléctricos são perigosos quando utilizados por pessoas inexperientes. e) Tratar o equipamento eléctrico com cuidado. Controlar se as partes móveis estão a funcionar perfeitamente e não emperram, e se há peças quebradas ou avariadas que afectem o funcionamento do equipamento eléctrico. Solicitar a reparação de peças danificadas antes de utilizar o aparelho. Muitos acidentes são causados por equipamentos eléctricos mal cuidados. f) Conservar as ferramentas de corte afiadas e limpas. 30
31 PT Ferramentas de corte tratadas cuidadosamente e com gumes afiados emperram menos e são mais fáceis de manejar. g) Utilizar o equipamento eléctrico, os acessórios, as ferramentas de aplicação, etc. segundo as instruções aqui indicadas. Para isso, considerar as condições de trabalho e a actividade a ser executada. A utilização de equipamentos eléctricos para outras aplicações além daquelas especificadas pode causar situações perigosas. h) Certifique-se de que as aberturas de ar se encontram sem sujidade. i) Remova a bateria - sempre que o utilizador se afaste da máquina, - antes de retirar bloqueios, - antes da verificação, limpeza ou trabalhos na máquina, - após contacto com um corpo estranho, para verificar se a máquina apresenta danos, - para a verificação imediata, quando a máquina começa a vibrar excessivamente; 5) MANEJO E UTILIZAÇÃO CUIDADOSOS DE APAREL- HOS COM ACUMULADORES a) Carregue as baterias somente em carregadores recomendados pelo fabricante. Para um carregador, que é adequado para um determinado tipo de bateria, existe o perigo de incêndio quando utilizado com outras baterias. b) Utilize apenas as baterias previstas para o efeito nas ferramentas elétricas. A utilização de outras baterias pode causar ferimentos e levar a perigo de incêndio. c) Mantenha as baterias não utilizadas afastadas de clips, moedas, chaves, pregos, parafusos ou outros objetos metálicos pequenos, que possam causar uma ligação em ponte dos contactos. Um curto-circuito entre os contactos das pilhas pode causar queimaduras ou um incêndio. d) No caso de uma má aplicação, poderá sair líquido da bateria. Nesse caso, evite o contacto. Lavar com água no caso de contacto acidental. Se o líquido atingir os olhos, procure ajuda médica. O vazamento de fluído da bateria pode causar irritação da pele ou queimaduras. 6) ASSISTÊNCIA TÉCNICA Incumbir a reparação do seu equipamento eléctrico somente a técnicos qualificados e utilizar apenas peças sobressalentes originais. Dessa maneira, garante-se que a segurança do equipamento eléctrico seja mantida. 31
32 PT 7) INDICAÇÕES ESPECIAIS EM MATÉRIA DE SEGURANÇA PARA APARELHOS COM ACUMULADOR a) Certifique-se que o aparelho está desligado antes de aplicar a bateria. A aplicação de uma bateria numa ferramenta elétrica em funcionamento pode causar acidentes. b) Carregue as baterias apenas em espaços fechados, visto que o carregador é apropriado apenas para tal. c) Para reduzir o risco de choque elétrico, puxe a ficha do carregador da tomada antes de realizar a sua limpeza. d) Não exponha a bateria a radiação solar intensa por um período prolongado, nem a coloque em cima de aquecedores. O calor danifica a bateria e pode causar uma explosão. e) Deixe arrefecer uma bateria aquecida antes de a carregar. f) Não abra a bateria e evite danos mecânicos da bateria. Existe o risco de um curto-circuito e podem sair vapores que irritam o trato respiratório. Procure ar fresco e procure ajuda médica em caso de dores. g) Não utilize baterias não recarregáveis! Outras instruções de segurança FORMAÇÃO Este aparelho não deve ser usado por crianças. As crianças devem ser vigiadas para que não brincam com o aparelho. A limpeza e manutenção não podem ser executadas por crianças. Não deve ser permitida a operação do aparelho a pessoas com limitações corporais, sensoriais ou mentais, com falta de experiência e conhecimento. As normas locais podem ditar uma limitação de idade para o utilizador. Deve-se observar, que o utilizador é responsável por acidentes ou riscos que possam ocorrer a terceiros ou é responsável pelos seus pertences. Não deve ser permitida a operação da máquina a crianças e pessoas com limitações corporais, sensoriais ou mentais, com falta de experiência e conhecimento ou pessoas que não estão familiarizadas com as instruções! As normas locais podem ditar uma limitação de idade para o utilizador. Nunca permita que crianças ou pessoas, que não estejam familiarizadas com as instruções, utilizem a máquina. PREPARAÇÃO Antes da utilização, a máquina deve ser verificada visualmente quanto a dispositivos ou coberturas de segurança danificados, 32
33 PT em falta ou incorretamente instalados. Antes de colocar a máquina em funcionamento, e após qualquer impacto, certifique-se de que não existem quaisquer indícios de desgaste ou danos e, se necessário, deixe realizar as reparações necessárias. OPERAÇÃO Durante o período de utilização da máquina é obrigatório o uso de proteção ocular, calças compridas e calçado fechado. Deve ser evitada a utilização da máquina sob condições meteorológicas adversas, especialmente em caso de risco de raios. Aviso! Não toque em peças em movimento perigosas, antes de tirar a bateria e todas as peças móveis perigosas estiverem completamente imobilizadas. Cuidado com os possíveis ferimentos nos pés e mãos causados pelo dispositivo de corte. Interrompa os trabalhos com a máquina se estiverem pessoas, em particular crianças ou animais de estimação, nas proximidades. Utilize a máquina apenas durante o dia ou com iluminação artificial muito boa. Mantenha as mãos e os pés sempre afastados do dispositivo de corte, especialmente se ligar o motor. Nunca monte os elementos de corte metálicos. Nunca utilize a máquina com os dispositivos de proteção danificados ou em falta. Evite uma postura corporal incorreta. Procure ter uma postura correta para poder manter sempre o equilíbrio durante o trabalho em encostas. Caminhe lentamente. Não corra com o aparelho na mão. Durante a utilização da máquina, utilize sempre calçado resistente e calças longas. Ao ocorrer um acidente ou uma avaria durante o funcionamento, o aparelho deve ser desligado imediatamente. Cuide corretamente dos ferimentos ou consulte um médico. Para resolver as avarias, leia o capítulo Busca de erros ou entre em contacto com o nosso centro de assistência. CONSERVAÇÃO E ARMAZENAMENTO Retirar a bateria removível antes de realizar os trabalhos de manutenção e limpeza. Utilizar apenas as peças de substituição e os acessórios recomendados pelo fabricante. Deve ser realizada a manutenção e o inspeção da máquina regularmente. A máquina apenas deve ser reparada no centro de serviço autorizado. Tratamento adequado do carregador de bateria Este aparelho pode ser usado por crianças de 8 anos e acima, bem como por pessoas com capacidades físicas, sensoriais ou mentais reduzidas ou com falta 33
34 PT de experiência e conhecimento, se tiverem sido instruídas de forma supervisionada ou com respeito à utilização segura do aparelho e se compreenderem os riscos daí resultantes. As crianças não devem brincar com o aparelho. A limpeza e manutenção do utilizador não podem ser executadas por crianças sem supervisão. As crianças devem ser vigiadas para assegurar que não brincam com o aparelho. Utilize exclusivamente o carregador fornecido para carregar a bateria. Existe o risco de incêndio e de explosão. Antes de cada utilização, verifique o carregador, o cabo e a tomada e deixe que estes sejam reparados por pessoal qualificado e apenas com peças de substituição originais. Não utilize um carregador com defeito e não o abra sozinho. Deste modo, assegura a segurança do aparelho. Certifique-se de que a tensão da rede coincide com as informações na etiqueta de identificação do carregador. Existe o perigo de um choque elétrico. Desligue o carregador da corrente antes que sejam abertas ou fechadas as conexões para a ferramenta elétrica. Mantenha o carregador limpo e longe da humidade e da chuva. Nunca utilize o carregador ao ar livre. Com poluição e penetração de água aumenta o risco de um choque elétrico. O carregador só pode ser manuseado com as baterias originais associadas. O carregamento de outras baterias pode causar ferimentos e levar a perigo de incêndio. Evite danos mecânicos no carregador. Eles podem conduzir a curto-circuitos internos. O carregador não deve ser utilizado sobre uma base inflamável (p. ex., papel, têxteis). Existe um risco de incêndio devido ao aquecimento que ocorre durante o carregamento. Se o cabo de conexão deste aparelho estiver danificado, deve ser substituído pelo fabricante, pelo seu serviço de apoio ou por uma pessoa similarmente qualificada, a fim de evitar situações de perigo. Não carregue no carregador quaisquer baterias não-recarregáveis. O aparelho pode danificar-se. PERIGOS RESIDUAIS Mesmo que utilize esta ferramenta eléctrica em conformidade absoluta com as prescrições, existem sempre alguns perigos residuais. É possível que subsistam os perigos a seguir enunciados, dependendo do tipo de construção e do modelo da ferramenta eléctrica: a) Cortes 34
35 PT b) Danos auditivos, no caso de não ser usada protecção auditiva apropriada. c) Danos para a saúde, resultantes das vibrações exercidas sobre as mãos e os braços, se a máquina for usada durante muito tempo, se não for usada correctamente ou se a manutenção não for realizada de forma adequada. Aviso! Em funcionamento, esta ferramenta eléctrica gera um campo electromagnético. Em determinadas situações, este campo pode influenciar o funcionamento correcto de dispositivos médicos activos ou passivos implantados. Para reduzir o perigo de ferimentos graves ou mortais, recomendamos que as pessoas portadoras deste tipo de implantes consultem o seu médico de família e o fabricante do respectivo dispositivo médico implantado antes de usar a máquina. Processo de carregamento Não exponha a bateria a condições extremas, como ao calor e ao choque. Existe o risco de ferimentos causado por vazamento de solução eletrolítica! Em caso de contacto com os olhos ou com a pele lave as zonas afetadas com água ou com neutralizador e procure ajuda médica. Carregue a bateria apenas em ambientes internos secos. A superfície exterior da bateria deve estar seca e limpa antes de ligar o carregador. Existe o perigo de ferimentos causados por choque elétrico. Carregue a bateria antes da primeira utilização. Não recarregar a bateria repetidamente por curtos espaços de tempo. Carregue apenas com o carregador original fornecido. Um período de funcionamento visivelmente reduzido, mesmo com carga, indica que a bateria está descarregada e que deve ser substituída. Utilize apenas uma bateria de substituição original, que pode ser adquirida junto do serviço de apoio ao cliente. Em todo o caso, observe as instruções de segurança válidas, bem como as determinações e indicações referentes à proteção do meio-ambiente. Defeitos resultantes de manuseamento incorreto não são cobertos pela garantia. Retirar / colocar bateria 1. Para retirar a bateria (16) do aparelho prima os botões de desbloqueio (17) na bateria e retire-a. 2. Para colocar a bateria (16) desloque a bateria ao longo das calhas-guia (20) para dentro do aparelho. Ela engata audivelmente. Coloque a bateria somente quando o aparelho estiver completamente montado. 35
36 PT Carregar bateria Carregue a bateria ( 16), quando apenas o LED vermelho do indicador de nível de carga ( 18) acender. O tempo de carregamento é de aproximadamente 1 hora. 1. Retire a bateria (16) do aparelho, caso necessário. 2. Insira a bateria (16) no compartimento de carga do carregador (19). 3. Ligue o carregador (19) a uma tomada. O LED vermelho da indicação do estado de carga (19a) no carregador (19) acende enquanto a bateria (16) estiver a ser carregada. Se o LED verde acender no carregador (19), a bateria (16) está carregada. 4. Após o processo de carga retire o carregador (19) da rede. 5. Retire a bateria (16) do carregador (19). Baterias descarregadas Um período de funcionamento visivelmente reduzido, mesmo com carga, indica que a bateria está descarregada e que deve ser substituída. Utilize apenas uma bateria de substituição que pode ser adquirida junto ao serviço de apoio ao cliente. Em todo o caso, observe as instruções de segurança válidas, assim como as determinações e indicações referentes à proteção do meio-ambiente (consulte Eliminação/Proteção do meio-ambiente ). Instruções de montagem Retire a bateria do aparelho antes da montagem. Coloque a bateria somente quando o aparelho estiver completamente montado. Existe perigo de ferimentos! Montar a capa protetora: 1. Coloque a capa protetora (14) na cabeça do motor (10) e aparafuse-a com os 3 parafusos de cabeça em cruz (Phillips) (14a). Montar a unidade de corte: 2. Coloque o disco de corte (12) no eixo. Existe apenas uma posição de montagem. Aparafuse o disco de corte (12) com o eixo. Preste atenção à rosca esquerda. Por favor, preste atenção ao lugar fixo do parafuso (12a). Coloque a lâmina de plástico (13) sobre o pino (23) no disco de corte (12) e puxe-a para fora até ela encaixar. As lâminas de plástico de substituição podem ser guardadas na caixa de armazenamento ( 4) no punho suplementar ( 5). Montar o punho suplementar: 3. Soltar e retirar os parafusos previamente montados (22) do punho adicional (5). 4. Separe as extremidades do punho suplementar (5) e deslize-os sobre o encaixe do punho (21). A caixa de armazenamento para lâminas de plástico (4) aponta para cima, deste modo. 36
37 PT 5. Enrosque o punho suplementar (5) com o parafuso do punho (22). Colocar bateria: 6. Para colocar a bateria (16) desloque a bateria ao longo das calhas-guia (20) para dentro do aparelho. Ela engata audivelmente Operação Atenção perigo de ferimentos! Não utilize o aparelho sem a capa protetora. Ao trabalhar com o aparelho use vestuário apropriado, bem como proteção ocular e auditiva. Certifique-se, antes de cada utilização, que o aparelho esteja operacional. O interruptor de ligar/desligar e bloqueio de ativação não podem ser travado. Depois de soltar o interruptor, deve desligar o motor. Se um interruptor estiver danificado, não deve trabalhar mais com a máquina. Respeite a proteção sonora e as prescrições locais. Ligar e desligar Tenha atenção a um posicionamento seguro e segure no aparelho com as duas mãos de forma afastada do corpo. Antes da ligação, verifique se o aparelho não toca em quaisquer objetos. 1. Certifique-se de que a bateria (16) está inserida (ver Instruções de montagem - Colocar bateria ). 2. Para ligar, acione com o polegar o bloqueio de ativação (3) e, em seguida, pressione o interruptor de ligar/desligar (2). Solte novamente o bloqueio de ativação. 3. Para desligar o aparelho, solte o interruptor de ligar/desligar (2). Não é possível um circuito de teste de resistência. Depois de desligar o aparelho, o dispositivo de corte ainda gira durante algum tempo. Deixe que o dispositivo de corte pare completamente. Não toque na lâmina de plástico em movimento e não a trave. Perigo de ferimentos! Verificar o estado de carga da bateria A indicação do estado de carga ( 18) sinaliza o estado de carga da bateria ( 16). Prima o botão da indicação do nível de carga ( 18a) na bateria. O estado de carga da bateria é visualizado quando a respetiva lâmpada LED acender. 3 LED acendem: Bateria carregada 2 LED acendem: Bateria parcialmente carregada 1 LED acende: A bateria tem de ser carregada Carregue a bateria ( 16), quando apenas o LED vermelho do indicador de nível de carga ( 18) acender. 37
38 PT Configurações no aparelho Ajustar punho suplementar: Pode colocar o punho suplementar em diversas posições. Ajuste o punho, de forma a que o disco de corte fique ligeiramente inclinado para a frente na posição de trabalho. Desaperte o parafuso do punho (22) e ajuste o punho suplementar (5) na posição desejada. Volte a apertar o parafuso do punho. Ajustar altura: O tubo telescópico permite configurar o dispositivo para o seu tamanho personalizado. Desaperte a cápsula de rosca (8). Coloque o tubo telescópico (9) no comprimento desejado e aparafuse novamente a cápsula de rosca. Ajustar ângulo de corte: Com um ângulo de corte alterado pode cortar até mesmo em locais de difícil acesso, p. ex., debaixo de bancos e saliências. Prima o botão de pressão (15) na caixa do motor e incline o tubo telescópi- co (9). São possíveis 7 posições (consulte também Instruções de trabalho ). Ajustar a parte do punho: A parte do punho pode ser rodada a 90 e 180 (consulte também Instruções de trabalho ). Deslize a barra (7) para baixo e gire a parte do punho (6) , até encaixar na posição desejada. Ajustar o arco distanciador (proteção de flores): O arco distanciador não afasta as plantas e os troncos a cortar afastados do dispositivo de corte. Deslize o arco distanciador (11) para a frente. Se o arco distanciador não for necessário, desloque-o de volta para a posição de descanso. Instruções de trabalho Atenção perigo de ferimentos! Não corte relva molhada ou húmida. Certifique-se, antes de iniciar o aparelho, de que o disco de corte não está em contacto com pedras, cascalho ou outros corpos estranhos. Ligue o aparelho antes de o aproximar da relva a cortar. Evite o esforço excessivo do aparelho durante o trabalho. Evitar o contacto com obstáculos fixos (pedras, muros, paliçadas, etc.). A lâmina de plástico ficaria gasta rapidamente. Evite a utilização do aparelho com mau tempo, especialmente quando existe perigo de relâmpagos! Cortar relva Cortar a relva, oscilando o aparelho para a direita e para a esquerda. Corte lentamente e mantenha o dispositivo inclinado em cerca de 30 para a frente ao cortar. Corte a relva comprida em camadas, de cima para baixo. 38
39 PT Corte vertical/aparar bordas do relvado Com um disco de corte guiado verticalmente é aconselhável especial cuidado e atenção. Mantenha a distância suficiente para com o dispositivo de corte, para evitar acidentes. Configurações para o corte vertical: Para o corte de taludes e encostas íngremes, mova o aparelho lentamente para a direita e esquerda. Parte do punho: 180 (ver ) Ângulo de corte: 0 (ver ) Arco distanciador na posição de descanso Configurações para aparar as bordas do relvado: Para aparar as bordas do relvado, mova a máquina lentamente ao longo das bordas do relvado. Parte do punho: 90 (ver ) Ângulo de corte: 90 (ver ) Arco distanciador na posição de descanso Limpeza e manutenção Aviso! Perigo de ferimentos devido a peças móveis perigosas! Deixe que os serviços de reparação, que não estão descritos nestas instruções, sejam realizados pelo nosso centro de assistência. Utilize apenas peças originais. Execute os seguintes trabalhos de limpeza e manutenção regularmente. Assim, é garantida uma utilização duradoura e de confiança. Limpeza O aparelho não pode ser lavado com uma mangueira, nem pode ser colocado em água. Existe o perigo de um choque elétrico. Mantenha as entradas de ventilação, a caixa do motor e os punhos do aparelho limpos. Para tal utilize um pano húmido ou uma escova. Não utilize produtos de limpeza ou solventes. Pode causar danos irreparáveis ao aparelho. Limpe a capa protetora e o dispositivo de corte após cada processo de corte de qualquer vestígio de relva ou terra. Para uma limpeza intensiva do dispositivo de corte, retire a lâmina de plástico ( 13) (consulte Substituir a lâmina de plástico ) e limpe o pino ( 23) com uma faca afiada. Trabalhos gerais de manutenção Verifique o aparelho antes da utilização quanto a deficiências visíveis como peças soltas, gastas ou danificadas. Verifique a posição fixa dos parafusos no disco de corte. Verifique as coberturas e dispositivos de proteção quanto a danos e posição correta. Substitua-os, se necessário. Desligue o aparelho e retire a bateria antes de todos os trabalhos. 39
40 PT Substituir lâmina de plástico 1. Deslize a lâmina de plástico (13) para dentro e pressione-a para fora do pino (23) no disco de corte (12). 2. Coloque a nova lâmina de plástico (13) sobre o pino (23) e puxea para fora até ela encaixar. Armazenamento Guarde o aparelho num local seco, protegido do pó e fora do alcance de crianças. Não coloque o aparelho sobre a capa protetora. Preferencialmente, pendure-o pelo punho superior, de modo a que a capa protetora não toque em quaisquer outros objetos. Existe o risco de a capa protetora se deformar e, assim, alterar as dimensões e características de segurança. Retire a bateria do aparelho antes de o armazenar por um período prolongado (p.ex. durante o inverno). Armazene a bateria recarregável apenas num estado parcialmente recarregado. O estado da carga deverá equivaler a 40-60% durante um período de armazenamento maior (duas lâmpadas da indicação do estado de carga na bateria estão acesas). Durante uma fase de armazenamento mais prolongada, verificar o estado da carga da bateria após aprox. cada 3 meses e, se necessário, recarregue-a. Guarde o aparelho a uma temperatura entre 10 C e 25 C. Durante o armazenamento, evite o calor ou o frio excessivo, para a bateria recarregável não perder a potência. Eliminação/ Proteção do ambiente Retire a bateria do aparelho e entregue o aparelho, bateria, acessórios e embalagem à reciclagem ecológica. Os equipamentos elétricos não devem ser eliminados no lixo doméstico. Não deite a bateria no lixo doméstico, no lume (perigo de explosão) ou na água. As baterias danificadas podem causar danos ao meio-ambiente e à sua saúde, quando saem vapores ou líquidos nocivos. Entregue o aparelho e o carregador a um posto de reciclagem. As peças de plástico e de metal utilizadas podem ser separadas e classificadas para serem entregues num ponto de reciclagem. Consulte, para isso, o nosso centro de assistência. Elimine as baterias num estado descarregado. Recomendamos que cubra os polos com fita adesiva, para proteger de um curto-circuito. Não abra a bateria. Elimine as baterias de acordo com as normas locais. Entregue as baterias num Ponto Eletrão, onde são adicionadas a uma reciclagem ecológica. Consulte a empresa de eliminação de resíduos local ou o nosso centro de assistência. Realizamos gratuitamente a eliminação dos seus aparelhos enviados com defeito. Coloque o produto cortado na compostagem e não a deite no lixo. 40
41 PT Busca de erros Em caso de acidente ou avaria de funcionamento, retire imediatamente a bateria do aparelho! Uma inobservância pode conduzir a ferimentos por corte. Problema Possível causa Resolução da avaria Carregar bateria ( 16) (consulte Descarregar bateria ( 16) Processo de carregamento ) Colocar bateria ( 16) (consulte O aparelho Bateria ( 16) não colocada Processo de carregamento ) não liga Interruptor de ligar/desligar ( 2) avariado Reparação por centro de assistência Motor danificado Aparelho trabalha com interrupçõe Mau contacto interior Interruptor de ligar/desligar ( 2) avariado Lâmina de plástico ( 13) partida Vibrações fortes Dispositivo de corte sujo Ruídos intensos Motor danificado Lâmina de plástico ( 13) partida Mau resultado Dispositivo de corte sujo de corte Bateria ( 16) não completamente carregada Peças sobressalentes/acessórios Reparação por centro de assistência Substituir lâmina de plástico ( 13) (consulte Limpeza e manutenção ) Limpar dispositivo de corte (ver Limpeza e manutenção ) Reparação por centro de assistência Substituir lâmina de plástico ( 13) (consulte Limpeza e manutenção ) Limpar dispositivo de corte (ver Limpeza e manutenção ) Carregar bateria ( 16) (consulte Processo de carregamento ) Pode obter as peças de reposição e os acessórios em Caso não tenha internet entre em contacto, por telefone, com o centro de assistência (ver Service-Center página 43). Mantenha os números de encomenda, em baixo mencionados, disponíveis. Lâminas de plástico (Embalagem de 20) Bateria Carregador
42 PT Garantia Prezada cliente, prezado cliente, Este aparelho tem uma garantia de 3 anos a contar a partir da data da compra. Em caso de deficiências verificadas neste produto, estão à sua disposição direitos legais face ao vendedor. Estes direitos legais não são restritos pela nossa garantia a seguir descrita. Termos de garantia O período de garantia começa a contar da data da compra. Mantenha guardado o talão de compra original. Esse documento é exigido como comprovativo de compra. Se no decorrer de três anos a partir da data de aquisição deste produto, ocorrer uma falha de material ou defeito de fabrico, o produto será substituído ou reparado gratuitamente, de acordo com a nossa escolha. Esta garantia exige que o dispositivo defeituoso e o talão de compra (recibo) sejam apresentados no decorrer de um prazo de três anos e que seja brevemente descrito por escrito, qual o defeito e quando é que ele ocorreu. Se o defeito for coberto pela nossa garantia é coberta, receberá de volta o produto reparado ou um novo produto. Com a substituição do aparelho inicia-se um novo prazo de garantia. Com a reparação do aparelho não se inicia nenhum novo prazo de garantia. Período de garantia e reclamações legais por defeitos O período de garantia não é prolongado pela prestação de garantia. Isto também se aplica às peças substituídas e reparadas. Quaisquer danos e defeitos eventualmente existentes verificados na altura da compra deverão ser comunicados imediatamente após se ter desembalado o produto. Após decorrido o período de garantia, as reparações necessárias estão sujeitas a pagamento. Âmbito da garantia O aparelho foi cuidadosamente produzido de acordo com diretivas de qualidade rigorosas e devidamente testado antes da entrega. A prestação de garantia aplica-se a falhas de material ou defeitos de fabrico. Esta garantia não cobre os componentes do produto que estão sujeitos a desgaste normal e que são portanto consideradas como peças de desgaste (por exemplo, faca ou corte de discos de plástico)nem os danos causados nas partes frágeis (por tais como a bateria, carregador, placa de corte, a caixa de protecção, o switch). Esta garantia caduca, se o produto for danificado ou se não for devidamente usado ou conservado. Para uma correta utilização do produto, deverão ser cumpridas todas as indicações descritas no manual de instruções. Deverão ser impreterivelmente evitados os usos e as ações desaconselhados no manual de instruções, ou para os quais são feitas advertências. Este produto foi concebido unicamente para uso privado e não é indicado para uso comercial. A garantia é anulada em caso de uso abusivo e inadequado, do uso de força, e em caso de intervenções que não tenham sido realizadas pela nossa estação de serviço autorizada. Procedimento em caso de reclamação de garantia Para assegurar um processamento rápido da sua reclamação, siga por favor as seguintes instruções: Mantenha à mão o talão de compra e o número de identificação (IAN ) como comprovativo da compra. Pode consultar o número do artigo na placa de identificação. Se ocorrerem erros na funcionalidade ou outros defeitos, contate imediatamente por telefone ou o departamento 42
43 PT de serviços a seguir designado. Receberá informações adicionais acerca do processamento da sua reclamação. Após consulta do nosso serviço de atendimento a clientes, pode enviarnos um produto defeituoso com despesas de envio gratuitas para si, mediante a anexação do talão de compra (recibo) e indicando onde e quando surgiu o defeito, para o endereço de serviço que lhe for comunicado. Para evitar problemas de receção e custos adicionais, use apenas o endereço que lhe for comunicado. Certifique-se de que o envio não foi enviado livre de franquia, através de serviço de transporte de mercadorias pesadas, serviço de envio expresso, ou qualquer outro serviço de envio especial. Envie o aparelho incluindo todas as peças acessórias fornecidas aquando efetuada a compra e use uma embalagem de transporte suficientemente segura. Serviço de reparação As reparações que não sejam abrangidas pela garantia podem ser efetuadas pelo nosso centro de serviço, mediante faturação. Ele apresentar-lhe-á de bom grado um orçamento dos custos. Podemos reparar apenas os aparelhos que tenham sido devidamente embalados e enviados com franquia suficiente. Atenção: Por favor, envie o seu aparelho limpo e mediante referência da falha ou defeito para a nossa sucursal de serviços. Não serão aceites máquinas ou aparelhos não franqueados, devolvidos como mercadorias volumosas, ou através de serviços postais por expresso ou especiais. Efetuamos gratuitamente a eliminação das suas máquinas defeituosas enviadas. Service-Center PT Assistência Portugal Tel.: (0,12 EUR/Min.) grizzly@lidl.pt IAN Importador Tenha em conta que o endereço seguinte não é nenhum endereço de serviço. Entre em contacto com o centro de atendimento acima referido. Grizzly Tools GmbH & Co. KG Stockstädter Straße Großostheim Alemanha 43
44 GB MT Content Introduction Intended purpose General description Extent of the delivery Overview Functional description Technical data Safety instructions Symbols and icons General safety instructions for power tools Additional safety instructions Residual risks Correct handling of the battery charger Charging the battery Removing/inserting the battery Recharging the battery Used batteries Assembling instructions Operation Turning on and off Checking the battery charge level Trimmer settings Manner of operation Cutting grass Vertical cut / lawn edge trimming Cleaning and maintenance Cleaning General maintenance Replacing the cutting insert Storage Disposal and protection of the environment Replacement parts/accessories Trouble shooting Guarantee Repair Service Service-Center Importer Translation of the original EC declaration of conformity Exploded Drawing Introduction Congratulations on the purchase of your new device. With it, you have chosen a high quality product. During production, this equipment has been checked for quality and subjected to a final inspection. The functionality of your equipment is therefore guaranteed. It cannot be ruled out that residual quantities of water or lubricants will remain on or in the equipment/hose lines in isolated cases. This is not a fault or defect and it represents no cause for concern. The operating instructions constitute part of this product. They contain important information on safety, use and disposal. Before using the product, familiarise yourself with all of the operating and safety instructions. Use the product only as described and for the applications specified. Keep this manual safely and in the event that the product is passed on, hand over all documents to the third party. 44
45 GB MT Intended purpose The appliance is solely intended for cutting grass and weeds in the garden and for edge trimming. Any other use that is not specifically approved in these Instructions can result in damage to the trimmer and give rise to serious danger for the user. Do not use the appliance to trim hedges or bushes. The appliance must only be used by adults. Young people aged 16 and over may only use the trimmer under adult supervision. The user or operator is responsible for accidents causing injury to other people or damage to property. The manufacturer cannot be held liable for damage when the trimmer is not used in conformity with its intended purpose or due to incorrect operation. This equipment is not suitable for commercial use. Commercial use will invalidate the guarantee. General description The illustration of the most important functional components can be found on the front and the back fold-out pages. Extent of the delivery Carefully unpack the trimmer and check that it is complete: - Battery-operated lawn trimmer - Nylon blade with one srew (left-hand thread) - Protective cover with three screws - Auxiliary handle - 20 Cutting inserts - Battery charger - Battery - Instruction Manual Overview 1 Top handle 2 On/Off switch 3 Switch lock 4 Box for cutting inserts (not visible) 5 Auxiliary handle 6 Handle rod 7 Lock of handle rod adjustment 8 Threaded bush for length adjustment 9 Telescopic shaft 10 Motor head 11 Spacer bow (flower guard) 12 Cutting disk 13 Cutting insert 14 Protective cover 15 Bar for tilt angle adjustment (not visible) 16 Battery 17 Battery release button 18 Battery charge state indicator 18a Button for charge level indicator 19 Battery charger 19a Control displays (LED) on charger 20 Guide track 14a Screws for protective cover 21 Handle holder 22 Handle screw 12a Screw, nylon blade 23 Pin, nylon blade Functional description The trimming assembly of the manually controlled, portable, battery-operated lawn trimmer consists of a system of plastic knife/cutting insert. 45
46 GB MT The appliance also features a pivoting motor head, adjustable aluminium telescopic shaft, and a spacer bow. A hood covering the cutting device protects the user. Refer to the following descriptions for a functional description of the controls. Technical data Cordless Grass Trimmer.FRTA 20 A1 Motor voltage (U) V Idling speed min -1 (rpm) Protection Class... III Protection category... IP20 Runtime...max. 45 min* Cutting circle mm Weight (without battery charger).2.15 kg Sound pressure level (L pa ) db (A), K pa = 3 db Sound power level (L WA ) guaranteed...96 db (A) measured db (A); K WA =2.51 db Vibration (a h ) upper handle m/s 2 ; K=1.5 m/s 2 additional handle m/s 2 ; K=1.5 m/s 2 Battery (Li-Ion)...FAP 20 A2 Number of battery cells...5 Nominal voltage V Capacity Ah Charging time... approx. 1 h Charger... FLG 20 A2 Nominal consumption W Uptake voltage/ Input V~, 50 Hz Voltage output/ Output V, 2.4 A Protection class... II Protection category... IP20 * The actual runtime under load of a fully charged battery depends on how you work and on the load put on the trimmer during operation. Noise and vibration values have been determined according to the standards and regulations mentioned in the declaration of conformity. The vibration and noise measuring processes in accordance with EN , were completed successfully. Noise and vibration values have been determined according to the standards and regulations mentioned in the declaration of conformity. The stated vibration emission value was measured in accordance with a standard testing procedure and may be used to compare one power tool to another. The stated vibration emission value may also be used for a preliminary exposure assessment. Warning: The vibration emission value may differ during actual use of the power tool from the stated value depending on the manner in which the power tool is used. Try to keep the exposure to vibrations as low as possible. Examples of measures to reduce vibration exposure are the wearing of gloves when using the tool and limiting the working hours. For this purpose all parts of the operating cycle have to be considered (for example, times when the electric tool is switched off and times when it is switched on but running without any load). Safety instructions Ensure that the safety instructions are observed when operating the trimmer. 46
47 GB MT Symbols and icons Symbols on the trimmer WARNING! Carefully read these Operating Instructions. Wear goggles and ear defenders. After turning off the appliance, the cutting disk will keep revolving for a couple of seconds. Keep away from your hand and feet. Do not expose the trimmer to moisture. Do not work when it is raining and do not cut wet grass. Keep by-standers well away. They could be injured by flung out objects. Danger due to materials blown out of machine! Remove persons in the vicinity from the danger area. Remove the battery prior to servicing the appliance. Noise level rating L WA in db Electrical appliances must not be disposed of with the domestic waste. Cutting circle Symbols on the battery Carefully read these Operating Instructions. Button for charge level indicator Do not dispose of batteries in household waste, fire or water. Do not subject the battery to strong sunlight over long periods and do not leave it on a heater (max. 45 C). Take batteries to an old battery collection point where they will be recycled in an environmentally friendly manner. Symbols on the Charger T3.15A 130 C WARNING! Before using for the first time, carefully read through the user manual The charger is for indoor use only. Miniature fuse Protection class II (Double insulation) Electrical appliances must not be disposed of with the domestic waste. Control displays (LED) on charger 47
48 GB MT Symbols in the manual Warning symbols with information on damage and injury prevention. Warning symbols with information on the prevention of personal injury caused by electric shock. Instruction symbols with information on preventing damage. Carefully read through the user manual Help symbols with information on improving tool handling. General safety instructions for power tools WARNING! Read all safety directions and instructions. Omissions in the compliance with safety directions and instructions can cause electrical shock, fire and/or severe injuries. Retain all safety directions and instructions for future use. The term Power Tools used in the safety instructions refers to mainsoperated power tools (with power cord) and to battery-operated power tools (without power cord). 1) WORK AREA SAFETY a) Keep work area clean and well lit. Cluttered or dark areas invite accidents. b) Do not operate power tools in explosive atmospheres, such as in the presence of flammable Iiquids, gases or dust. Power tools create sparks which may ignite the dust or fumes. c) Keep children and bystanders away while operating a power tool. Distractions can cause you to lose control. 2) ELECTRICAL SAFETY a) Power tool plugs must match the outlet. Never modify the plug in any way. Do not use any adapter plugs with earthed (grounded) power tools. Unmodified plugs and matching outlets will reduce risk of electric shock. b) Avoid body contact with earthed or grounded surfaces, such as pipes, radiators, ranges and refrigerators. There is an increased risk of electric shock if your body is earthed or grounded. c) Do not expose power tools to rain or wet conditions. Water entering a power tool will increase the risk of electric shock. d) Do not abuse the cord. Never use the cord for carrying, pulling or unplugging the power tool. Keep cord away from heat, oil, sharp edges or moving parts. Damaged or entangled cords increase the risk of electric shock. 48
49 GB MT e) When operating a power tool outdoors, use an extension cord suitable for outdoor use. Use of a cord suitable for outdoor use reduces the risk of electric shock. f) If operating a power tool in a damp location is unavoidable, use a residual current device (RCD) protected supply. Use of an RCD reduces the risk of electric shock. 3) PERSONAL SAFETY a) Stay alert, watch what you are doing and use common sense when operating a power tool. Do not use a power tool while you are tired or under the influence of drugs, alcohol or medication. A moment of inattention white operating power tools may result in serious personal injury. b) Use personal protective equipment. Always wear eye protection. Protective equipment such as dust mask, non-slip safety shoes, hard hat, or hearing protection used for appropriate conditions will reduce personal injuries. c) Prevent unintentional starting. Ensure the switch is in the off-position before connecting to power source and/or battery pack, picking up or carrying the tool. Carrying power tools with your finger on the switch or energising power tools that have the switch on invites accidents. d) Remove any adjusting key or wrench before turning the power tool on. A wrench or a key left attached to a rotating part of the power tool may result in personal injury. e) Do not overreach. Keep proper footing and balance at all times. This enables better control of the power tool in unexpected situations. f) Dress properly. Do not wear loose clothing or jewellery. Keep your hair, clothing and gloves away from moving parts. Loose clothes, jewellery or long hair can be caught in moving parts. g) If devices are provided for the connection of dust extraction and collection facilities, ensure these are connected and properly used. Use of dust collection can reduce dust-related hazards. 4) POWER TOOL USE AND CARE a) Do not force the power tool. Use the correct power tool for your application. The correct power tool will do the job better and safer at the rate for which it was designed. b) Do not use the power tool if the switch does not turn it on and off. Any power tool that cannot be controlled with the switch is dangerous and must be repaired. c) Disconnect the plug from the power source and/or the battery pack from the power tool before making 49
50 GB MT any adjust -ments, changing accessories, or storing power tools. Such preventive safety measures reduce the risk of starting the power tool accidentaily. d) Store idle power tools out of the reach of children and do not allow persons unfamiliar with the power tool or these instructions to operate the power tool. Power tools are dangerous in the hands of untrained users. e) Maintain power tools. Check for misalignment or binding of moving parts, breakage of parts and any other condition that may affect the power tool s operation. If damaged, have the power tool repaired before use. Many accidents are caused by poorly maintained power tools. f) Keep cutting tools sharp and clean. Properly maintained cutting tools with sharp cutting edges are less Iikely to bind and are easier to control. g) Use the power tool, accessories and tool bits etc. in accordance with these instructions, taking into account the working conditions and the work to be performed. Use of the power tool for operations different from those intended could result in a hazardous situation. h) Ensure that the vents are free of soiling. i) Remove the battery pack from the power tool - whenever the user no longer remains in the vicinity of the machine. - before the removal of blockages. - before checking, cleaning or working on the machine. - after touching a foreign body in order to check the machine for damage. - for an immediate check if the machine begins to vibrate excessively. 5) CAREFUL HANDLING AND USE OF BATTERY DEVICES a) Charge the batteries only in chargers that are recommended by the manufacturer. Risk of fire if a charger that is suitable for a specific type of battery is used with other batteries. b) In the power tools, use only the batteries designed for the purpose. The use of other batteries may result in injuries and risk of fire. c) Keep the unused battery away from paper clips, coins, keys, nails, screws and other small metal objects, which could cause bridging of the contacts. A short circuit between the battery contacts may cause burns or fire. d) If used incorrectly, liquid may leak from the battery. Avoid contact with this. In the event of accidental contact, rinse off with water. If the liquid gets into eyes, seek medical assistance. Leaking bat- 50
51 GB MT tery fluid may cause skin irritations or burns. 6) SERVICE Have your power tool serviced by a qualified repair person using only identical replacement parts. This will ensure that the safety of the power tool is maintained. 7) SPECIAL SAFETY DIREC- TIONS FOR BATTERY-OPER- ATED TOOLS a) Ensure that the device is switched off before inserting the battery. Inserting a battery into a power tool that is switched on may result in accidents. b) Recharge the batteries indoors only because the battery charger is designed for indoor use only. c) To reduce the electric shock hazard, unplug the battery charger from the mains before cleaning the charger. d) Do not subject the battery to strong sunlight over long periods and do not leave it on a heater. Heat damages the battery and there is a risk of explosion. e) Allow a hot battery to cool before charging. f) Do not open up the battery and avoid mechanical damage to the battery. Risk of short circuit and fumes may be emitted that irritate the respiratory tract. Ensure fresh air and seek medical assistance in the event of discomfort. g) Do not use non-rechargeable batteries! Additional safety instructions TRAINING The appliance is not suitable for use by children. Children should be supervised to ensure that they do not play with the appliance. Cleaning and user maintenance shall not be made by children. This appliance is not intended for use by persons with reduced physical, sensory or mental capabilities, or lack of experience and knowledge. Local regulations or bylaws may determine the minimum age for using the device. The operator or user is responsible for accidents or damage to other persons or their property. Children and persons with limited physical, sensory or mental capabilities or inadequate experience and knowledge, or persons who are not familiar with the instructions, should never be allowed to use the machine! Local regulations may specify an age limit for the user. Never let children or persons who are not familiar with the instructions mentioned use the machine. 51
52 GB MT PREPARATION Before each use, carry out a visual inspection on missing or wrongly mounted protective devices or parts of the cutting device. Before commissioning and after any impacts, check for signs of wear and damages, and have any necessary repairs performed. OPERATION Wear safety goggles, stable shoes and long trousers over the entire period of use of the machine. The use of the machine under bad weather conditions, especially in case of lightning risk, must be avoided. Warning! Do not touch any moving dangerous parts before the battery has been removed and the moving dangerous parts have come to a complete stop. Caution, risk of injury from cuts on hands and feet. Stop using the machine when persons, above all children, and house pets are in the vicinity. Use the machine only in daylight or with good artificial lighting. Always keep your hands and feet away from the cutting equipment, above all when you switch the motor on. Never install metallic cutting elements. Never use the machine with damaged or missing protective equipment. Avoid an abnormal body posture. Ensure secure footing at all times to maintain balance when working on slopes. Go slowly. Do not walk with the device in your hand. Always wear sturdy shoes and long trousers during operation of the machine. In the case of an accident or malfunction during operation, the device must be switched off immediately. Injuries must be properly treated or medical assistance sought. Read the Trouble shooting section to correct any malfunctions or contact our Service Centre. MAINTENANCE AND STORAGE Remove the removable battery before carrying out maintenance or cleaning work. Use only spare parts and accessories supplied and recommended by the manufacturer. The machine must be checked regularly and maintained. Have the machine repaired in a licensed workshop. Residual risks Even if properly operating and handling this electric tool, some residual risks will remain. Due to its construction and build, this electric tool may present the following hazards: a) Cuts b) Ear damage if working without ear protection. c) Damage to your health caused by swinging your hands and arms when operating the appliance for longer periods of time or if the unit is not held or maintained properly. 52
53 GB MT Warning! During operation, this electric tool generates an electromagnetic field which, under certain circumstances, may impair the functionality of active or passive medical implants. To reduce the risk of serious or lethal injuries, we recommend that persons with medical implants consult their doctor and the manufacturer of their medical implant before operating the machine. Correct handling of the battery charger This appliance is not intended for operation by persons (including children) with reduced physical, sensory or mental capabilities, or lacking experience and/or knowledge, unless they are under the supervision of or have been instructed on how to use the appliance by a person responsible for their safety. Keep the equipment away from children and pets. Children should be supervised in order to ensure that they do not play with the equipment. To charge the battery, use only the charger supplied. Risk of fire and explosion. This ensures that the safety of the device is maintained. Before each use, check the charger, cable and plug and have them repaired by qualified professionals and only with original parts. Do not use a defective charger and do not open it up yourself. This ensures that the safety of the device is maintained. Connect the charger only to a socket with an earth. Ensure that the mains voltage matches the specifications on the charger rating plate. Risk of electric shock. Disconnect the charger from the mains before closing or opening connection to the battery / power tool / device. Keep the charger clean and away from wet and rain. Do not use the charger outdoors. Dirt and the entry of water increase the risk of electric shock. Operate the charger only with the appropriate original batteries. Charging other batteries may result in injuries and risk of fire. Avoid mechanical damage to the charger. This can result in internal short circuits. Do not operate the charger on a combustible surface (e.g. paper, textiles). Risk of fire due to heating during charging. If the power cable for this equipment is damaged, it must be replaced by the manufacturer, a customer service agent of the same or a similarly qualified person in order to prevent hazards. Do not use the charger to charge non-rechargeable batteries. The device could become damaged. 53
54 GB MT Charging the battery Do not expose the battery to extreme conditions such as heat or impact. Risk of injury from escaping electrolytic solution! After eye/skin contact, rinse the affected areas with water or a neutraliser and consult a doctor. Charge the battery in a dry room only. Prior to attaching the charger, check that the battery s outer surface is clean and dry. There is a risk of injury due to electric shock. Charge the battery before the first time of use. Do not briefly charge the battery several time in a row. Only charge with the originally supplied charger. If a fully recharged battery lasts for considerably shorter operating times, the battery is used up and needs to be replaced. Only use an OEM spare battery available from our Customer Service. Always take heed of the applicable safety instructions as well as the environmental protection regulations and information. The warranty excludes all defects caused by improper handling. Removing/inserting the battery 1. To remove the battery (16) from the appliance, press the release button (17) on the battery and pull out the battery. 2. To insert the battery (16), place it on the guide track (20) and push it back into the appliance. It will audibly snap in. Do not insert the battery until the appliance is fully assembled. Risk of injury! Recharging the battery Only charge the battery ( 16) when the red LED on the charge level indicator ( 18) is on. Charging time is approx. 1 hour. 1. Remove the battery (16) from the appliance, as necessary. 2. Inser the battery (16) in the charging compartment of the battery charger (19). 3. Plug the battery charger (19) into a mains outlet. The red LED on the control display (19a), which is on the charger, (19) comes on when the battery (16) is loading. If the green LED on the charger (19) is on, the battery (16) is charged. 4. When the battery is fully recharged unplug the battery charger (19) from the mains. 5. Remove the battery (16) from the charger (19). Used batteries If a fully recharged battery lasts for considerably shorter operating times, the battery is used up and needs to be replaced. Only use an OEM battery pack replacement available from our Customer Service. Always take heed of the applicable safety instructions as well as the environmental protection regulations and information (see Cleaning and Maintenance ). 54
55 GB MT Assembling instructions Remove the rechargeable battery from the device before assembly. Insert the rechargeable battery only once the device is completely assembled. There is a risk of injury! To put on the protective cover: 1. Place the protective cover (14) on the motor head (10) and screw it down with the 3 Phillips screws (14a). Mounting the trimming unit: 2. Slip the nylon blade (12) onto the axle. There is only one mounting position. Screw the nylon blade (12) to the axle. Take note: The screw is a left-handed thread and should be turned anti-clockwise to tighten and clockwise to loosen. Please ensure that the screws (12a) are properly tightened. Place the cutting insert (13) on the pin (23) on the cutting disk (12) and pull out the insert until it snaps in. Spare cutting inserts are kept in the box ( 4) on the auxiliary handle ( 5). To put on the auxiliary handle: 3. Unscrew and remove the preassembled screw (22) of the additional handle (5). 4. Pull the ends of the auxiliary handle (5) to extend the handle and slide it over the handle holder (22). The storage box for your plastic knife (4) must point upwards. 5. Screw down the screw (23) in the auxiliary handle (5). To insert the battery: 6. To insert the battery (16), place it on the guide track (20) and push it into the appliance. It will audibly snap in. Operation Caution: risk of injury! Do not operate the appliance without the protective cover. To operate the appliance, wear suitable clothing, eye and ear protection. Prior to every use, check that the appliance is operative. Do not block the On/Off switch or the switch lock. They must reliably turn off the motor when you release the switch. Do not operate the appliance if one of the switches is damaged. Please observe local regulations concerning noise protection. Turning on and off Maintain a firm stand and hold the appliance well with both hands and at some distance away from your body. Before turning on the appliance, check that it will not touch any objects. 1. Check that the battery (16) is in (see Assembly instructions - Inserting the battery ). 2. To turn on, use your thumb to actuate the switch lock (3), then press the On/Off switch (2). Release the switch lock. 3. To turn off, release the On/Off switch (2). There is no continuous operation mode. 55
56 GB MT After turning off the appliance, the trimming assembly will keep revolving for some time. Allow the trimming assembly to come to a standstill. Neither touch nor slow down the moving cutting insert. Risk of injury! Checking the battery charge level The battery s ( 16) charge level is indicated by the charge state indicator ( 18). Press the button on the charge level indicator ( 18a) on the battery. The charge level of the battery is indicated by illumination of the corresponding LED light. 3 LEDs are on: Battery charged 2 LEDs are on: Battery partially charged 1 LED is on: Battery needs to be charged Only charge the battery ( 16) when the red LED on the charge level indicator ( 18) is on. Trimmer settings To adjust the auxiliary handle: The auxiliary handle can be set to various positions. Adjust the handle such that the cutting disk slightly tilts forward in your working position. Loosen the screw (23) in the handle and move the auxiliary handle (5) to your favourite position. Tighten the screw in the handle. To adjust the height: The telescopic shaft allows you to adjust the appliance to your personal size. Loosen the threaded bush (8). Adjust the telescopic shaft (9) to the correct length and tighten the threaded bush. To adjust the cutting angle: Changing the cutting angle lets you trim grass at places that a difficult to reach, e.g. under benches or wall offsets. Tread on the pedal (15) on the motor housing and tilt the telescopic shaft (9). There are 7 preset tilt angles (see Work instructions ). To adjust the handle rod: The handle rod can be turned by 90 and 180 (see Work instructions ). Push down the lock (7) and turn the handle rod (6) until it snaps into your favourite position. To adjust the spacer bow (flower guard): The spacer bow keeps the trimming assembly away from plants and trunks not to be cut. Push the spacer bow (11) forward. When the spacer bow is not in use you can move it back to its parking position. Manner of operation WARNING. Danger of injury! Do not cut moist or wet grass. Prior to starting the appliance, check that the cutting disk does not contact stones, gravel or other foreign bodies. Switch on the trimmer before you approach the grass that is to be cut. Do not overload the trimmer during operation. 56
57 GB MT Avoid contact with obstacles (stones, walls, fences, etc.) as this will rapidly wear out the lines. Avoid using the device in bad weather, especially if there is a danger of lightning! Cutting grass Cut the grass by swaying the trimmer sideways to the right and left. Cut slowly while the trimmer is tilted forwards by approx. 30. Cut tall grass by a series of levels from top to bottom. Vertical cut / lawn edge trimming Be particularly careful and attentive when operating the cutter vertically. To avoid injuries, keep enough distance to the trimming assembly. Setup for vertical trimming: Move the appliance to the right and left in a slow swinging motion to trim slopes and steep inclines. Handle rod: 180 (see ) Cutting angle: 0 (see ) Spacer bow in parking position Setup for edge trimming: To trim lawn edges, slowly move the appliance along the lawn edges. Handle rod: 90 (see ) Cutting angle: 90 (see ) Spacer bow in parking position Cleaning and maintenance Warning! Risk of injury from moving dangerous parts! Contact our Service Centre about repairs and servicing not described in this manual. Only use OEM parts. Risk of injury! Turn off the appliance and, before doing any servicing, remove the battery. The following cleaning and servicing should be done regularly. This will ensure a long and reliable service life. Cleaning Do not spray the appliance with water and do not immerse it in water. Electric shock hazard! Keep clean the ventilation slots, motor housing and handles of the appliance. Use a damp cloth or a brush. Do not use cleaning agents or solvents. You may otherwise irreparably damage the appliance. After every trimming session, remove grass and soil from the protective cover and the trimming assembly. To thoroughly clean the trimming assembly, remove the cutting insert ( 13) (see Replacing the cutting insert ) and use a sharp knife to clean the pin ( 23). 57
58 GB MT General maintenance Prior to every use, check the appliance for obvious defects such as loose, worn or damaged parts. Check that the screws in the cutting disk are tight. Check covers and safety devices for damages and correct installation. Replace as necessary. Replacing the cutting insert 1. Slide the cutting insert (13) inward and push it out of the pin (23) on the cutting disk (12). 2. Place the new cutting insert (13) on the pin (23) and pull out the insert until it snaps in. Storage Store the trimmer in a dry place well out of reach of children. Do not stand the trimmer on its protective cover. Suspend it by its upper handle in such a manner that the protective cover does not come into contact with other objects. This is because the protective cover could become deformed, thereby changing its dimensions and its safety properties. Remove the battery before storing the unit for longer periods of time (e.g. hibernation). Store the battery only in a partially charged state. The state of charge should be % over a longer storage period (two LED lights of the charge status indicator light up). During a longer storage period, check the state of charge of the battery and recharge if necessary roughly every 3 months. In order to keep the battery well charged, avoid exposing the appliance to extreme heat or cold in storage. Store the equipment between 10 C and 25 C. During storage, avoid extreme cold or heat so the battery does not lose power. Disposal and protection of the environment Remove the battery from the device and take the device, battery, accessories and packaging for environmentally friendly recycling. Machines do not belong with domestic waste. Do not dispose of batteries in household waste, fire (risk of explosion) or water. Damaged batteries may damage the environment and your health if toxic fumes or liquids leak out. Return the unit to a recycling centre. The plastics and metals in the unit can be sorted and appropriately recycled. Ask our Service Centre for details. Dispose of batteries in discharged condition. We recommend covering the pole with adhesive tape to prevent a short circuit. Do not open up the battery. Dispose of batteries in accordance with the local regulations. Take batteries to an old battery collection point where they will be recycled in an environmentally friendly manner. For information about this, ask your local waste management company or our service centre. Defective units returned to us will be disposed of for free. Throw the cut grass on the compost. Do not throw it in the normal household waste. 58
59 GB MT Replacement parts/accessories Spare parts and accessories can be obtained at If you do not have internet access, please contact the Service Centre via telephone (see Service-Center page 61). Please have the order number mentioned below ready. Cutting inserts (pack of 20) Battery Battery charger EU Trouble shooting In the event of an accident or malfunction, remove the battery from the device immediately! Failure to comply may result in injuries from cuts. Problem Possible cause Corrective action Battery ( 16) discharged Recharge battery ( 16) (see Charging the battery ) Appliance Insert battery ( 16) (see Charging the Battery ( 16) not in won t start battery ) On/Off switch ( 2) defective Motor defective Send in to Service Centre for repair Intermittent Internal loose contact operation On/Off switch ( 2) defective Send in to Service Centre for repair Much vibration Loud noise Bad trim Cutting insert ( 13) broken Trimming assembly dirty Motor defective Cutting insert ( 13) broken Trimming assembly dirty Battery ( 16) not fully charged Replace cutting insert ( 13) (see Cleaning and maintenance ) Clean trimming assembly (see Cleaning and maintenance ) Send in to Service Centre for repair Replace cutting insert ( 13) (see Cleaning and maintenance ) Clean trimming assembly (see Cleaning and maintenance ) Recharge battery ( 16) (see Charging the battery ) 59
60 GB MT Guarantee Dear Customer, This equipment is provided with a 3-year guarantee from the date of purchase. In case of defects, you have statutory rights against the seller of the product. These statutory rights are not restricted by our guarantee presented below. Terms of Guarantee The term of the guarantee begins on the date of purchase. Please retain the original receipt. This document is required as proof of purchase. If a material or manufacturing defect occurs within three years of the date of purchase of this product, we will repair or replace at our choice the product for you free of charge. This guarantee requires the defective equipment and proof of purchase to be presented within the three-year period with a brief written description of what constitutes the defect and when it occurred. If the defect is covered by our guarantee, you will receive either the repaired product or a new product. No new guarantee period begins on repair or replacement of the product. Guarantee Period and Statutory Claims for Defects The guarantee period is not extended by the guarantee service. This also applies for replaced or repaired parts. Any damages and defects already present at the time of purchase must be reported immediately after unpacking. Repairs arising after expiry of the guarantee period are chargeable. Guarantee Cover The equipment has been carefully produced in accordance with strict quality guidelines and conscientiously checked prior to delivery. The guarantee applies for all material and manufacturing defects. This guarantee does not extend to cover product parts that are subject to normal wear and may therefore be considered as wearing parts (e.g. cutting inserts) or to cover damage to breakable parts (e.g. battery, charger, cutting plate, protective housing, switches). This guarantee shall be invalid if the product has been damaged, used incorrectly or not maintained. Precise adherence to all of the instructions specified in the operating manual is required for proper use of the product. Intended uses and actions against which the operating manual advises or warns must be categorically avoided. The product is designed only for private and not commercial use. The guarantee will be invalidated in case of misuse or improper handling, use of force, or interventions not undertaken by our authorised service branch. Processing in Case of Guarantee To ensure quick handling of you issue, please follow the following directions: Please have the receipt and item number (IAN ) ready as proof of purchase for all enquiries. Please find the item number on the rating plate. Should functional errors or other defects occur, please initially contact the service department specified below by telephone or by . You will then receive further information on the processing of your complaint. After consultation with our customer service, a product recorded as defective can be sent postage paid to the service address communicated to you, with the proof of purchase (receipt) and specification of what constitutes the defect and when it occurred. In or- 60
61 GB MT der to avoid acceptance problems and additional costs, please be sure to use only the address communicated to you. Ensure that the consignment is not sent carriage forward or by bulky goods, express or other special freight. Please send the equipment inc. all accessories supplied at the time of purchase and ensure adequate, safe transport packaging. Repair Service For a charge, repairs not covered by the guarantee can be carried out by our service branch, which will be happy to issue a cost estimate for you. We can handle only equipment that has been sent with adequate packaging and postage. Attention: Please send your equipment to our service branch in clean condition and with an indication of the defect. Equipment sent carriage forward or by bulky goods, express or other special freight will not be accepted. We will dispose of your defective devices free of charge when you send them to us. Service-Center GB MT Importer Service Great Britain Tel.: ( 0.10/Min.) grizzly@lidl.co.uk IAN Service Malta Tel.: grizzly@lidl.com.mt IAN Please note that the following address is not a service address. Please initially contact the service centre specified above. Grizzly Tools GmbH & Co. KG Stockstädter Straße Großostheim Germany 61
62 DE AT CH Inhalt Einleitung Bestimmungsgemäße Verwendung Allgemeine Beschreibung Lieferumfang Funktionsbeschreibung Übersicht Technische Daten Sicherheitshinweise Symbole und Bildzeichen Allgemeine Sicherheitshinweise für Elektrowerkzeuge Weiterführende Sicherheitshinweise.. 70 Restrisiken Richtiger Umgang mit dem Akkuladegerät Ladevorgang Akku entnehmen/einsetzen Akku aufladen Verbrauchte Akkus Montageanleitung Bedienung Ein- und Ausschalten Ladezustand des Akkus prüfen Einstellungen am Gerät Arbeitshinweise Gras schneiden Senkrechtschnitt/ Rasenkantentrimmen Reinigung und Wartung Reinigung Allgemeine Wartungsarbeiten Kunststoff-Messer auswechseln Lagerung Entsorgung/Umweltschutz Garantie Reparatur-Service Service-Center Importeur Fehlersuche Ersatzteile/Zubehör Original-EG-Konformitätserklärung Explosionszeichnung Einleitung Herzlichen Glückwunsch zum Kauf Ihres neuen Gerätes. Sie haben sich damit für ein hochwertiges Gerät entschieden. Dieses Gerät wurde während der Produktion auf Qualität geprüft und einer Endkontrolle unterzogen. Die Funktionsfähigkeit Ihres Gerätes ist somit sichergestellt. Es ist nicht auszuschließen, dass sich in Einzelfällen am oder im Gerät bzw. in Schlauchleitungen Restmengen von Wasser oder Schmierstoffen befinden. Dies ist kein Mangel oder Defekt und kein Grund zur Besorgnis. Die Betriebsanleitung ist Bestandteil dieses Gerätes. Sie enthält wichtige Hinweise für Sicherheit, Gebrauch und Entsorgung. Machen Sie sich vor der Benutzung des Gerätes mit allen Bedien- und Sicherheitshinweisen vertraut. Benutzen Sie das Gerät nur wie beschrieben und für die angegebenen Einsatzbereiche. Bewahren Sie die Betriebsanleitung gut auf und händigen Sie alle Unterlagen bei Weitergabe des Gerätes an Dritte mit aus. Bestimmungsgemäße Verwendung Das Gerät ist nur zum Schneiden von Gras in Gärten und entlang von Beeträndern geeignet. Jede andere Verwendung, die in dieser Anleitung nicht ausdrücklich zuge- 62
63 DE AT CH lassen wird, kann zu Schäden am Gerät führen und eine ernsthafte Gefahr für den Benutzer darstellen. Verwenden Sie das Gerät nicht zum Schneiden von Hecken oder Sträuchern. Das Gerät ist zum Gebrauch durch Erwachsene bestimmt. Jugendliche über 16 Jahre dürfen das Gerät nur unter Aufsicht benutzen. Der Hersteller haftet nicht für Schäden, die durch bestimmungswidrigen Gebrauch oder falsche Bedienung verursacht wurden. Dieses Gerät ist nicht zur gewerblichen Nutzung geeignet. Bei gewerblichem Einsatz erlischt die Garantie. Allgemeine Beschreibung Lieferumfang Die Abbildung der wichtigsten Funktionsteile finden Sie auf der vorderen und der hinteren Ausklappseite. Packen Sie das Gerät aus und kontrollieren Sie, ob es vollständig ist: - Akku-Rasentrimmer - Schneidscheibe mit 1 Schraube (Linksgewinde) - Schutzabdeckung mit drei Schrauben - Zusatzgriff - 20 Kunststoff-Messer - Ladegerät - Akku - Betriebsanleitung Funktionsbeschreibung Der handgeführte und tragbare Akku-Rasentrimmer besitzt als Schneideinrichtung ein Messersystem aus Kunststoff. Zusätzlich ist das Gerät mit einem schwenkbaren Motorkopf, verstellbarem Alu-Teleskoprohr und Distanzbügel ausgestattet. Zum Schutz des Anwenders ist das Gerät mit einer Schutzeinrichtung versehen, die die Schneideinrichtung abdeckt. Die Funktion der Bedienteile entnehmen Sie bitte den nachfolgenden Beschreibungen. Übersicht 1 Oberer Handgriff 2 Ein-/Ausschalter 3 Einschaltsperre 4 Aufbewahrungsbox für Kunststoff-Messer (nicht sichtbar) 5 Zusatzgriff 6 Griffteil 7 Riegel zur Verstellung des Griffteils 8 Schraubhülse zur Längenverstellung 9 Teleskoprohr 10 Motorkopf 11 Distanzbügel (Blumenschutz) 12 Schneidscheibe 13 Kunststoff-Messer 14 Schutzabdeckung 15 Druckknopf zur Verstellung des Neigungswinkels (nicht sichtbar) 16 Akku 17 Entriegelungstaste Akku 18 Ladezustandsanzeige Akku 18a Taste zur Ladezustandsanzeige 19 Ladegerät 19a Kontrollanzeigen (LED) Ladegerät 20 Führungsschiene 14a Schrauben Schutzabdeckung 21 Griffaufnahme 22 Griffschraube 12a Schraube Schneidscheibe 23 Stift, Schneidscheibe 63
64 DE AT CH Technische Daten Akku Rasentrimmer...FRTA 20 A1 Motorspannung U V Leerlaufdrehzahl n min -1 Schutzklasse...III Schutzart...IP20 Laufzeit... ca. 45 min* Schnittkreis mm Gewicht (ohne Ladegerät)...2,15 kg Schalldruckpegel (L pa )... 78,6 db(a); K pa =3 db Schallleistungspegel (L WA ) garantiert db(a) gemessen... 89,8 db(a); K WA = 2,51 db Vibration (a h )... Oberer Handgriff... 2,65 m/s 2 Zusatzhandgriff... 3,11 m/s 2 K=1,5 m/s 2 Akku (Li-Ion)... FAP 20 A2 Anzahl der Batteriezellen... 5 Nennspannung V Kapazität... 2,0 Ah Ladezeit... ca. 1 h Ladegerät... FLG 20 A2 Nennaufnahme...65 W Eingangsspannung V~, 50 Hz Ausgangsspannung... 21,5 V ; 2,4 A Schutzklasse... II Schutzart...IP20 * Die effektive Laufzeit eines voll geladenen Akkus unter Last hängt von der Arbeitsweise und der Beanspruchung während des Schneidens ab. Lärm- und Vibrationswerte wurden entsprechend den in der Konformitätserklärung genannten Normen und Bestimmungen ermittelt. Die Schwingungs- und Geräuschmessverfahren gemäß EN wurden erfolgreich durchlaufen. Der angegebene Schwingungsemissionswert ist nach einem genormten Prüfverfahren gemessen worden und kann zum Vergleich eines Elektrowerkzeugs mit einem anderen verwendet werden. Der angegebene Schwingungsemissionswert kann auch zu einer einleitenden Einschätzung der Aussetzung verwendet werden. Warnung: Der Schwingungsemissionswert kann sich während der tatsächlichen Benutzung des Elektrowerkzeugs von dem Angabewert unterscheiden, abhängig von der Art und Weise, in der das Elektrowerkzeug verwendet wird. Versuchen Sie, die Belastung durch Vibrationen so gering wie möglich zu halten. Beispielhafte Maßnahmen zur Verringerung der Vibrationsbelastung sind das Tragen von Handschuhen beim Gebrauch des Werkzeugs und die Begrenzung der Arbeitszeit. Dabei sind alle Anteile des Betriebszyklus zu berücksichtigen (beispielsweise Zeiten, in denen das Elektrowerkzeug abgeschaltet ist, und solche, in denen es zwar eingeschaltet ist, aber ohne Belastung läuft). Sicherheitshinweise Beim Gebrauch der Maschine sind die Sicherheitshinweise zu beachten. Symbole und Bildzeichen Bildzeichen auf dem Gerät: Achtung! Lesen Sie die Betriebsanleitung aufmerksam durch. 64
65 DE AT CH Tragen Sie Augen- und Gehörschutz. Nach dem Ausschalten dreht sich die Schneidscheibe noch für einige Sekunden. Hände und Füße fernhalten. Setzen Sie das Gerät nicht der Feuchtigkeit aus. Arbeiten Sie nicht bei Regen und schneiden Sie kein nasses Gras. Halten Sie andere Personen fern. Sie könnten durch weggeschleuderte Fremdkörper verletzt werden. Verletzungsgefahr durch weggeschleuderte Teile. Umstehende Personen vom Gerät fernhalten. Entfernen Sie den Akku vor Wartungsarbeiten. Angabe des Schallleistungspegels L WA in db Elektrogeräte gehören nicht in den Hausmüll. Schnittkreis Bildzeichen auf dem Akku: Lesen Sie die Betriebsanleitung aufmerksam durch. Werfen Sie den Akku nicht in den Hausmüll, ins Feuer oder ins Wasser. Setzen Sie den Akku nicht über längere Zeit starker Sonneneinstrahlung aus und legen Sie ihn nicht auf Heizkörpern ab (max. 45 C). Geben Sie Akkus an einer Altbatteriesammelstelle ab, wo sie einer umweltgerechten Wiederverwertung zugeführt werden. Bildzeichen auf dem Ladegerät: T3.15A 130 C Achtung! Lesen Sie die Betriebsanleitung aufmerksam durch. Das Ladegerät ist nur zur Verwendung in Räumen geeignet. Gerätesicherung Schutzklasse II (Doppelisolierung) Elektrogeräte gehören nicht in den Hausmüll. Kontrollanzeigen (LED) Ladegerät Taste zur Ladezustandsanzeige 65
66 DE AT CH Symbole in der Anleitung: Gefahrenzeichen mit Angaben zur Verhütung von Personen- oder Sachschäden. Gefahrenzeichen mit Angaben zur Verhütung von Personenschäden durch elektrischen Schlag. Gebotszeichen mit Angaben zur Verhütung von Schäden. Lesen Sie die Betriebsanleitung aufmerksam durch. Hinweiszeichen mit Informationen zum besseren Umgang mit dem Gerät. Allgemeine Sicherheitshinweise für Elektrowerkzeuge WARNUNG! Lesen Sie alle Sicherheitshinweise und Anweisungen. Versäumnisse bei der Einhaltung der Sicherheitshinweise und Anweisungen können elektrischen Schlag, Brand und/oder schwere Verletzungen verursachen. Bewahren Sie alle Sicherheitshinweise und Anweisungen für die Zukunft auf. Der in den Sicherheitshinweisen verwendete Begriff,,Elektrowerkzeug bezieht sich auf netzbetriebene Elektrowerkzeuge (mit Netzkabel) und auf akkubetriebene Elektrowerkzeuge (ohne Netzkabel). 1) ARBEITSPLATZSICHERHEIT a) Halten Sie Ihren Arbeitsbereich sauber und gut beleuchtet. Unordnung oder unbeleuchtete Arbeitsbereiche können zu UnfälIen führen. b) Arbeiten Sie mit dem Elektrowerkzeug nicht in expiosionsgefährdeter Umgebung, in der sich brennbare Flüssigkeiten, Gase oder Stäube befinden. Elektrowerkzeuge erzeugen Funken, die den Staub oder die Dämpfe entzünden können. c) Halten Sie Kinder und andere Personen während der Benutzung des EIektrowerkzeugs fern. Bei Ablenkung können Sie die Kontrolle über das Gerät verlieren. 2) ELEKTRISCHE SICHERHEIT a) Der Anschlussstecker des Elektrowerkzeuges muss in die Steckdose passen. Der Stecker darf in keiner Weise verändert werden. Verwenden Sie keine Adapterstecker gemeinsam mit schutzgeerdeten Elektrowerkzeugen. Unveränderte Stecker und passende Steckdosen verringern das Risiko eines elektrischen Schlages. b) Vermeiden Sie Körperkontakt mit geerdeten OberfIächen, wie von Rohren, Heizungen, Herden und Kühlschränken. Es besteht ein erhöhtes Risiko 66
67 DE AT CH durch elektrischen Schlag, wenn Ihr Körper geerdet ist. c) Halten Sie Elektrowerkzeuge von Regen oder Nässe fern. Das Eindringen von Wasser in ein Elektrogerät erhöht das Risiko eines elektrischen Schlages. d) Zweckentfremden Sie das Kabel nicht, um das Elektrowerkzeug zu tragen, aufzuhängen oder um den Stecker aus der Steckdose zu ziehen. Halten Sie das Kabel fern von Hitze, Öl, scharfen Kanten oder sich bewegenden Geräteteilen. Beschädigte oder verwickelte Kabel erhöhen das Risiko eines elektrischen Schlages. e) Wenn Sie mit einem Elektrowerkzeug im Freien arbeiten, verwenden Sie nur Verlängerungskabel, die auch für den Außenbereich geeignet sind. Die Anwendung eines für den Außenbereich geeigneten Verlängerungskabels verringert das Risiko eines elekrischen Schlages. f) Wenn der Betrieb des Elektrowerkzeugs in feuchter Umgebung nicht vermeidbar ist, verwenden Sie einen Fehlerstromschutzschalter. Der Einsatz eines Fehlerstromschutzschalters vermindert das Risiko eines elektrischen Schlages. 3) SICHERHEIT VON PERSONEN a) Seien Sie aufmerksam, achten Sie darauf, was Sie tun, und gehen Sie mit Vernunft an die Arbeit mit einem Elektrowerkzeug. Benutzen Sie kein Elektrowerkzeug, wenn Sie müde sind oder unter dem Einfluss von Drogen, Alkohol oder Medikamenten stehen. Ein Moment der Unachtsamkeit beim Gebrauch des Elektrowerkzeuges kann zu ernsthaften Verletzungen führen. b) Tragen Sie persönliche Schutzausrüstung und immer eine Schutzbrille. Das Tragen persönlicher Schutzausrüstung, wie Staubmaske, rutschfeste Sicherheitsschuhe, Schutzhelm oder Gehörschutz, je nach Art und Einsatz des Elektrowerkzeuges, verringert das Risiko von Verletzungen. c) Vermeiden Sie eine unbeabsichtigte lnbetriebnahme. Vergewissern Sie sich, dass das Elektrowerkzeug ausgeschaltet ist, bevor Sie es an die Stromversorgung und/oder den Akku anschließen, es aufnehmen oder tragen. Wenn Sie beim Tragen des Elektrowerkzeuges den Finger am Schalter haben oder das Gerät eingeschaltet an die Stromversorgung anschließen, kann dies zu Unfällen führen. d) Entfernen Sie Einstellwerkzeuge oder Schraubenschlüssel, bevor Sie das Elektrowerkzeug einschalten. Ein Werkzeug oder Schlüssel, der sich in einem 67
68 DE AT CH drehenden Geräteteil befindet, kann zu Verletzungen führen. e) Vermeiden Sie eine abnormale Körperhaltung. Sorgen Sie für einen sicheren Stand und halten Sie jederzeit das Gleichgewicht. Dadurch können Sie das Elektrowerkzeug in unerwarteten Situationen besser kontrollieren. f) Tragen Sie geeignete Kleidung. Tragen Sie keine weite Kleidung oder Schmuck. Halten Sie Haare, Kleidung und Handschuhe fern von sich bewegenden Teilen. Lockere Kleidung, Schmuck oder lange Haare können von sich bewegenden Teilen erfasst werden. g) Wenn Staubabsaug- und -auffangeinrichtungen montiert werden können, vergewissern Sie sich, dass diese angeschlossen sind und richtig verwendet werden. Verwendung einer Staubabsaugung kann Gefährdungen durch Staub verringern. 4) SORGFÄLTIGER UMGANG MIT UND GEBRAUCH VON ELEKTROWERKZEUGEN a) Überlasten Sie das Gerät nicht. Verwenden Sie für Ihre Arbeit das dafür bestimmte Elektrowerkzeug. Mit dem passenden Elektrowerkzeug arbeiten Sie besser und sicherer im angegebenen Leistungsbereich. b) Benutzen Sie kein Elektrowerkzeug, dessen Schalter defekt ist. Ein Elektrowerkzeug, das sich nicht mehr ein- oder ausschalten Iässt, ist gefährlich und muss repariert werden. c) Ziehen Sie den Stecker aus der Steckdose und/ oder entfernen Sie den Akku, bevor Sie GeräteeinsteIlungen vornehmen, Zubehörteile wechseln oder das Gerät weglegen. Diese Vorsichtsmaßnahme verhindert den unbeabsichtigten Start des Elektrowerkzeuges. d) Bewahren Sie unbenutzte Elektrowerkzeuge außerhalb der Reichweite von Kindern auf. Lassen Sie Personen das Gerät nicht benutzen, die mit diesem nicht vertraut sind, oder diese Anweisungen nicht gelesen haben. Elektrowerkzeuge sind gefährlich, wenn sie von unerfahrenen Personen benutzt werden. e) Pflegen Sie Elektrowerkzeuge mit Sorgfalt. Kontrollieren Sie, ob bewegliche Teile einwandfrei funktionieren und nicht klemmen, ob Teile gebrochen oder so beschädigt sind, dass die Funktion des Elektrowerkzeuges beeinträchtigt ist. Lassen Sie beschädigte Teile vor dem Einsatz des Gerätes reparieren. Viele Unfälle haben ihre Ursache in schlecht gewarteten Elektrowerkzeugen. f) Halten Sie Schneidwerkzeuge scharf und sau- 68
69 DE AT CH ber. SorgfäItig gepflegte Schneidwerkzeuge mit scharfen Schneidkanten verklemmen sich weniger und sind Ieichter zu führen. g) Verwenden Sie Elektrowerkzeug, Zubehör, Einsatzwerkzeuge usw. entsprechend diesen Anweisungen. Berücksichtigen Sie dabei die Arbeitsbedingungen und die auszuführende Tätigkeit. Der Gebrauch von Elektrowerkzeugen für andere als die vorgesehenen Anwendungen kann zu gefährlichen Situationen führen. h) Achten Sie darauf, dass Luftöffnungen frei von Verschmutzungen sind. i) Entfernen Sie den Akku - wann immer sich der Anwender von der Maschine entfernt, - vor dem Entfernen von Blockierungen, - vor Überprüfen, Reinigen oder Arbeiten an der Maschine, - nach Berühren eines Fremdkörpers, um die Maschine auf Beschädigungen zu überprüfen, - zur sofortigen Überprüfung, wenn die Maschine beginnt, übermäßig stark zu vibrieren. 5) SORGFÄLTIGER UMGANG MIT UND GEBRAUCH VON AKKUWERKZEUGEN a) Laden Sie die Akkus nur in Ladegeräten auf, die vom Hersteller empfohlen werden. Für ein Ladegerät, das für eine bestimmte Art von Akkus geeignet ist, besteht Brandgefahr, wenn es mit anderen Akkus verwendet wird. b) Verwenden Sie nur die dafür vorgesehenen Akkus in den Elektrowerkzeugen. Der Gebrauch von anderen Akkus kann zu Verletzungen und Brandgefahr führen. c) Halten Sie den nicht benutzten Akku fern von Büroklammern, Münzen, Schlüsseln, Nägeln, Schrauben oder anderen kleinen Metallgegenständen, die eine Überbrückung der Kontakte verursachen könnten. Ein Kurzschluss zwischen den Akkukontakten kann Verbrennungen oder Feuer zur Folge haben. d) Bei falscher Anwendung kann Flüssigkeit aus dem Akku austreten. Vermeiden Sie den Kontakt damit. Bei zufälligem Kontakt mit Wasser abspülen. Wenn die Flüssigkeit in die Augen kommt, nehmen Sie zusätzlich ärztliche Hilfe in Anspruch. Austretende Akkuflüssigkeit kann zu Hautreizungen oder Verbrennungen führen. 6) SERVICE Lassen Sie lhr Elektrowerkzeug nur von qualifiziertem Fachpersonal und nur mit Original-Ersatzteilen reparieren. Damit wird sichergestellt, dass die Sicherheit des Gerätes erhalten bleibt. 69
70 DE AT CH 7) SPEZIELLE SICHERHEITS- HINWEISE FÜR AKKU- GERÄTE a) Stellen Sie sicher, dass das Gerät ausgeschaltet ist, bevor Sie den Akku einsetzen. Das Einsetzen eines Akkus in ein Elektrowerkzeug, das eingeschaltet ist, kann zu Unfällen führen. b) Laden Sie Ihre Batterien nur im Innenbereich auf, weil das Ladegerät nur dafür bestimmt ist. c) Um das Risiko eines elektrischen Schlags zu reduzieren, ziehen Sie den Stecker des Ladegeräts aus der Steckdose heraus, bevor Sie es reinigen. d) Setzen Sie den Akku nicht über längere Zeit starker Sonneneinstrahlung aus und legen Sie ihn nicht auf Heizkörpern ab. Hitze schadet dem Akku und es besteht Explosionsgefahr. e) Lassen Sie einen erwärmten Akku vor dem Laden abkühlen. f) Öffnen Sie den Akku nicht und vermeiden Sie eine mechanische Beschädigung des Akkus. Es besteht die Gefahr eines Kurzschlusses und es können Dämpfe austreten, die die Atemwege reizen. Sorgen Sie für Frischluft und nehmen Sie bei Beschwerden zusätzlich ärztliche Hilfe in Anspruch. g) Verwenden Sie keine nicht wiederaufladbaren Batterien! Weiterführende Sicherheitshinweise SCHULUNG Dieses Gerät darf nicht von Kindern benutzt werden. Kinder sollten beaufsichtigt werden, damit sie nicht mit dem Gerät spielen. Reinigung und Wartung darf nicht von Kindern durchgeführt werden. Das Gerät darf nicht von Personen mit verminderten physischen, sensorischen oder geistigen Fähigkeiten oder Personen mit unzureichendem Wissen oder Erfahrung benutzt werden. Lokale Vorschriften können eine Altersbeschränkung für den Anwender festlegen. Es ist zu beachten, dass der Benutzer selbst für Unfälle oder Gefährdungen gegenüber anderen Personen oder deren Besitz verantwortlich ist. Kindern und Personen mit eingeschränkten körperlichen, sensorischen oder geistigen Fähigkeiten oder unzureichender Erfahrung und Wissen oder Personen, welche mit den Anweisungen nicht vertraut sind, darf die Verwendung der Maschine nie gestattet werden! Lokale Vorschriften können die Altersbeschränkung für den Anwender festlegen. Erlauben Sie nie, dass Kinder oder Personen, die mit den genannten Anweisungen nicht vertraut sind, die Maschine benutzen. 70
71 DE AT CH VORBEREITUNG Vor der Benutzung ist die Maschine optisch auf beschädigte, fehlende oder falsch angebrachte Schutzeinrichtungen oder abdeckungen zu überprüfen. Vor Inbetriebnahme der Maschine und nach irgendwelchem Aufprall, prüfen Sie sie auf Anzeichen von Verschleiß oder Beschädigung und lassen Sie notwendige Reparaturen durchführen. BETRIEB Augenschutz, lange Hose und festes Schuhwerk sind über den gesamten Zeitraum der Benutzung der Maschine zu tragen. Die Verwendung der Maschine unter Schlechtwetterbedingungen, insbesondere bei Blitzrisiko, ist zu vermeiden. Warnung! Berühren Sie keine sich bewegenden gefährlichen Teile, bevor die Batterie entfernt wurde und die beweglichen gefährlichen Teile vollständig zum Stillstand gekommen sind. Vorsicht vor Verletzungen durch die Schneideinrichtung an Füßen und Händen. Unterbrechen Sie den Gebrauch der Maschine, wenn Personen, vor allem Kinder oder Haustiere in der Nähe sind. Benutzen Sie die Maschine nur bei Tageslicht oder guter künstlicher Beleuchtung. Halten Sie immer Hände und Füße von der Schneideinrichtung entfernt, vor allem, wenn Sie den Motor einschalten. Ersetzen Sie niemals die nichtmetallische Schneideinrichtung durch eine metallische Schneideinrichtung. Niemals die Maschine mit beschädigter Abdeckung oder Schutzeinrichtung bzw. ohne Abdeckung oder Schutzeinrichtungen verwenden. Vermeiden Sie eine abnormale Körperhaltung. Sorgen Sie für einen sicheren Stand, um jederzeit das Gleichgewicht beim Arbeiten an Hängen halten zu können. Gehen Sie langsam. Laufen Sie nicht mit dem Gerät in der Hand. Tragen Sie während des Betriebs der Maschine jederzeit festes Schuhwerk und lange Hosen. Bei Auftreten eines Unfalles oder einer Störung während des Betriebs ist das Gerät sofort auszuschalten. Versorgen Sie Verletzungen sachgemäß oder suchen Sie einen Arzt auf. Lesen Sie zur Beseitigung von Störungen das Kapitel Fehlersuche oder kontaktieren Sie unser Service-Center. INSTANDHALTUNG UND AUFBEWAHRUNG Die herausnehmbare Batterie entfernen, bevor die Wartung oder Reinigungsarbeiten durchgeführt werden. Nur die vom Hersteller empfohlenen Ersatz- und Zubehörteile sind zu verwenden. Die Maschine ist regelmäßig zu überprüfen und zu warten. Die Maschine nur in einer Vertragswerkstatt instand setzen lassen. 71
72 DE AT CH Restrisiken Auch wenn Sie dieses Elektrowerkzeug vorschriftsmäßig bedienen, bleiben immer Restrisiken bestehen. Folgende Gefahren können im Zusammenhang mit der Bauweise und Ausführung dieses Elektrowerkzeugs auftreten: a) Schnittverletzungen b) Gehörschäden, falls kein geeigneter Gehörschutz getragen wird. c) Gesundheitsschäden, die aus Hand-Arm-Schwingungen resultieren, falls das Gerät über einen längeren Zeitraum verwendet wird oder nicht ordnungsgemäß geführt und gewartet wird. Warnung! Dieses Elektrowerkzeug erzeugt während des Betriebs ein elektromagnetisches Feld. Dieses Feld kann unter bestimmten Umständen aktive oder passive medizinische Implantate beeinträchtigen. Um die Gefahr von ernsthaften oder tödlichen Verletzungen zu verringern, empfehlen wir Personen mit medizinischen Implantaten ihren Arzt und den Hersteller des medizinischen Implantats zu konsultieren, bevor die Maschine bedient wird. Richtiger Umgang mit dem Akkuladegerät Dieses Gerät kann von Kindern ab 8 Jahren und darüber sowie von Personen mit verringerten physischen, sensorischen oder mentalen Fähigkeiten oder Mangel an Erfahrung und Wissen benutzt werden, wenn sie beaufsichtigt oder bezüglich des sicheren Gebrauchs des Gerätes unterwiesen wurden und die daraus resultierenden Gefahren verstehen. Kinder dürfen nicht mit dem Gerät spielen. Reinigung und Benutzer-Wartung dürfen nicht von Kindern ohne Beaufsichtigung durchgeführt werden. Kinder sollten beaufsichtigt werden, um sicherzustellen, dass sie nicht mit dem Gerät spielen. Verwenden Sie zum Laden des Akkus ausschließlich das mitgelieferte Ladegerät. Es besteht Brand- und Explosionsgefahr. Überprüfen Sie vor jeder Benutzung Ladegerät, Kabel und Stecker und lassen Sie es von qualifiziertem Fachpersonal und nur mit Original-Ersatzteilen reparieren. Benutzen Sie ein defektes Ladegerät nicht und öffnen Sie es nicht selbst. Damit wird sichergestellt, dass die Sicherheit des Gerätes erhalten bleibt. Achten Sie darauf, dass die Netzspannung mit den Angaben des Typenschildes auf dem Ladegerät übereinstimmt. Es besteht die Gefahr eines elektrischen Schlags. 72
73 DE AT CH Trennen Sie das Ladegerät vom Netz, bevor Verbindungen zum Elektrowerkzeug geschlossen oder geöffnet werden. Halten Sie das Ladegerät sauber und fern von Nässe und Regen. Benutzen Sie das Ladegerät niemals im Freien. Durch Verschmutzung und das Eindringen von Wasser erhöht sich das Risiko eines elektrischen Schlags. Das Ladegerät darf nur mit den zugehörigen Original-Akkus betrieben werden. Das Laden von anderen Akkus kann zu Verletzungen und Brandgefahr führen. Vermeiden Sie mechanische Beschädigungen des Ladegerätes. Sie können zu inneren Kurzschlüssen führen. Das Ladegerät darf nicht auf brennbarem Untergrund (z. B. Papier, Textilien) betrieben werden. Es besteht Brandgefahr wegen der beim Laden auftretenden Erwärmung. Wenn die Anschlussleitung dieses Gerätes beschädigt wird, muss sie durch den Hersteller oder seinen Kundendienst oder eine ähnlich qualifizierte Person ersetzt werden, um Gefährdungen zu vermeiden. Laden Sie in dem Ladegerät keine nichtaufladbaren Batterien auf. Das Gerät könnte beschädigt werden. Ladevorgang Setzen Sie den Akku nicht extremen Bedingungen wie Wärme und Stoß aus. Es besteht Verletzungsgefahr durch auslaufende Elektrolytlösung! Spülen Sie bei Augen- oder Hautkontakt die betroffenen Stellen mit Wasser oder Neutralisator und suchen Sie einen Arzt auf. Laden Sie den Akku nur in trockenen Räumen auf. Die Außenfläche des Akkus muss sauber und trocken sein, bevor Sie das Ladegerät anschließen. Es besteht die Gefahr von Verletzungen durch Stromschlag. Laden Sie den Akku vor dem ersten Gebrauch auf. Den Akku nicht mehrmals hintereinander kurz aufladen. Laden Sie nur mit beiliegendem Original- Ladegerät auf. Eine wesentlich verkürzte Betriebszeit trotz Aufladung zeigt an, dass der Akku verbraucht ist und ersetzt werden muss. Verwenden Sie nur einen Original-Ersatzakku, den Sie über den Kundendienst beziehen können. Beachten Sie in jedem Falle die jeweils gültigen Sicherheitshinweise sowie Bestimmungen und Hinweise zum Umweltschutz. Defekte, die aus unsachgemäßer Handhabung resultieren, unterliegen nicht der Garantie. 73
74 DE AT CH Akku entnehmen/einsetzen 1. Zum Herausnehmen des Akkus (16) aus dem Gerät drücken Sie die Entriegelungstasten (17) am Akku und ziehen den Akku heraus. 2. Zum Einsetzen des Akkus (16) schieben Sie den Akku entlang der Führungsschiene (20) in das Gerät. Er rastet hörbar ein. Setzen Sie den Akku erst ein, wenn das Gerät vollständig montiert ist. Es besteht Verletzungsgefahr! Akku aufladen Laden Sie den Akku ( 16) auf, wenn nur noch die rote LED der Ladezustandsanzeige ( 18) leuchtet. Die Ladezeit beträgt etwa 1 Stunde. 1. Nehmen Sie gegebenenfalls den Akku (16) aus dem Gerät. 2. Schieben Sie den Akku (16) in den Ladeschacht des Ladegerätes (19). 3. Schließen Sie das Ladegerät (19) an eine Steckdose an. Die rote LED der Kontrollanzeige (19a) am Ladegerät (19) leuchtet, solange der Akku (16) lädt. Leuchtet die grüne LED am Ladegerät (19), ist der Akku (16) aufgeladen. 4. Nach erfolgtem Ladevorgang trennen Sie das Ladegerät (19) vom Netz. 5. Ziehen Sie den Akku (16) aus dem Ladegerät (19). Verbrauchte Akkus Eine wesentlich verkürzte Betriebszeit trotz Aufladung zeigt an, dass der Akku verbraucht ist und ersetzt werden muss. Verwenden Sie nur einen Ersatz- Akku, den Sie über den Kundendienst beziehen können. Beachten Sie in jedem Falle die jeweils gültigen Sicherheitshinweise sowie Bestimmungen und Hinweise zum Umweltschutz (siehe Entsorgung/Umweltschutz ). Montageanleitung Nehmen Sie vor der Montage den Akku aus dem Gerät. Setzen Sie den Akku erst ein, wenn das Gerät vollständig montiert ist. Es besteht Verletzungsgefahr! Schutzabdeckung montieren: 1. Setzen Sie die Schutzabdeckung (14) auf den Motorkopf (10) auf und schrauben Sie diese mit den 3 Kreuzschlitzschrauben (14a) fest. Schneideinheit montieren: 2. Setzen Sie die Schneidscheibe (12) auf die Achse auf. Es besteht nur eine Montageposition. Verschrauben Sie die Schneidscheibe (12) mit der Achse. Beachten Sie das Linksgewinde. Bitte achten Sie auf festen Sitz der Schraube (12a). Setzen Sie das Kunststoff-Messer (13) auf den Stift (23) an der Schneidscheibe (12) auf und ziehen dieses nach außen, bis es einrastet. 74
75 DE AT CH Ersatz-Kunststoff-Messer finden Platz in der Aufbewahrungsbox ( 4) am Zusatzgriff ( 5). Zusatzgriff montieren: 3. Lösen und entfernen Sie die vormontierte Schraube (22) des Zusatzhandgriffes (5). 4. Ziehen Sie die Enden des Zusatzgriffes (5) auseinander und schieben Sie diese über die Griffaufnahme (21). Die Aufbewahrungsbox für Kunststoff-Messer (4) zeigt dabei nach oben. 5. Schrauben Sie den Zusatzgriff (5) mit der Griffschraube (22) an. Akku einsetzen: 6. Zum Einsetzen des Akkus (16) schieben Sie den Akku entlang der Führungsschiene (20) in das Gerät. Er rastet hörbar ein. Bedienung Achtung Verletzungsgefahr! Verwenden Sie das Gerät nicht ohne Schutzabdeckung. Tragen Sie beim Arbeiten mit dem Gerät geeignete Kleidung sowie Augen- und Gehörschutz. Vergewissern Sie sich vor jeder Benutzung, dass das Gerät funktionstüchtig ist. Der Ein-/Ausschalter und die Einschaltsperre dürfen nicht arretiert werden. Sie müssen nach Loslassen des Schalters den Motor ausschalten. Sollte ein Schalter beschädigt sein, darf mit dem Gerät nicht mehr gearbeitet werden. Beachten Sie den Lärmschutz und örtliche Vorschriften. Ein- und Ausschalten Achten Sie auf einen sicheren Stand und halten Sie das Gerät mit beiden Händen und mit Abstand vom eigenen Körper gut fest. Achten Sie vor dem Einschalten darauf, dass das Gerät keine Gegenstände berührt. 1. Vergewissern Sie sich, dass der Akku (16) eingesetzt ist (siehe Montageanleitung - Akku einsetzen ). 2. Zum Einschalten betätigen Sie mit dem Daumen die Einschaltsperre (3) und drücken dann den Ein-/Ausschalter (2). Lassen Sie die Einschaltsperre wieder los. 3. Zum Ausschalten lassen Sie den Ein-/Ausschalter (2) los. Eine Dauerlaufschaltung ist nicht möglich. Nach dem Ausschalten des Gerätes dreht sich die Schneideinrichtung noch einige Zeit weiter. Lassen Sie die Schneideinrichtung vollständig zur Ruhe kommen. Berühren Sie das sich bewegende Kunststoff-Messer nicht und bremsen Sie dieses nicht ab. Verletzungsgefahr! Ladezustand des Akkus prüfen Die Ladezustandsanzeige ( 18) signalisiert den Ladezustand des Akkus ( 16). 75
76 DE AT CH Drücken Sie die Taste zur Ladezustandsanzeige ( 18a) am Akku. Der Ladezustand des Akkus wird durch Aufleuchten der entsprechenden LED-Leuchte angezeigt. 3 LEDs leuchten: Akku geladen 2 LEDs leuchten: Akku teilweise geladen 1 LED leuchtet: Akku muss geladen werden Laden Sie den Akku ( 16) auf, wenn nur noch die rote LED der Ladezustandsanzeige ( 18) leuchtet. Einstellungen am Gerät Zusatzgriff verstellen: Sie können den Zusatzgriff in verschiedene Positionen bringen. Stellen Sie den Griff so ein, dass die Schneidscheibe in der Arbeitshaltung leicht nach vorne geneigt ist. Lösen Sie die Griffschraube (22) und verstellen Sie den Zusatzgriff (5) in die gewünschte Position. Ziehen Sie die Griffschraube wieder fest. Höhe verstellen: Das Teleskoprohr erlaubt es Ihnen, das Gerät auf Ihre individuelle Größe einzustellen. Lösen Sie die Schraubhülse (8). Bringen Sie das Teleskoprohr (9) auf die gewünschte Länge und schrauben Sie die Schraubhülse wieder fest. Schnittwinkel verstellen: Mit verändertem Schnittwinkel können Sie auch an unzugänglichen Stellen trimmen, z. B. unter Bänken und Vorsprüngen. Drücken Sie den Druckknopf (15) am Motorgehäuse und neigen Sie das Teleskoprohr (9). Es sind 7 Stellungen möglich (siehe auch Arbeitshinweise ). Griffteil verstellen: Das Griffteil lässt sich um 90 und 180 drehen (siehe auch Arbeitshinweise ). Schieben Sie den Riegel (7) nach unten und drehen Sie das Griffteil (6) , bis es in der gewünschten Position einrastet. Distanzbügel (Blumenschutz) verstellen: Der Distanzbügel hält nicht zu schneidende Pflanzen und Stämme von der Schneideinrichtung fern. Schieben Sie den Distanzbügel (11) nach vorne. Wenn der Distanzbügel nicht benötigt wird, schieben Sie ihn in die Parkposition zurück. Arbeitshinweise Achtung Verletzungsgefahr! Schneiden Sie kein feuchtes oder nasses Gras. Vergewissern Sie sich vor dem Starten des Gerätes, dass die Schneidscheibe nicht mit Steinen, Geröll oder anderen Fremdkörpern in Berührung ist. Schalten Sie das Gerät ein, bevor Sie sich dem zu schneidenden Gras nähern. Vermeiden Sie die Überbeanspruchung des Gerätes während der Arbeit. Vermeiden Sie die Berührung mit festen Hindernissen (Steine, Mauern, Lattenzäune usw.). Das Kunststoff- Messer würde sich schnell abnutzen. Vermeiden Sie die Verwendung des Gerätes bei schlechtem Wetter, besonders bei Blitzgefahr! 76

77 DE AT CH Gras schneiden Schneiden Sie Gras, indem Sie das Gerät nach rechts und links schwenken. Schneiden Sie langsam und halten Sie beim Schneiden das Gerät um ca. 30 nach vorn geneigt. Schneiden Sie langes Gras schichtweise von oben nach unten. Senkrechtschnitt/ Rasenkantentrimmen Bei senkrecht geführter Schneidscheibe ist besondere Vorsicht und Aufmerksamkeit geboten. Halten Sie genügend Abstand zur Schneideinrichtung, um Verletzungen zu vermeiden. Einstellungen für den Senkrechtschnitt: Zum Schneiden von Böschungen und steilen Hängen führen Sie das Gerät langsam nach rechts und links. Griffteil: 180 (siehe ) Schnittwinkel: 0 (siehe ) Distanzbügel in Parkposition Einstellungen für das Rasenkantentrimmen: Zum Trimmen von Rasenkanten führen Sie das Gerät langsam an den Rasenkanten entlang. Griffteil: 90 (siehe ) Schnittwinkel: 90 (siehe ) Distanzbügel in Parkposition Reinigung und Wartung Warnung! Verletzungsgefahr durch bewegliche gefährliche Teile! Lassen Sie Instandsetzungsarbeiten und Wartungsarbeiten, die nicht in dieser Anleitung beschrieben sind, von unserem Service-Center durchführen. Verwenden Sie nur Originalteile. Schalten Sie das Gerät aus und nehmen Sie vor allen Arbeiten den Akku aus dem Gerät. Führen Sie folgende Reinigungs- und Wartungsarbeiten regelmäßig durch. Dadurch ist eine lange und zuverlässige Nutzung gewährleistet. Reinigung Das Gerät darf weder mit Wasser abgespritzt werden, noch in Wasser gelegt werden. Es besteht die Gefahr eines Stromschlages. Halten Sie Lüftungsschlitze, Motorgehäuse und Griffe des Gerätes sauber. Verwenden Sie dazu ein feuchtes Tuch oder eine Bürste. Verwenden Sie keine Reinigungs- bzw. Lösungsmittel. Sie könnten das Gerät damit irreparabel beschädigen. Reinigen Sie nach jedem Schneidevorgang die Schutzabdeckung und die Schneideinrichtung von Gras und Erde. Zur intensiven Reinigung der Schneideinrichtung nehmen Sie das Kunststoff-Messer ( 13) ab (siehe Kunststoff-Messer auswechseln ) und reinigen Sie den Stift ( 23) mit einem scharfen Messer. 77
78 DE AT CH Allgemeine Wartungsarbeiten Kontrollieren Sie das Gerät vor jedem Gebrauch auf offensichtliche Mängel wie lose, abgenutzte oder beschädigte Teile. Prüfen Sie den festen Sitz der Schrauben in der Schneidscheibe. Überprüfen Sie Abdeckungen und Schutzeinrichtungen auf Beschädigungen und korrekten Sitz. Tauschen Sie diese gegebenenfalls aus. Kunststoff-Messer auswechseln 1. Schieben Sie das Kunststoff-Messer (13) nach innen und drücken Sie es aus dem Stift (23) an der Schneidscheibe (12). 2. Setzen Sie das neue Kunststoff- Messer (13) auf den Stift (23) auf und ziehen dieses nach außen, bis es einrastet. Lagerung Bewahren Sie das Gerät an einem trockenen und staubgeschützten Ort und außerhalb der Reichweite von Kindern auf. Legen Sie das Gerät nicht auf der Schutzabdeckung ab. Hängen Sie es am Besten am oberen Handgriff auf, dass die Schutzabdeckung keine anderen Gegenstände berührt. Es besteht die Gefahr, dass sich die Schutzabdeckung verformt und sich damit Abmessungen und Sicherheitseigenschaften verändern. Nehmen Sie den Akku vor einer längeren Lagerung (z. B. Überwinterung) aus dem Gerät (zwei Lämpchen der Ladezustandsanzeige am Akku leuchten). Lagern Sie den Akku nur im teilgeladenen Zustand. Der Ladezustand sollte während einer längeren Lagerzeit 40-60% betragen. Prüfen Sie während einer längeren Lagerungsphase etwa alle 3 Monate den Ladezustand des Akkus und laden Sie bei Bedarf nach. Lagern Sie den Akku zwischen 10 C bis 25 C. Vermeiden Sie während der Lagerung extreme Kälte oder Hitze, damit der Akku nicht an Leistung verliert. Entsorgung/ Umweltschutz Nehmen Sie den Akku aus dem Gerät und führen Sie Gerät, Akku, Zubehör und Verpackung einer umweltgerechten Wiederverwertung zu. Elektrische Geräte gehören nicht in den Hausmüll. Werfen Sie den Akku nicht in den Hausmüll, ins Feuer (Explosionsgefahr) oder ins Wasser. Beschädigte Akkus können der Umwelt und ihrer Gesundheit schaden, wenn giftige Dämpfe oder Flüssigkeiten austreten. Geben Sie das Gerät und das Ladegerät an einer Verwertungsstelle ab. Die verwendeten Kunststoff- und Metallteile können sortenrein getrennt werden und so einer Wiederverwertung zugeführt werden. Fragen Sie hierzu unser Service-Center. Entsorgen Sie Akkus im entladenen Zustand. Wir empfehlen die Pole mit einem Klebestreifen zum Schutz vor einem Kurzschluss abzudecken. Öffnen Sie den Akku nicht. Entsorgen Sie Akkus nach den lokalen Vorschriften. Geben Sie Akkus an einer Altbatteriesammelstelle ab, wo 78
79 DE AT CH sie einer umweltgerechten Wiederverwertung zugeführt werden. Fragen Sie hierzu Ihren lokalen Müllentsorger oder unser Service-Center. Die Entsorgung Ihrer defekten eingesendeten Geräte führen wir kostenlos durch. Führen Sie Schnittgut der Kompostierung zu und werfen Sie dieses nicht in die Mülltonne. Garantie Sehr geehrte Kundin, sehr geehrter Kunde, Sie erhalten auf dieses Gerät 3 Jahre Garantie ab Kaufdatum. Im Falle von Mängeln dieses Produkts stehen Ihnen gegen den Verkäufer des Produkts gesetzliche Rechte zu. Diese gesetzlichen Rechte werden durch unsere im Folgenden dargestellte Garantie nicht eingeschränkt. Garantiebedingungen Die Garantiefrist beginnt mit dem Kaufdatum. Bitte bewahren Sie den Original- Kassenbon gut auf. Diese Unterlage wird als Nachweis für den Kauf benötigt. Tritt innerhalb von drei Jahren ab dem Kaufdatum dieses Produkts ein Materialoder Fabrikationsfehler auf, wird das Produkt von uns nach unserer Wahl für Sie kostenlos repariert oder ersetzt. Diese Garantieleistung setzt voraus, dass innerhalb der Drei-Jahres-Frist das defekte Gerät und der Kaufbeleg (Kassenbon) vorgelegt und schriftlich kurz beschrieben wird, worin der Mangel besteht und wann er aufgetreten ist. Wenn der Defekt von unserer Garantie gedeckt ist, erhalten Sie das reparierte oder ein neues Produkt zurück. Mit Reparatur oder Austausch des Produkts beginnt kein neuer Garantiezeitraum. Garantiezeit und gesetzliche Mängelansprüche Die Garantiezeit wird durch die Gewährleistung nicht verlängert. Dies gilt auch für ersetzte und reparierte Teile. Eventuell schon beim Kauf vorhandene Schäden und Mängel müssen sofort nach dem Auspacken gemeldet werden. Nach Ablauf der Garantiezeit anfallende Reparaturen sind kostenpflichtig. Garantieumfang Das Gerät wurde nach strengen Qualitätsrichtlinien sorgfältig produziert und vor Anlieferung gewissenhaft geprüft. Die Garantieleistung gilt für Material- oder Fabrikationsfehler. Diese Garantie erstreckt sich nicht auf Produktteile, die normaler Abnutzung ausgesetzt sind und daher als Verschleißteile angesehen werden können (z. B. Kunststoffmesser, Schneidscheibe), oder für Beschädigungen an zerbrechlichen Teilen (z. B. Schalter, Akkus). Diese Garantie verfällt, wenn das Produkt beschädigt, nicht sachgemäß benutzt oder nicht gewartet wurde. Für eine sachgemäße Benutzung des Produkts sind alle in der Betriebsanleitung aufgeführten Anweisungen genau einzuhalten. Verwendungszwecke und Handlungen, von denen in der Betriebsanleitung abgeraten oder vor denen gewarnt wird, sind unbedingt zu vermeiden. Das Produkt ist lediglich für den privaten und nicht für den gewerblichen Gebrauch bestimmt. Bei missbräuchlicher und unsachgemäßer Behandlung, Gewaltanwendung und bei Eingriffen, die nicht von unserer autorisierten Service-Niederlassung vorgenommen wurden, erlischt die Garantie. Abwicklung im Garantiefall Um eine schnelle Bearbeitung Ihres Anliegens zu gewährleisten, folgen Sie bitte den folgenden Hinweisen: 79
80 DE AT CH Bitte halten Sie für alle Anfragen den Kassenbon und die Artikelnummer (IAN ) als Nachweis für den Kauf bereit. Die Artikelnummer entnehmen Sie bitte dem Typenschild. Sollten Funktionsfehler oder sonstige Mängel auftreten, kontaktieren Sie zunächst die nachfolgend benannte Serviceabteilung telefonisch oder per . Sie erhalten dann weitere Informationen über die Abwicklung Ihrer Reklamation. Ein als defekt erfasstes Produkt können Sie, nach Rücksprache mit unserem Kundenservice, unter Beifügung des Kaufbelegs (Kassenbons) und der Angabe, worin der Mangel besteht und wann er aufgetreten ist, für Sie portofrei an die Ihnen mitgeteilte Service-Anschrift übersenden. Um Annahmeprobleme und Zusatzkosten zu vermeiden, benutzen Sie unbedingt nur die Adresse, die Ihnen mitgeteilt wird. Stellen Sie sicher, dass der Versand nicht unfrei, per Sperrgut, Express oder sonstiger Sonderfracht erfolgt. Senden Sie das Gerät bitte inkl. aller beim Kauf mitgelieferten Zubehörteile ein und sorgen Sie für eine ausreichend sichere Transportverpackung. Reparatur-Service Sie können Reparaturen, die nicht der Garantie unterliegen, gegen Berechnung von unserer Service-Niederlassung durchführen lassen. Sie erstellt Ihnen gerne einen Kostenvoranschlag. Wir können nur Geräte bearbeiten, die ausreichend verpackt und frankiert eingesandt wurden. Achtung: Bitte senden Sie Ihr Gerät gereinigt und mit Hinweis auf den Defekt an unsere Service-Niederlassung. Nicht angenommen werden unfrei - per Sperrgut, Express oder mit sonstiger Sonderfracht - eingeschickte Geräte. Die Entsorgung Ihrer defekten eingesendeten Geräte führen wir kostenlos durch. Service-Center DE AT CH Service Deutschland Tel.: grizzly@lidl.de IAN Service Österreich Tel.: (0,15 EUR/Min.) grizzly@lidl.at IAN Service Schweiz Tel.: (0,08 CHF/Min., Mobilfunk max. 0,40 CHF/Min.) grizzly@lidl.ch IAN Importeur Bitte beachten Sie, dass die folgende Anschrift keine Serviceanschrift ist. Kontaktieren Sie zunächst das oben genannte Service-Center. Grizzly Tools GmbH & Co. KG Stockstädter Straße Großostheim Germany 80
81 DE AT CH Fehlersuche Im Falle eines Unfalls oder einer Betriebsstörung nehmen Sie sofort den Akku aus dem Gerät! Eine Nichtbeachtung kann zu Schnittverletzungen führen. Problem Mögliche Ursache Fehlerbehebung Gerät startet nicht Gerät arbeitet mit Unterbrechungen Akku ( 16) entladen Akku ( 16) laden (siehe Ladevorgang ) Akku ( 16) einsetzen Akku ( 16) nicht eingesetzt (siehe Ladevorgang ) Ein-/Ausschalter ( 2) defekt Reparatur durch Service-Center Motor defekt Interner Wackelkontakt Reparatur durch Service-Center Ein-/Ausschalter ( 2) defekt Starke Vibrationen, Starke Geräusche Schlechtes Schneidergebnis Kunststoff-Messer ( 13) gebrochen Schneideinrichtung verschmutzt Motor defekt Kunststoff-Messer ( 13) gebrochen Schneideinrichtung verschmutzt Akku ( 16) nicht voll geladen Kunststoff-Messer ( 13) auswechseln (siehe Reinigung und Wartung ) Schneideinrichtung reinigen (siehe Reinigung und Wartung ) Reparatur durch Service-Center Kunststoff-Messer ( 13) auswechseln (siehe Reinigung und Wartung ) Schneideinrichtung reinigen (siehe Reinigung und Wartung ) Akku ( 16) laden (siehe Ladevorgang ) Ersatzteile/Zubehör Ersatzteile und Zubehör erhalten Sie unter Sollten Sie kein Internet haben, so wenden Sie sich bitte telefonisch an das Service- Center (siehe Service-Center Seite 80). Halten Sie die unten genannten Bestellnummern bereit. Kunststoffmesser (20-er Pack) Akku Ladegerät
82 82
83 IT MT Traduzione della dichiarazione di conformità CE originale Con la presente dichiariamo che Decespugliatore a batteria serie di costruzione FRTA 20 A1 numero di serie corrisponde alle seguenti direttive UE in materia nella rispettiva versione valida: 2006/42/EC 2014/30/EU 2000/14/EC 2005/88/EC 2011/65/EU* Per garantire la conformità sono state applicate le seguenti norme armonizzate e anche le norme e disposizioni nazionali che seguono: EN :2014 EN 62233:2008 EN :2006/A2:2011 EN :2015 EN :2014 EN :2013 EN :2004/A2:2010 EN :2012/A11:2014 EN :2013 Si dichiara inoltre in conformità alla direttiva 2000/14/EC sull emissione acustica ambientale: Livello di potenza sonora garantita: 96 db(a) misurata: 89,8 db(a) Procedura della valutazione della conformità applicata come da allegato VI / 2000/14/EC Autorità registrata: TÜV Süd Industrie Service GmbH, Westendstrasse 199, München, Deutschland, NB 0036 Il produttore è il solo responsabile della stesura della presente dichiarazione di conformità: Grizzly Tools GmbH & Co. KG Stockstädter Straße Großostheim, Germany, Christian Frank Responsabile documentazione tecnica * L oggetto descritto sopra è conforme alle prescrizioni della Direttiva 2011/65/EU del Parlamento Europeo e del Consiglio dell 8 giugno 2011 sulla restrizione dell uso di determinate sostanze pericolose nelle apparecchiature elettriche ed elettroniche. 83
84 PT Tradução do original da Declaração de conformidade CE Vimos, por este meio, declarar que o Aparador elétrico da série FRTA 20 A1 Número de série corresponde às respectivas normas da UE na sua versão em vigor: 2006/42/EC 2014/30/EU 2000/14/EC 2005/88/EC 2011/65/EU* Para garantir a conformidade, foram aplicadas as seguintes normas harmonizadas bem como normas e disposições nacionais: EN :2014 EN 62233:2008 EN :2006/A2:2011 EN :2015 EN :2014 EN :2013 EN :2004/A2:2010 EN :2012/A11:2014 EN :2013 Adicionalmente declara-se de acordo com a Directiva de Emissões Sonoras para o Ambiente da 2000/14/EC: Nível de potência acústica garantido: 96 db(a) medido: 89,8 db(a) Foi aplicado o procedimento de avaliação de conformidade de acordo com o Anexo VI / 2000/14/EC Benannte Stelle: TÜV Süd Industrie Service GmbH, Westendstrasse 199, München, Deutschland, NB 0036 O fabricante é o único responsável pela emissão desta declaração de conformidade: Grizzly Tools GmbH & Co. KG Stockstädter Straße Großostheim, Germany, Christian Frank Encarregado de documentação * O objeto acima descrito da declaração cumpre as normas da diretiva 2011/65/UE do Parlamento Europeu e do Conselho do dia 8 de junho de 2011 sobre a restrição da utilização de determinadas substâncias em aparelhos elétricos e eletrónicos. 84
85 GB MT Translation of the original EC declaration of conformity We hereby confirm that the FRTA 20 A1 series Cordless Grass Trimmer Serial number conforms with the following applicable relevant version of the EU guidelines: 2006/42/EC 2014/30/EU 2000/14/EC 2005/88/EC 2011/65/EU* In order to guarantee consistency, the following harmonised standards as well as national standards and stipulations have been applied: EN :2014 EN 62233:2008 EN :2006/A2:2011 EN :2015 EN :2014 EN :2013 EN :2004/A2:2010 EN :2012/A11:2014 EN :2013 We additionally confirm the following in accordance with the 2000/14/EC emissions guideline: Guaranteed sound power level: 96 db(a) Measured sound power level: 89,8 db(a) Compliance evaluation process carried out in accordance with Appendix VI, 2000/14/EC Registered Office: TÜV Süd Industrie Service GmbH, Westendstrasse 199, München, Deutschland, NB 0036 This declaration of conformity is issued under the sole responsibility of the manufacturer: Grizzly Tools GmbH & Co. KG Stockstädter Straße Großostheim, Germany, Christian Frank Documentation Representative * The object of the declaration described above satisfies the provisions of Directive 2011/65/ EU of the European Parliament and the Council of 8 June 2011 on limiting the use of certain harmful substances in electrical and electronic appliances. 85
86 86

87 DE AT CH Original-EG-Konformitätserklärung Hiermit bestätigen wir, dass der Akku-Rasentrimmer Baureihe FRTA 20 A1 Seriennummer folgenden einschlägigen EU-Richtlinien in ihrer jeweils gültigen Fassung entspricht: 2006/42/EG 2014/30/EU 2000/14/EG 2005/88/EG 2011/65/EU* Um die Übereinstimmung zu gewährleisten, wurden folgende harmonisierte Normen sowie nationale Normen und Bestimmungen angewendet: EN :2014 EN 62233:2008 EN :2006/A2:2011 EN :2015 EN :2014 EN :2013 EN :2004/A2:2010 EN :2012/A11:2014 EN :2013 Zusätzlich wird entsprechend der Geräuschemissionsrichtlinie 2000/14/EG bestätigt: Schallleistungspegel: Garantiert: 96 db(a); Gemessen: 89,8 db(a) Angewendetes Konformitätsbewertungsverfahren entsprechend Anh. VI / 2000/14/EG Benannte Stelle: TÜV Süd Industrie Service GmbH, Westendstrasse 199, München, Deutschland, NB 0036 Die alleinige Verantwortung für die Ausstellung dieser Konformitätserklärung trägt der Hersteller: Grizzly Tools GmbH & Co. KG Stockstädter Straße Großostheim, Germany, Christian Frank Dokumentationsbevollmächtigter * Der oben beschriebene Gegenstand der Erklärung erfüllt die Vorschriften der Richtlinie 2011/65/EU des Europäischen Parlaments und des Rates vom 8. Juni 2011 zur Beschränkung der Verwendung bestimmter gefährlicher Stoffe in Elektro- und Elektronikgeräten. 87
88 88
89 FRTA 20 A1 Vista esplosa Vista em corte Exploded Drawing Explosionszeichnung informativo, informative, informativ _rev02_sh 89


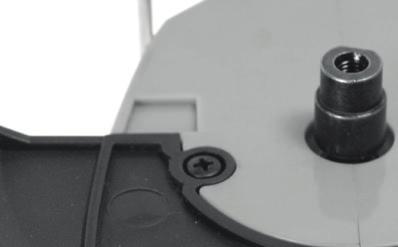
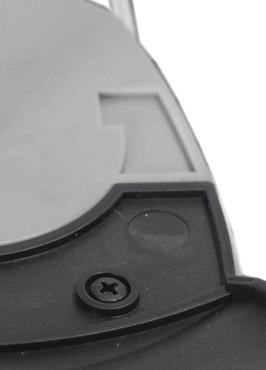


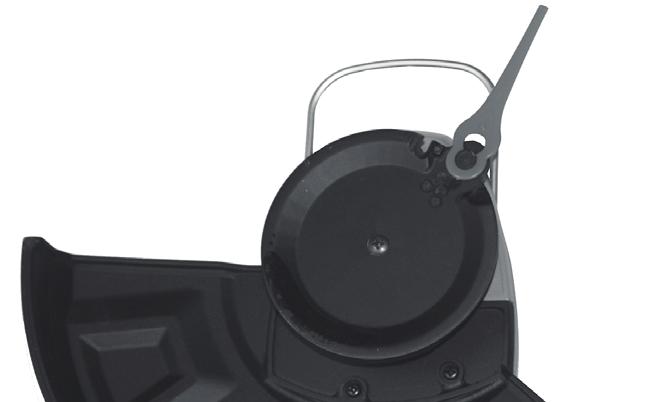
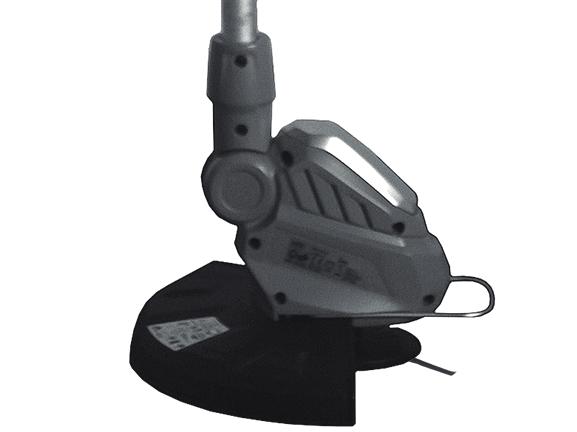


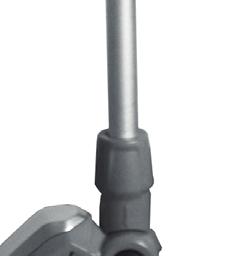
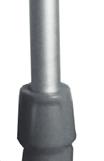
90 10 14a a
IAN Tagliasiepi elettrico FHT 600 D3. Tagliasiepi elettrico Traduzione delle istruzioni d uso originali
 Tagliasiepi elettrico FHT 600 D3 Tagliasiepi elettrico Traduzione delle istruzioni d uso originali Apara-sebes elétrico Tradução do manual de instruções original Electric Hedge Trimmer Translation of the
IAN LEVIGATRICE PHS 160 D4. LEVIGATRICE Traduzione delle istruzioni d uso originali. LIXADORA Tradução do manual de instruções original
 LEVIGATRICE PHS 160 D4 LEVIGATRICE Traduzione delle istruzioni d uso originali LIXADORA Tradução do manual de instruções original DETAIL SANDER Translation of the original instructions HANDSCHLEIFER Originalbetriebsanleitung
IAN SMERIGLIATRICE DOPPIA PDOS 200 B2. SMERIGLIATRICE DOPPIA Traduzione delle istruzioni d uso originali
 SMERIGLIATRICE DOPPIA PDOS 200 B2 SMERIGLIATRICE DOPPIA Traduzione delle istruzioni d uso originali ESMERILADORA Tradução do manual de instruções original DOUBLE BENCH GRINDER Translation of the original
IAN STAZIONE DI AFFILATURA PSS 65 A1. STAZIONE DI AFFILATURA Traduzione delle istruzioni d uso originali
 STAZIONE DI AFFILATURA PSS 65 A1 STAZIONE DI AFFILATURA Traduzione delle istruzioni d uso originali AFIADOR ELÉTRICO Tradução do manual de instruções original SHARPENING STATION Translation of the original
IAN MOLATRICE DA BANCO PNTS 250 A1. MOLATRICE DA BANCO Traduzione delle istruzioni d uso originali
 MOLATRICE DA BANCO PNTS 250 A1 MOLATRICE DA BANCO Traduzione delle istruzioni d uso originali LIXADORA A SECO/MOLHADO Tradução do manual de instruções original WET/DRY GRINDER Translation of the original
IAN PKGA 20-Li A1. APARELHO COMBINADO 4 EM 1 COM BATERIA Tradução do manual de instruções original ATTREZZO MULTIFUNZIONE RICARICABILE 4 IN 1
 ATTREZZO MULTIFUNZIONE RICARICABILE 4 IN 1 PKGA 20-Li A1 ATTREZZO MULTIFUNZIONE RICARICABILE 4 IN 1 Traduzione delle istruzioni d uso originali APARELHO COMBINADO 4 EM 1 COM BATERIA Tradução do manual
IAN Soffiatore, aspiratore, trituratore per foglie FLS 3000 B2
 Soffiatore, aspiratore, trituratore per foglie FLS 3000 B2 Soffiatore, aspiratore, trituratore per foglie Traduzione delle istruzioni d uso originali Aspirador de folhas elétrico Tradução do manual de
IAN ASPIRACENERE PAS 1200 B2. ASPIRACENERE Traduzione delle istruzioni d uso originali
 ASPIRACENERE PAS 1200 B2 ASPIRACENERE Traduzione delle istruzioni d uso originali ASPIRADOR DE CINZAS Tradução do manual de instruções original ASH VACUUM CLEANER Translation of the original instructions
TRAPANO AVVITATORE RICARICABILE PABS
 TRAPANO AVVITATORE RICARICABILE PABS 20-Li A1 TRAPANO AVVITATORE RICARICABILE Indicazioni per l uso e per la sicurezza Traduzione delle istruzioni d uso originali Aparafusadora com acumulador Instruções
ASPIRAPOLVERE-LIQUIDI PNTS 1500 C4
 ASPIRAPOLVERE-LIQUIDI PNTS 1500 C4 ASPIRAPOLVERE-LIQUIDI Traduzione delle istruzioni d uso originali ASPIRADOR DE LÍQUIDOS / PÓ Tradução do manual de instruções original WET AND DRY VACUUM CLEANER Translation
IAN Pompa ad immersione per acque scure FTS 1100 B2. Pompa ad immersione per acque scure Traduzione delle istruzioni d uso originali
 Pompa ad immersione per acque scure FTS 1100 B2 Pompa ad immersione per acque scure Traduzione delle istruzioni d uso originali Bomba para águas residuais Tradução do manual de instruções original Dirty
Codifica dell Informazione
 Francesco Folino CODIFICA DI DATI E ISTRUZIONI Algoritmi Istruzioni che operano su dati Per scrivere un programma è necessario rappresentare dati e istruzioni in un formato tale che l esecutore automatico
TRAPANO AVVITATORE RICARICABILE PABS
 TRAPANO AVVITATORE RICARICABILE PABS 18-Li B4 TRAPANO AVVITATORE RICARICABILE Indicazioni per l uso e per la sicurezza Traduzione delle istruzioni d uso originali APARAFUSADORA COM ACUMULADOR Instruções
IAN ASPIRACENERE PAS 900 A1 ASPIRADOR DE CINZAS ASPIRACENERE ASCHESAUGER ASH VACUUM CLEANER. Tradução do manual de instruções original
 ASPIRACENERE PAS 900 A1 ASPIRACENERE Traduzione delle istruzioni d uso originali ASPIRADOR DE CINZAS Tradução do manual de instruções original ASH VACUUM CLEANER Translation of the original instructions
IAN DECESPUGLIATORE BL FBS 25 A1. DECESPUGLIATORE Traduzione delle istruzioni d uso originali
 DECESPUGLIATORE BL FBS 25 A1 DECESPUGLIATORE Traduzione delle istruzioni d uso originali ROÇADEIRA A GASOLINA Tradução do manual de instruções original PETROL TRIMMER Translation of the original instructions
IAN ASPIRAPOLVERE / LIQUIDI PNTS 1500 B3. ASPIRADOR DE LÍQUIDOS / PÓ Tradução do manual de instruções original
 ASPIRAPOLVERE / LIQUIDI PNTS 1500 B3 ASPIRAPOLVERE / LIQUIDI Traduzione delle istruzioni d uso originali ASPIRADOR DE LÍQUIDOS / PÓ Tradução do manual de instruções original WET AND DRY VACUUM CLEANER
ASPIRAPOLVERE-LIQUIDI PNTS 1400 F2
 ASPIRAPOLVERE-LIQUIDI PNTS 1400 F2 ASPIRAPOLVERE-LIQUIDI Traduzione delle istruzioni d uso originali ASPIRADOR DE LÍQUIDOS / PÓ Tradução do manual de instruções original WET AND DRY VACUUM CLEANER Translation
IXO. Robert Bosch GmbH Power Tools Division Leinfelden-Echterdingen GERMANY A 0P3 (2014.
 WEU WEU Robert Bosch GmbH Power Tools Division 70764 Leinfelden-Echterdingen GERMANY IXO www.bosch-pt.com 1 609 92A 0P3 (2014.08) I / 207 WEU pt it nl da sv Manual original Istruzioni originali Oorspronkelijke
IAN CARICABATTERIE CON FUNZIONE DI AVVIAMENTO ULG 12 A2
 CARICABATTERIE CON FUNZIONE DI AVVIAMENTO ULG 12 A2 CARICABATTERIE CON FUNZIONE DI AVVIAMENTO Indicazioni per l uso e per la sicurezza Traduzione delle istruzioni d uso originali CAR BATTERY CHARGER WITH
IAN AVVITATORE A PERCUSSIONE RICARICABILE PDSSA 20-Li A1 APARAFUSADORA DE IMPACTO GIRATÓRIA COM BATERIA AVVITATORE A PERCUSSIONE RICARICABILE
 AVVITATORE A PERCUSSIONE RICARICABILE AVVITATORE A PERCUSSIONE RICARICABILE Traduzione delle istruzioni d uso originali CORDLESS IMPACT DRIVER Translation of the original instructions APARAFUSADORA DE
heading quick guide 1
 heading quick guide 1 contenuti Grazie per aver acquistato la Drift HD SERVIZIO CLIENTI Controllate il nostro sito ufficiale per aggiornamenti firmware, servizio clienti, novità sui prodotti e video inviati
IAN POTATORE RICARICABILE FAHE 18 B2 POTATORE RICARICABILE SERRA TELESCÓPICA COM ACUMULADOR CORDLESS PRUNER AKKU-HOCHENTASTER
 ATTENZIONE Prima della messa in esercizio leggere il manuale e le istruzioni per l uso. Badare alle avvertenze relative alla sicurezza. POTATORE RICARICABILE POTATORE RICARICABILE Traduzione delle istruzioni
O Gestor de Baterias. O Carregador de Baterias Multifunções
 O Gestor de Baterias O Carregador de Baterias Multifunções Doctor Charge: o gestor de baterias. Doctor Charge é o DISPOSITIVO DE GESTÃO DE BATERIAS com tecnologia Power Stream para manutenção total de
IAN SEGA ELETTRICA FKS 2200 D2 SEGA ELETTRICA MOTOSSERRA ELEKTRO-KETTENSÄGE ELECTRIC CHAINSAW. Traduzione delle istruzioni d uso originali
 SEGA ELETTRICA FKS 2200 D2 SEGA ELETTRICA Traduzione delle istruzioni d uso originali MOTOSSERRA Tradução do manual de instruções original ELECTRIC CHAINSAW Translation of original operation manual ELEKTRO-KETTENSÄGE
Introduzione a Matlab
 Introduzione a Matlab Ana Alonso Dipartimento di Matematica - Università di Trento 19-26 settembre 2013 Matlab Calcolatrice. 3+4 2 (3+1) 9 4 3 1 cos ( π 4 ) e 2 Variabili who, whos a = 3 b = 4 c = a +
QUESTIONARIO DI SODDISFAZIONE DEL FAMILIARE DATI GENERALI. NUCLEO DI APPARTENENZA DEL SUO CONGIUNTO: Dati personali Nome Cognome Residenza
 ALLEGATO 1 Cooperativa Sociale Auxilium Vi.Pa.Vi. rev.0.1 del 07/11/2017 QUESTIONARIO DI SODDISFAZIONE DEL FAMILIARE La preghiamo di rispondere alle seguenti domande per aiutarci a migliorare i nostri
Per loro è Meglio. Para o bebê é melhor. Dormire sulla schiena Non avere troppo caldo Essere allattati al seno Non fumare nel loro ambiente
 Per loro è Meglio Para o bebê é melhor Dormire sulla schiena Non avere troppo caldo Essere allattati al seno Non fumare nel loro ambiente Dormir de costas Não sentir muito calor Ser amamentado ao seio
GRATTUGIA RICARICABILE
 MI001990 Istruzioni per l uso Instruções para o uso GRATTUGIA RICARICABILE GRATTUGIA RICARICABILE RALADOR RECARREGÁVEL pagina 1 Página 8 www. imetec.com Tenacta Group S.p.A. Via Piemonte 5/11 24052 Azzano
LEVIGATRICE A PENNA PFBS 160 A1
 LEVIGATRICE A PENNA PFBS 160 A1 LEVIGATRICE A PENNA Indicazioni per l uso e per la sicurezza Traduzione delle istruzioni d uso originali PERFURADORA-LIXADORA DE PRECISÃO Instruções de utilização e de segurança
SUPERPLATE COMPACT. Istruzioni per l uso Instruções para o uso. IT pagina 1 PT página 8. lucidatrice per pavimenti Enceradora para pavimentos
 MI001720 Istruzioni per l uso Instruções para o uso IT pagina 1 PT página 8 SUPERPLATE COMPACT lucidatrice per pavimenti Enceradora para pavimentos www. imetec.com Tenacta Group S.p.A. Via Piemonte 5/11
GSR 10,8-LI Professional
 Robert Bosch GmbH Power Tools Division 70745 Leinfelden-Echterdingen Germany www.bosch-pt.com GSR 10,8-LI Professional 2 609 140 669 (2011.08) O / 146 UNI pt Manual original it Istruzioni originali nl
IAN LEVIGATRICE A PENNA PFBS 160 A1. LEVIGATRICE A PENNA Indicazioni per l uso e per la sicurezza Traduzione delle istruzioni d uso originali
 LEVIGATRICE A PENNA PFBS 160 A1 LEVIGATRICE A PENNA Indicazioni per l uso e per la sicurezza Traduzione delle istruzioni d uso originali PERFURADORA-LIXADORA DE PRECISÃO Instruções de utilização e de segurança
Carrozzina Polifunzionale Elettronica. Cadeira de rodas Polifuncional Eletrónica
 Carrozzina Polifunzionale Elettronica Cadeira de rodas Polifuncional Eletrónica La carrozzina elettronica con seggiolone polifunzionale che consente la mobilità del paziente sia nell uso domestico che
IAN SIERRA DE CALAR PARA MODELISMO SEGHETTO PER MODELLISMO PMST 100 A1 SERRA DE RECORTES PARA CONS- TRUÇÃO DE MODELOS SEGHETTO PER MODELLISMO
 SIERRA DE CALAR PARA MODELISMO SEGHETTO PER MODELLISMO SEGHETTO PER MODELLISMO Traduzione delle istruzioni d uso originali MODELLING JIGSAW Translation of the original instructions SERRA DE RECORTES PARA
Wireless Stereo Headset
 3-280-325-42 (1) Wireless Stereo Headset Istruzioni per l uso Manual de Instruções IT PT DR-BT21iK 2007 Sony Corporation AVVERTENZA Per ridurre il rischio di incendi o scosse elettriche, non esporre questo
AVVITATORE RICARICABILE PAS 3.6 B1
 AVVITATORE RICARICABILE PAS 3.6 B1 AVVITATORE RICARICABILE Indicazioni per l uso e per la sicurezza Traduzione delle istruzioni d uso originali APARAFUSADORA COM BATERIA Instruções de utilização e de segurança
ASPIRAPOLVERE / LIQUIDI PNTS 1500 B3
 ASPIRAPOLVERE / LIQUIDI PNTS 1500 B3 ASPIRAPOLVERE / LIQUIDI Traduzione delle istruzioni d uso originali WET AND DRY VACUUM CLEANER Translation of the original instructions ASPIRADOR DE LÍQUIDOS / PÓ Tradução
ECO NEXT EVO X SFT SCALDABAGNO A GAS ISTANTANEO CALENTADORES A GAS INSTANTÁNEO INSTANT AQUECEDORES GAS
 ECO NEXT EVO X SFT MANUALE D USO PER L UTENTE ISTRUZIONI TECNICHE PER L INSTALLAZIONE E LA MANUTENZIONE MANUAL DE USUARIO INSTRUCCIONES TÉCNICAS PARA LA INSTALACIÓN Y EL MANTENIMIENTO MANUAL DE UTILIZAÇÃO
Controllo dei componenti
 IT IT ontrollo dei componenti Lock Waterblock PU x Mantenere il dispositivo di blocco della clip LG775 (D)/LG55/LG56/la clip LG66 (F) in posizione di preinstallazione. pplicare uno strato sottile di Grasso
UNIVERSITÀ DI ROMA TOR VERGATA. Analisi Matematica II per Ingegneria Prof. C. Sinestrari
 UNIVERSITÀ DI ROMA TOR VERGATA Analisi Matematica II per Ingegneria Prof. C. Sinestrari Risposte (sintetiche) agli esercizi dell.xii.8. Il tetraedro può essere descritto come insieme normale rispetto all
PP 455 E IT PT NL GR. Istruzioni per l uso. Instruções para o uso. Gebruiksaanwijzing ËÁ Â Ú Ûˆ
 IT PT NL GR Istruzioni per l uso Prima di usare la macchina, leggere per intero le istruzioni per l uso e accertarsi di averne compreso il contenuto. Instruções para o uso Leia as instruções para o uso
IAN SET AEROGRAFO PABK 60 B2. SET AEROGRAFO Indicazioni per l uso e per la sicurezza Traduzione delle istruzioni d uso originali
 SET AEROGRAFO PABK 60 B2 SET AEROGRAFO Indicazioni per l uso e per la sicurezza Traduzione delle istruzioni d uso originali CONJUNTO DE AEROGRAFIA Instruções de utilização e de segurança Tradução do manual
FHA 1100 A1. Estación de bombeo. Sistema automatico per acqua domestica. Automatismo para água doméstica. Domestic Water Pump.
 FHA 1100 A1 Estación de bombeo Traducción del manual de instrucciones original Automatismo para água doméstica Tradução do manual de instruções original Sistema automatico per acqua domestica Traduzione
IAN MULTIATTREZZO 4 IN 1 A MOTORE FBK 4 B2
 MULTIATTREZZO 4 IN 1 A MOTORE MULTIATTREZZO 4 IN 1 A MOTORE Traduzione delle istruzioni d uso originali Leggere attentamente prima di utilizzare la macchina! APARELHO COMBINADO A GASOLINA 4 EM 1 Tradução
IAN CARICABATTERIE PER AUTOVEICOLI CON FUNZIONE DI AVVIAMENTO ULG 12 B3 CARICABATTERIE PER AUTOVEICOLI CON FUNZIONE DI AVVIAMENTO ULG 12 B3
 CARICABATTERIE PER AUTOVEICOLI CON FUNZIONE DI AVVIAMENTO ULG 12 B3 IT CARICABATTERIE PER AUTOVEICOLI CON FUNZIONE DI AVVIAMENTO ULG 12 B3 Indicazioni per l uso e per la sicurea Traduzione delle istruzioni
02/2015. Mod: HL20/A1. Production code: HH200
 02/2015 Mod: HL20/A1 Production code: HH200 A B C D G H2O E F H I L M a b c d N O IIIIIIIIIIIIIIIIIIIIIIIIIIIIIIIIIIIIIIIIIII IIIIIIIIIIIIIII I 1) MOVIMENTAZIONE E TRASPORTO Allo scopo di evitare eventuali
SCROSTATORE AD AGHI AD ARIA COMPRESSA PDNE 4000 A1
 SCROSTATORE AD AGHI AD ARIA COMPRESSA PDNE 4000 A1 SCROSTATORE AD AGHI AD ARIA COMPRESSA Indicazioni per l uso e per la sicurezza Traduzione delle istruzioni d uso originali PISTOLA DE AR COMPRIMIDO DE
IAN ATTREZZO MULTIFUNZIONE A MOTORE 4 IN 1 FBK 4 B2 APARELHO COMBINADO A GASOLINA 4 EM 1 ATTREZZO MULTIFUNZIONE A MOTORE 4 IN 1
 ATTREZZO MULTIFUNZIONE A MOTORE 4 IN 1 ATTREZZO MULTIFUNZIONE A MOTORE 4 IN 1 Traduzione delle istruzioni d uso originali Leggere attentamente prima di utilizzare la macchina! APARELHO COMBINADO A GASOLINA
ELETTROUTENSILE PMFW 280 A2
 ELETTROUTENSILE PMFW 280 A2 ELETTROUTENSILE Indicazioni per l uso e per la sicurezza Traduzione delle istruzioni d uso originali FERRAMENTA MULTIFUNCIONAL Instruções de utilização e de segurança Tradução
IAN SMERIGLIATRICE DOPPIA PER MODELLISMO PMDS 100 B1 SMERIGLIATRICE DOPPIA PER MODELLISMO ESMERILADORA PARA CONSTRUÇÃO DE MODELOS
 SMERIGLIATRICE DOPPIA PER MODELLISMO SMERIGLIATRICE DOPPIA PER MODELLISMO Traduzione delle istruzioni d uso originali ESMERILADORA PARA CONSTRUÇÃO DE MODELOS Tradução do manual de instruções original MINI
DMS 240 IT PT NL GR. Istruzioni per l uso. Instruções para o uso. Gebruiksaanwijzing ËÁ Â Ú Ûˆ
 IT PT NL GR Istruzioni per l uso Prima di usare la macchina, leggere per intero le istruzioni per l uso e accertarsi di averne compreso il contenuto. Instruções para o uso Leia as instruções para o uso
TRONCATRICE CIRCOLARE MITRE-SAW KREISSÄGE SCIE A ONGLET TRONZADORA CIRCULAR SERRA CIRCULAR
 IT EN DE FR ES PT TRONCATRICE CIRCOLARE MITRE-SAW KREISSÄGE SCIE A ONGLET TRONZADORA CIRCULAR SERRA CIRCULAR PT ISTRUZIONI PER L USO E MANUTENZIONE USE AND MAINTENANCE MANUAL GEBRAUCHS- UND WARTUNGSANLEI-
TRONCATRICE INCLINABILE A SPOSTAMENTO RADIALE RADIAL MITRE SAW TRONZADORAS INGLETADORA INCLINABLE CON DESPLAZAMIENTO RADIAL SERROTE DE ESQUADRIA
 TRONCATRICE INCLINABILE A SPOSTAMENTO RADIALE RADIAL MITRE SAW TRONZADORAS INGLETADORA INCLINABLE CON DESPLAZAMIENTO RADIAL SERROTE DE ESQUADRIA D 254 F36-255 MANUALE DI ISTRUZIONI / ASSEMBLY AND OPERATING
consumidor bem informado é capaz de mudar as relações de consumo
 Na sociedade atual, cada vez mais permeada pelo consumo, todos nós, cidadãos, somos consumidores, independente de classe social ou escolaridade. Alguns especialistas ressaltam que consumir tem se consolidado
IAN SEGA AD IMMERSIONE PTS 500 A1 SEGA AD IMMERSIONE REBARBADORA TAUCHSÄGE PLUNGE SAW. Traduzione delle istruzioni d uso originali
 SEGA AD IMMERSIONE PTS 500 A1 SEGA AD IMMERSIONE Traduzione delle istruzioni d uso originali REBARBADORA Tradução do manual de instruções original PLUNGE SAW Translation of the original instructions TAUCHSÄGE
SIMBOLOGIA. Simboli. Utilizzare sempre guanti protettivi omologati. Usare stivali robusti e antisdrucciolo.
 Simboli AVVERTENZA Usati in maniera impropria o negligente lo sfrascatore, il decespugliatore e il bordatore possono essere attrezzi pericolosi, in grado di provocare lesioni gravi o mortali all utilizzatore
MANUALE USO E MANUTENZIONE USE AND MAINTENANCE MANUAL MANUEL D UTILISATIONET DE MAINTENANCE.
 MANUALE USO E MANUTENZIONE USE AND MAINTENANCE MANUAL MANUAL DE USO Y MANTENIMIENTO MANUEL D UTILISATIONET DE MAINTENANCE MANUAL DE UTILIZAÇÃO E MANUTENÇÃO www.pramac.com ITALIANO...1 ENGLISH...57 FRANÇAIS...113
IAN PLASTIFICATORE ULG 300 B1 PLASTIFICATORE MÁQUINA DE PLASTIFICAR LAMINIERGERÄT LAMINATOR. Istruzioni per l'uso. Manual de instruções
 PLASTIFICATORE PLASTIFICATORE Istruzioni per l'uso MÁQUINA DE PLASTIFICAR Manual de instruções LAMINATOR Operating instructions LAMINIERGERÄT Bedienungsanleitung IAN 284912 Prima di leggere aprire la pagina
Videocámara digital HD de bolsillo
 * Videocámara digital HD de bolsillo IT MT Videocamera HD digitale tascabile Istruzioni per l uso e informationi di servizio Camcorder HD Digital de Bolso Manual do Utilizador e Informação Relativa a Assistência
PP 480 HF IT PT NL GR. Istruzioni per l uso. Instruções para o uso. Gebruiksaanwijzing ËÁ Â Ú Ûˆ
 IT PT NL GR Istruzioni per l uso Prima di usare la macchina, leggere per intero le istruzioni per l uso e accertarsi di averne compreso il contenuto. Instruções para o uso Leia as instruções para o uso
FHT 600 A1. Cortasetos eléctrico Traducción del manual de instrucciones original. Tagliasiepi elettrico Traduzione delle istruzioni d uso originali
 FHT 600 A1 Cortasetos eléctrico Traducción del manual de instrucciones original Tagliasiepi elettrico Traduzione delle istruzioni d uso originali Apara-sebes eléctrico Tradução do manual de instruções
MONTASCALA MOBILE T10 MOBILE STAIRLIFT T10
 Istruzioni Originali Original instructions Vimec s.r.l Via Parri, 7-42045 Luzzara - Reggio Emilia- Italy Tel. + 39 0522 970 666 - Fax. + 39 0522 970919 www.vimec.biz MONTASCALA MOBILE T10 MOBILE STAIRLIFT
Analisi continua di gas. SIPROCESS GA700 Apparecchi in versione con protezione antideflagrante. Premessa 1. Avvertenze di sicurezza 2.
 Premessa 1 Avvertenze di sicurezza 2 Analisi continua di gas SIPROCESS GA700 Apparecchi in versione con protezione antideflagrante Istruzioni operative sintetiche Installazione 3 Collegamento 4 Comando
CS 2512 IT PT NL GR. Istruzioni per l uso. Instruções para o uso. Gebruiksaanwijzing ËÁ Â Ú Ûˆ
 IT PT NL GR Istruzioni per l uso Prima di usare la macchina, leggere per intero le istruzioni per l uso e accertarsi di averne compreso il contenuto. Instruções para o uso Leia as instruções para o uso
IAN TRITACARNE SFW 350 C2 TRITACARNE PICADORA DE CARNE FLEISCHWOLF MINCER. Istruzioni per l uso. Manual de instruções. Bedienungsanleitung
 TRITACARNE TRITACARNE Istruzioni per l uso PICADORA DE CARNE Manual de instruções MINCER Operating instructions FLEISCHWOLF Bedienungsanleitung IAN 277055 Prima di leggere aprire la pagina con le immagini
MISCELATORE PER COLORE E MALTA PFMR 1400 C2
 MISCELATORE PER COLORE E MALTA PFMR 1400 C2 MISCELATORE PER COLORE E MALTA Indicazioni per l uso e per la sicurezza Traduzione delle istruzioni d uso originali MISTURADOR DE TINTAS E ARGAMASSA Instruções
IAN SEGA CIRCOLARE PHKS 1350 B2 SERRA CIRCULAR SEGA CIRCOLARE HANDKREISSÄGE CIRCULAR SAW. Tradução do manual de instruções original
 SEGA CIRCOLARE SEGA CIRCOLARE Traduzione delle istruzioni d uso originali CIRCULAR SAW Translation of the original instructions SERRA CIRCULAR Tradução do manual de instruções original HANDKREISSÄGE Originalbetriebsanleitung
Spine RJ e Prese Keystone
 Spine RJ e Prese Keystone RoHS 118 CARATTERISTICHE Le spine e le prese sono progettate secondo le caratteristiche richieste dalle Norme TIA 568A/B e ISO/IEC 11801, EN 50173-2 Sono disponibili i seguenti
VarioStar 1500 VarioStar 2500 VarioStar 3100
 VarioStar 1500 VarioStar 2500 VarioStar 3100 I E P Istruzioni d impiego Lista parti di ricambio Impianto MIG/MAG Instrucciones de uso Lista de repuestos Fuente de corriente MIG/MAG Manual de instruções
Varese, Lunedì 21 Gennaio 2013
 Varese, Lunedì 21 Gennaio 2013 PRINCIPI DI GIOCO SVILUPPI DI GIOCO REGOLE COMUNI CONCETTI DI GIOCO Smarcamento Passaggio Controllo e difesa della palla Finta e/o dribbling Tiro in porta Scaglionamento
IAN PISTOLA A SPRUZZO PER VERNICIARE PFS 100 B2
 PISTOLA A SPRUZZO PER VERNICIARE PFS 100 B2 PISTOLA A SPRUZZO PER VERNICIARE Indicazioni per l uso e per la sicurezza Traduzione delle istruzioni d uso originali PISTOLA DE PINTURA Instruções de utilização
Il funzionamento di un cerniera a molla dipende dal montaggio
 ERNIERE MOLL Il funzionamento di un cerniera a molla dipende dal montaggio 0 Telaio Porta 180 Molla a chiudere ad Molla aprire 90 683 la coppia di chiusura o apertura della molla dipende dalla posizione
SEGATRICE A NASTRO BANDSAW BANDSÄGEMASCHINE SCIE À RUBAN SIERRA DE CINTA SERRA DE FITA
 IT EN DE FR ES PT SEGATRICE A NASTRO BANDSAW BANDSÄGEMASCHINE SCIE À RUBAN SIERRA DE CINTA SERRA DE FITA PT ISTRUZIONI PER L USO E MANUTENZIONE USE AND MAINTENANCE MANUAL GEBRAUCHS- UND WARTUNGSANLEI-
TRONCATRICE CIRCOLARE / MITRE SAW KREISSÄGE / SCIE A ONGLET TRONZADORA / SERRA CIRCULAR
 TRONCATRICE CIRCOLARE / MITRE SAW KREISSÄGE / SCIE A ONGLET TRONZADORA / SERRA CIRCULAR CERTIFICATA CERTIFIED GEPRÜFT CERTIFIE CERTIFICADA CERTIFICADA CONSERVARE PER UTILIZZI FUTURII / PLEASE RETAIN FOR
ASPIRADOR EN HÚMEDO Y SECO / ASPIRAPOLVERE LIQUIDI PNTS 1500 B2
 ASPIRADOR EN HÚMEDO Y SECO / ASPIRAPOLVERE LIQUIDI PNTS 1500 B2 ASPIRADOR EN HÚMEDO Y SECO Traducción del manual de instrucciones original ASPIRADOR DE LÍQUIDOS / PÓ Tradução do manual de instruções original
Nuovi orientamenti. 06 novembre 2017
 EMPRESA INDIVIDUAL DE RESPONSABILIDADE LIMITADA SOCIETA INDIVIDUALE A RESPONSABILITÀ LIMITATA Nuovi orientamenti. 06 novembre 2017 2017, BC Consultoria e Auditoria Ltda. ESTRATTO DEL CODICE CIVILE DELLA
MasterIN System. Relé modular de interface com tecnologia Push-in
 MasterIN System Relé modular de interface com tecnologia Push-in Dal 1954 ci mettiamo passione PRODUZIONE E CONTROLLO QUALITÀ REALIZZAZIONE ATTREZZATURE E AUTOMAZIONI VENDITE, DISTRIBUZIONE E ASSISTENZA
balcony/incasso Istruzioni di installazione e manutenzione GVM 24/28-1/3 H NBI / GVM 24/28-1/3 H NEI Caldaia murale a gas a camera stagna
 balcony/incasso GVM 24/28 -/3 H NBI / GVM 24/28 -/3 H NEI x x x x x x x x x x x x x x x x x x x x x x x x x x x x x x x x x x x x x x x x x x x x x x 6 720 6 347-00.O Istruzioni di installazione e manutenzione
Cargador USB universal SUL 1000 A1 Caricabatterie USB universale
 5 Cargador USB universal SUL 1000 A1 Caricabatterie USB universale Cargador USB universal Instrucciones de uso Caricabatterie USB universale Istruzioni per l uso KOMPERNASS GMBH BURGSTRASSE 21 D-44867
Viaggi Generale. Generale - Essenziale. Generale - Conversazione. Você pode me ajudar, por favor? Chiedere aiuto
 - Essenziale Può aiutarmi? Chiedere aiuto Parla inglese? Chiedere se una persona sa parlare in inglese Parla _[lingua]_? Chiedere se una persona parla una certa lingua Non parlo _[lingua]_. Spiegare che
30344 Black Box. Instruções de montagem e modo de utilização Istruzioni per il montaggio e l uso
 30344 Black Box Instruções de montagem e modo de utilização Istruzioni per il montaggio e l uso 2 Instruções de montagem e modo de utilização Reservados os direitos de alterações técnicas e no design Istruzioni
TKI2 145 D. PT-Manual de Instruções IT-Manuale di istruzioni EL-Εγχειρίδιο οδηγιών PL- AR-
 TKI2 145 D PT-Manual de Instruções IT-Manuale di istruzioni EL-Εγχειρίδιο οδηγιών PL- AR- Por favor, leia cuidadosamente este manual antes de usar! Caro cliente, Queremos que o seu produto, produzido em
*Necessità di collegamento corretto per il funzionamento ottimale della commutazione
 0 7 0 LUNA LUNA 09 09 0 00, 09 0 00 0 0 00, 0 0 00 struzioni per il montaggio e per l uso nterruttore crepuscolare Test 000 LUNA 09 :-5 : 5-00 : 00-000 max V:-5klx V: 5-50klx D GB F E P NL PL 0,5mm -,5mm
PT P.58 NL P.30 IT P.2 SCPH-50004 SS
 Italiano IT P.2 Nederlands NL P.30 Português PT P.58 Manuale di istruzioni Grazie per avere acquistato il sistema digitale di intrattenimento PlayStation 2. Tramite il presente sistema è possibile utilizzare
in primo luogo su... Introdução geral sobre um assunto que é de consenso geral, mas que você gostaria de questionar
 - Nesta redação/ tese/ dissertação será examinado(a)/ investigado(a)/ avaliado(a)... geral para uma redação / tese/ dissertação Para responder esta questão deve-se observar... Introduzindo o assunto sobre
POS 150/180. Printed: Doc-Nr: PUB / / 000 / 02
 POS 150/180 Kurzanleung Quick-start guide Guide de démarrage rapide Guida rapida Guía rápida Manual de instruções Korte handleiding Kort instruktion Pikaopas Краткое руководство de en fr es pt nl sv fi
SEGATRICE A NASTRO BANDSAW BANDSÄGEMASCHINE SCIE À RUBAN SIERRA DE CINTA SERRA DE FITA.
 IT EN DE FR ES PT SEGATRICE A NASTRO BANDSAW BANDSÄGEMASCHINE SCIE À RUBAN SIERRA DE CINTA SERRA DE FITA PT ISTRUZIONI PER L USO E MANUTENZIONE USE AND MAINTENANCE MANUAL GEBRAUCHS- UND WARTUNGSANLEI-
LIMPIADOR DE SUPERFICIES / LAVAPAVIMENTI DA ESTERNI PER IDROPULITRICE PFR 28 A1
 LIMPIADOR DE SUPERFICIES / LAVAPAVIMENTI DA ESTERNI PER IDROPULITRICE PFR 28 A1 LIMPIADOR DE SUPERFICIES Traducción del manual de instrucciones original APARELHO DE LIMPEZA DE SUPERFÍCIES Tradução do manual
Køleskab Jääkaappi Frigorifero Frigorífico FSE 1073 FSE 1073 X FSE 1073 X FSE 1000 FSE 1070 FSE 1072 FSE 1074 FSE 1072 X
 Køleskab Jääkaappi Frigorifero Frigorífico FSE 1073 FSE 1073 X FSE 1073 X FSE 1000 FSE 1070 FSE 1072 FSE 1074 FSE 1072 X Leggere innanzitutto il manuale di istruzioni. Gentile Cliente, ci auguriamo che
DOMIcompact F 24 ISTRUZIONI PER L USO L'INSTALLAZIONE E LA MANUTENZIONE + CERTIFICATO DI GARANZIA
 caldaia murale a gas camera stagna per sanitario e riscaldamento caldera mural de gas con cámara estanca para agua sanitaria y calefacción caldeira mural a gás, câmara estanque, para produção de água quente
GEM GEMJ. Applica qui l adesivo col codice a barre Apply the bar code label here
 GEM Applica qui l adesivo col codice a barre Apply the bar code label here GEMJ it Istruzioni d installazione ed uso 3 Conservate con cura per future consultazioni en Installation and Operating Instructions
WS 462. Gebruiksaanwijzing. Istruzioni per l uso. Instruções para o uso ËÁ Â Ú Ûˆ IT PT NL GR HUSQVARNA CONSTRUCTION PRODUCTS
 IT Istruzioni per l uso Prima di usare la macchina, leggere per intero le istruzioni per l uso e accertarsi di averne compreso il contenuto. Instruções para o uso Leia as instruções para o uso com toda
SIMBOLOGIA. I simboli sulla macchina: Simboli nelle istruzioni per l uso:
 Istruzioni per l uso Manual de instrucciones Instruções para o uso ËÁ Â Ú Ûˆ Manuel d utilisation Gebruiksaanwijzing Bedienungsanweisung Kullaním kílavuzu T435 Prima di usare la macchina, leggere per
ITALIANO 7 ENGLISH 23 FRANÇAIS 39 DEUTSCH 55 ESPAÑOL 71 PORTUGUÊS
 IDROPULITRICI ELETTRICHE ELECTRIC HIGH-PRESSURE WATER CLEANERS NETTOYEURS HAUTE PRESSION ELECTRIQUES ELEKTRISCHE WASSER-HOCHDRUCKREINIGER HIDROLAVADORA ELÉCTRICAS HIDROLIMPADORAS ELÉCTRICAS (I) MANUALE