USER MANUAL
|
|
|
- Emanuel Mendonça Anjos
- 8 Há anos
- Visualizações:
Transcrição
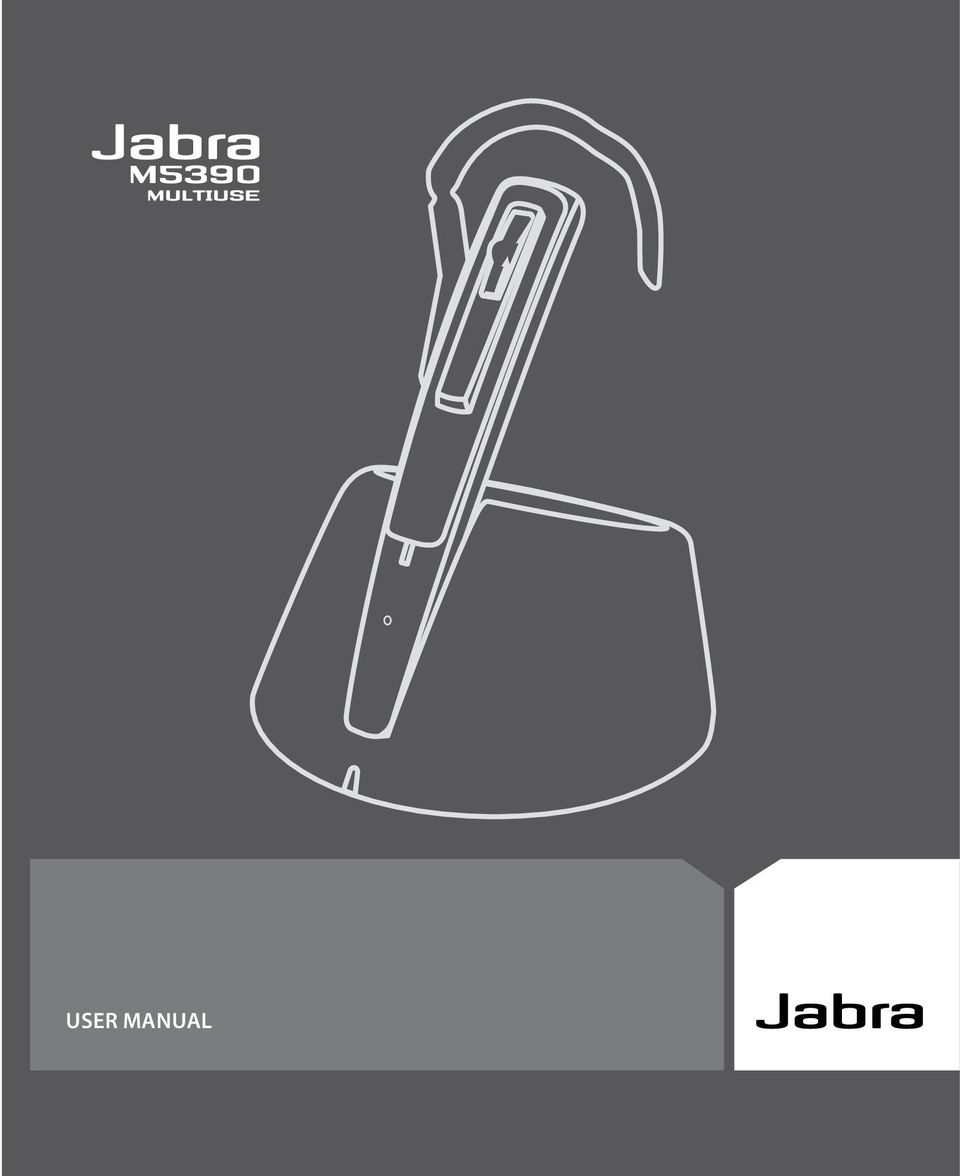
1 M5390 USER MANUAL
2 The Jabra brand is wholly owned by GN Netcom. Customer service is provided by GN Netcom. Please see details below. Australia Austria Canada Denmark France Germany Hong Kong Italy Japan P. R. China Singapore Spain Sweden United Kingdom USA

3 User manual ENG 1 Guide d utilisation FR 20 Manual del usuario ES 39 Manual do Utilizador P 58 Jabra M5390 Multiuse UM NA: RevB

4 Thank you Thank you for purchasing the Jabra M5390 Multiuse headset. The Jabra M5390 Multiuse Headset is supplied together with the Jabra A335w Dongle and the Jabra M5390 Multiuse Base. This unique combination allows you to use one single headset for all your communication needs. The Jabra M5390 Multiuse headset connects simultaneously to mobile phones and desk phones - or to mobile phones and PC softphones. The headset base and the headset are used together with your desk phone. The dongle allows the headset to communicate with a softphone such as Microsoft Office Communicator, Skype or Cisco IP Communicator, etc. through your PC or laptop.the headset can also be connected directly to your Bluetooth -enabled cell phone. Furthermore, the headset and dongle have been optimized for the new wideband technology and are compliant to the TIA-920 specifications that ensure clear and crisp voice reception and transmission (wideband is only supported between the dongle and the headset). English Contents 1. Overview Fitting the headset Setting up your desk phone Setting up your cell phone Making a call from your desk phone Answering a call from your desk phone Making and answering a call from your cell phone Features Reset/Pairing Using the Jabra M5390 Multiuse Headset with multiple Bluetooth -enabled devices Operating devices in multiuse scenarios Switching between Base and Jabra A335w Dongle in a multiuse scenario Troubleshooting & FAQ Maintenance, safety and disposal Appendix GN 1000 Remote Handset Lifter (RHL) (optional accessory)

5 1. Overview English Headset [1] Visual indicator [2] Answer/End button [3] Volume up/down [4] Ear hook [5] Mute button [6] Microphone [7] Reset button [8] Snap-on cover (replaceable) Base unit [9] Charge cradle [10] Visual indicator [11] Clear dial tone switch [12] AUX port [13] Telephone port [14] Handset port [15] AC power adapter port [16] Transmit volume [17] Reset button [18] Headset switch Cords & adapters [19] Connection cord [20] AC power adapter [21] Dongle [22] Travel charger [23] USB cable for travel charger! Definition of Tap, double tap and press : Tap = Press the button for up to 0.8 sec. Press = Press a button for longer than 0.8 sec, and release before 1.5 sec. Listen for a tone. Double tap = Two taps made within 0.5 sec. 2
![port [16] Transmit volume [17] Reset button [18] Headset switch Cords & adapters [19] Connection cord [20] AC power adapter [21] Dongle [22] Travel charger [23] USB cable for travel charger!](/docs-images/46/3218299/images/page_5.jpg "Definition of Tap, double tap and press : Tap = Press the button for up to 0.8 sec. Press = Press a button for longer than 0.8 sec, and release before 1.5 sec. Listen for a tone.")
6 2. Fitting the headset Fitting to the headset to your ear 2.1 Open the hinged ear hook as wide as possible. 1) 2.2 Hold the headset to your ear so that the speaker fits comfortably and the microphone points towards your mouth. English Close the hinged ear hook around your ear. 2.4 Adjust the ear hook for a comfortable fit. 2.5 Fitting the headset to your left ear 2.5 Pull the ear hook hinge from the slot and insert it on the opposite side of the headset into the slot marked with L. Perform steps above. 1) Note: The headset is configured by default for use with the right ear. 3

7 3. Setting up your desk phone English 3.1 If your telephone has a headset port, go directly to 3.2b. 3.1 Unplug the handset cord from your telephone and connect it to the port on the base unit marked with a Connect the enclosed telephone cord to the now empty handset port on the telephone, and to the port on the base unit marked with. 3.2b (Only for use on phones with a headset port) Connect the enclosed telephone cord to the headset port on telephone, and to the port on base unit marked with. 3.3 Connect the AC power adapter to the port on the bottom of base unit, then plug the adapter into the AC power outlet. If the headset power supply is disconnected, the indicator on the base will flash green. Note: The AUX port is used for Remote Handset Lifter (RHL). Please refer to the Appendix. 4
. Please refer to the Appendix. 4")
8 Place the headset in the charge cradle and charge for a minimum of 30 min. before use. A full charge takes about 2 hours. The visual indicator on the headset will flash green while headset is charging, and the light will remain steady green when fully charged. The same procedure is to be followed when using the travel charger. English sec 3.5 Turn the headset on by pressing the Answer/End button for 1 sec. (the visual indicator will flash blue four times and headset will beep three times), or by placing headset in charge cradle. Turn the headset off by pressing the Answer/End button for 2 sec. (visual indicator will flash blue four times and headset will beep three times) Clear dial tone 3.6 Take the headset out of charge cradle and put it on. 3.7 Pick up the telephone handset and listen for a dial tone through the headset If dial tone is missing or unclear, slowly slide the clear dial tone switch on bottom of base unit through the 3 settings. 3.9 Set the switch to the position that gives the clearest dial tone. 5
, or by placing headset in charge cradle. Turn the headset off by pressing the Answer/End button for 2 sec.")
9 English 3.10 Setting the outgoing volume 3.10 Make a call (see section 4) to someone who can act as a test person Adjust the outgoing volume using the transmit volume control on the base unit. Move the switch through the 3 settings until test person confirms the appropriate volume. 1) Setting the incoming volume 3.12 During a call, adjust incoming volume by pressing the Volume button on the headset A tone will be heard to indicate when min./max. volume is reached. 6 1) Note: If you can hear your own voice, the outgoing volume is probably too high. Reduce the volume setting on your desk phone (if the feature is available) and compensate by increasing the volume on your headset.
 Note: If you can hear your own voice, the outgoing volume is probably too high.")
10 4. Setting up your cell phone Setup Pairing your headset with your cell phone NOTE: Before use, please charge your headset (see 3.4). Before using your Jabra M5390 Multiuse headset with a cell phone, you need to pair it with your cell phone. Make sure the headset is off. During start-up keep pressing the Answer/End button for three seconds. Alternatively remove the snap-on cover and press the reset button on the headset for three seconds. The visual indicator on the headset will turn to steady blue. (see 9.1) Instruct your phone's Bluetooth to discover the Jabra M5390 Multiuse headset: o Follow the instructions in your phone s User Manual. This usually involves going to a setup, connect or Bluetooth menu on your phone and selecting the option to discover or add a Bluetooth device. o Your phone will find the Jabra M5390 Multiuse headset and ask if you want to pair with it. English Accept pairing by pressing Yes/OK (or similar) on the phone and confirm with the passkey or PIN 0000 (4 zeros). Your phone will confirm when pairing is complete. If pairing is unsuccessful, repeat the steps above. Some cell phones require a manual connection to be established after pairing. Note that on some cell phones, the headset has to be set as Trusted device. NOTE: If you accidentally put the headset into pairing mode, tap the Answer/End button to exit pairing mode. IMPORTANT: The same headset can be paired with multiple cell phones. However, if you have multiple cell phones paired, switched on and within range of the headset, the headset will not be able to connect to the base. It is only possible to be connected to one cell phone and the headset base at a time. To be able to connect to the headset base, only have one paired cell phone may be turned on and within range of the headset. 7

11 5. Making a call from your desk phone Put on headset. 1) English 5.2 Lift the handset from cradle, or press the telephone s line button if the base is connected directly to the telephone's headset port. Then tap the Answer/End button to transfer the call to the headset Wait for a dial tone, then the dial number. 5.4 To end the call, tap the Answer/ End button on the headset and replace the handset in the cradle, or press the telephone s end call button if the base is connected directly to the telephone s headset port Making a call with your handset 5.5 Place the headset in charge cradle. 5.6 Use the handset as usual. 1) Note: When making a call using the telephone handset, make sure the headset is placed in charge cradle. Otherwise, the call will be routed through to the headset. 8

12 6. Answering a call from your desk phone Put on headset. 1) 6.2 Lift the handset from cradle, or press the telephone s line button if the base is connected directly to the telephone's headset port. Then tap the Answer/End button to transfer the call to the headset. English To end the call, tap the Answer/ End button on the headset and replace the handset in the cradle, or press the telephone s end call button if the base is connected directly to the telephone s headset port. 6.4 Switching from your phone's handset to the headset 6.4 During a call using the telephone handset, take the headset from the charge cradle. Tap the Answer/End button and the call will automatically be routed to the headset. 1) 9

13 English 6.5 Switching from the headset to the telephone's handset 6.5 During a call using the headset, pick up the telephone handset and replace the headset in charge cradle. The call will not be routed through to the telephone handset until after the headset is in the charge cradle. 1) Important: Do not hang up the handset as this will disconnect the call. 7. Making and answering a call from your cell phone Making and ending a cell phone call When you make a call from your cell phone, the call will transfer to your headset automatically (this is subject to your phone's settings, see your cell phone s User Manual to find out how to activate this feature). If your phone does not allow this feature, see your cell phone s User Manual for details on how to answer a call with a headset. To end a call, tap the headset Answer/End button, OR press End/Off (or similar) on your cell phone. Answering and ending an incoming cell phone call To answer, tap the headset Answer/End button on your headset after the first ring OR, if the headset is placed in the base, simply remove it from the base. To end a call, tap the headset Answer/End button, OR press End/Off (or similar) on your cell phone, or place the headset in the base. IMPORTANT: If you answer a call on your cell phone handset, some cell phone models will not automatically transfer the call to your headset. 10
.")
14 Switching from the headset to your cell phone You can switch from your headset to your cell phone during an active call. You might want to do this if, for example, your headset battery is running low. Use the menu on your cell phone to switch from the headset to your cell phone during an active call (see your cell phone s User Manual). Switching from your cell phone to the headset You can switch from your cell phone to your headset during an active call. Use the menu on your cell phone to switch from your cell phone to the headset during an active call (see your cell phone s User Manual). English Rejecting an incoming call Press the headset Answer/End button when the phone rings to reject an incoming call. Depending on your phone settings, the person who called will either be forwarded to your voice mail or hear a busy signal. Making a call with Voice Dial Tap the headset Answer/End button to enter Voice Dial mode. (Consult your cell phone s User Manual for more information about how to use this feature.) For best results, record the voice dialing tag through your headset. Redialing the last number dialed Double tap the headset Answer/End button. Handling multiple calls When one call is active on the headset Double tap the Answer/End to place the active call on hold and call the last number dialed. When one call is active and you receive a second incoming call Tap the Answer/End button to end the active call and answer the incoming call. Double tap the Answer/End button to reject the incoming call. Press Answer/End button for app. 1.5 sec to put the active call on hold and answer the incoming call. When one call is active and a second call is on hold Tap the Answer/End button to end the active call and retrieve call waiting on hold. Press Answer/End button for app. 1.5 sec. to switch between the two calls. Please note that this behaviour may change depending on type of phone connected to the headset. 11
.")
15 English Staying within range The sound quality through your headset will deteriorate if you move outside of range. 1) Move back into range to restore sound quality. If you move too far from your cell phone, the call might end or be re-routed to your cell phone from the headset, depending on the cell phone model you are using. Please see your cell phone s User Manual for more information on this function. Remember! For optimal performance, wear the Jabra M5390 Multiuse headset and your cell phone on the same side of your body or within a line of sight of one another. In general, you will get better performance when there are no obstructions between your headset and your cell phone. 8. Features Muting & unmuting 8.1 Press the Mute button on headset. A dual tone will be heard in the headset. 8.2 To unmute, press Mute button again. A dual tone will be heard in the headset. 1) Note: If answering a call with telephone handset, make sure the headset is placed in charge cradle. Otherwise, the call will be routed through the headset. 12

16 min Low battery 8.3 App. 10 minutes before the headset runs out of battery, the visual indicator on headset will start to flash with a red light and a series of tones will be heard. If the battery runs out of power, the visual indicator on headset will switch off automatically. Replace the headset in the charge cradle and continue the call using telephone handset. The headset contains a battery level indicator. Tap the Vol. up/down button and the visual indicator will flash quickly twice - green, yellow or red depending on the battery level. English m/230 feet Out of range 8.4 If you go out of range (app. 230 feet/70m), all buttons except the Answer/End button will stop working until back in range again. 2) Please note that the majority of cell phones only support 33 feet/10m. If the headset is muted when going out of range, it will also be muted when returning within range again. 2) Important: If the headset is out of range for more than 1 min., the connection between base and headset will be terminated. 13
, all buttons except the Answer/End button will stop working until back in range again.")
17 English 8.5 Headset switch 8.5 If the headset is absent, the headset switch must be activated in order to use the handset or, if the headset is in use with another Bluetooth device, the headset switch must be activated in order to use the handset. Features: Range 230 feet/70m headset/base - headset/dongle 33 feet/10 m for most cell phones Talk time/ standby time Transmission protocol Frequency band Up to 5 hours/up to 60 hours Bluetooth 2.4 GHz 14

18 9. Reset/Pairing 9.1 ~ 3 sec. 9.1 At start-up, press the Answer/ End button down for three seconds. Alternatively, remove the snap-on cover and press the reset button on the headset for three seconds. The visual indicator on the headset will turn to steady blue. 1) English 9.2 ~ 3 sec. 9.2 Then press the reset button on the base unit for 3 seconds. The visual indicator on the base unit will turn steady to blue Make sure headset and the base are within 3 feet/1m of eachother. When pairing is successful,both visual indicators will flashblue 5 times, and the visual indicator on the base unit will turn to steady green. 3 feet/1m In order to clear the pairing list in the base, press and hold the reset button underneath the base for 5 seconds. In order to clear the pairing list in the headset, press and hold the reset button on the headset for 5 seconds. Note that after resetting, a new pairing sequence has to be set up. 1) Note: The headset is already paired with the base unit from the factory. Pairing should only be necessary if a new headset is required to work with an existing base unit (or vice versa). 15

19 English 10. Using the Jabra M5390 Multiuse headset with multiple Bluetooth -enabled devices Your Jabra M5390 Multiuse headset can be paired with up to 8 devices. However, only two can be connected (paired with the headset, turned on and in range) with the headset at one time. This could be any two Bluetooth devices (for example, a cell phone and the Jabra M5390 Multiuse base, or the Jabra A335w Dongle and a cell phone, or two cell phones). Therefore, if the headset is in range of the Jabra M5390 Multiuse base or Jabra A335w Dongle, only one additional Bluetooth device can be connected to the headset (paired with the headset, turned on and in range). The headset is by default paired with the base and the dongle. This means that the headset will automatically connect to these two devices from the factory if in range and turned on. Therefore, if a cell phone needs to be connected to the headset, either the dongle or base has to be turned off or placed out of range. It is also possible to have two Bluetooth -enabled cell phones connected to the Jabra M5390 Multiuse headset simultaneously. In this case, both the base and the dongle should be disconnected from the headset. 11. Operating devices in multiuse scenarios 16 Using the button interface of the headset, it is possible to operate both connected devices in a multiuse scenario (the two devices connected to the headset). Operations can be divided into receiving incoming and placing outgoing calls. If receiving an incoming call from either of the connected devices, this device will automatically be the device in use and a tap of the button will answer the call. Press the buttone to cancel the call. If you would like to place an outgoing call activated from the headset, you must manually place one of the devices in use. When a device is placed in use, everytime a button is pressed on the headset, the instruction is sent to the selected device. For example, if you wish to make a call using Voice Dial on the second connected device, you must first make sure that the second device is in use. After confirming the device is in use, simply tap the button to activate Voice Dial. In order to switch between the two connected devices, press the Answer/End button for app. 1.5 seconds. After swaping the in use status of two devices, different indicators will be used to indicate which device is now in use ; When activating the Jabra A335w dongle as in use, the LED of the dongle will give 5 quick light-blue flashes. Also the speaker of the headset will say Dongle in focus. When activating the Jabra M5390 base as in use, the LED on the base will give 5 quick light-blue flashes. Also the speaker of the headset will say Base in focus. When activating a cell phone as in use the speaker of the headset will say Mobile in focus. Please note that this only applies to multiuse scenarios. If the headset is only connected to one device, then this device will automatically be in focus. Also note that the Last Number Redial command does not use the in focus concept. Upon double tapping the Answer/End button, the Last Number Redial command will automatically be sent to the connected device with the most recent incoming call (which was received while connected to the headset).

20 NOTE: When multiple Bluetooth-enabled devices are paired with the headset, the Voice Dial* function will work with the last device that was paired. 12. Switching between the base and the Jabra A335w Dongle in a multiuse scenario A typical multiuse scenario is to have the headset connected to one cell phone and either the base or the dongle. If you wish to switch the between base and dongle, while maintaining the cell phone connection, just press and hold the Volume up/down button for 4 seconds. English 13. Troubleshooting & FAQ Q: Nothing happens when I try to adjust the clear dial tone. A: Make sure the base is tunning at full power (the visual indicator on the base unit is a steady green). Then establish a voice link between base and headset (visual indicators on base unit and headset will be flashing green). Also ensure that the telephone is activated (the handset is off the hook or the line button is pressed). Q: I hear myself when I talk. A: Your transmit volume level (please refer to section 3.10) is probably too high. Turn down the transmit volume level (3->2, 2->1). Q: The sound through the headset is of poor quality or the person at the other end cannot hear me. A: Make sure that you have positioned the clear dial tone switch correctly. To do this, call someone as a test case, and adjust the clear dial tone switch. Q: When I press the Answer/End button, the GN 1000 RHL lifts, but the call is not connected. A: Make sure that you are using the telephone s handset port and not the headset port (if your telephone has one), when using a GN 1000 RHL for remote answering. Q: I have moved desks at work. Is it possible to put my headset on another base? A: Yes, this is possible. The headset only needs to be paired to the new base. Just follow the procedure as described in section 9 of this guide. Q: I cannot hear anything in my headset when using my cell phone. A: - Increase the volume on the headset (or phone). - As the volume level needed might vary between your desk phone and cell phone, it might be best to adjust the level on the phones. - Then use the headset volume level adjustments for general adjustments (but ensure that the headset is paired with the cell phone). - Make sure that the phone is connected to the headset - if it does not connect either from the phone s Bluetooth menu or by tapping the Answer/End button, follow the pairing procedure (see section 4 Pairing your headset with your cell phone in this guide). *If the cell phone supports this feature. 17
.")
21 Q: Can I use wideband with a cell phone or a desk phone? A: No, the headset only supports wideband with the Jabra A335w Dongle. Please see the Jabra A335w Dongle manual for wideband settings. English Note: If your desk phone has a volume button, it might help to adjust it to optimize the sound quality in your headset. 14. Maintenance, safety and disposal Maintenance The ear hook can be wiped with a dry or slightly damp cloth. The cords and base unit can be dry-dusted as required. Avoid getting moisture or liquids into any button sockets, receptors or other openings. Avoid exposing the product to rain. Children and product packaging The packaging, including plastic bags and wrapping parts, are not toys for children. The bags themselves or the small parts they contain may cause choking if ingested. Batteries and product disposal Do not expose the headset batteries to heat. Dispose of the product and/or batteries according to local standards and regulations. Need more help? For your country s support details, see the European and Australasia Safety & Declaration or NorthAmerican Declaration & Warranty that came with your Jabra M5390 Multiuse. Charger Warning: Do not attempt to charge your Jabra headset with anything other than the AC adapter provided. The use of any other AC adapter may damage or destroy the headset and may invalidate any approval or warranty, and may be dangerous. For the availability of approved accessories, please check with your dealer. When you disconnect the power cord of any accessory, grasp and pull the plug, not the cord. Never use a charger that is damaged. Important: The colored indicator light will be on while charging and will turn off when charging is complete. The Jabra headset cannot be used while charging. Battery information Your device is powered by a rechargeable battery. The full performance of a new battery is achieved only after two or three complete charge and discharge cycles. The battery can be charged and discharged hundreds of times, but will eventually wear out. Recharge your battery only with the provided approved chargers designated for this device. Unplug the charger from the electrical plug and the device when not in use. Do not leave a fully charged battery connected to a charger, since overcharging may shorten its lifetime. If left unused, a fully charged battery will lose its charge over time. Leaving the device in hot or cold places, such as in a closed car in the summer or in winter conditions, will reduce the capacity and lifetime of the battery. Always try to keep the battery between 15 C and 25 C (59 F and 77 F). A device with a hot or cold battery may not work temporarily, even when the battery is fully charged. Battery performance is particularly limited in temperatures well below freezing. Do not dispose of batteries in a fire as they may explode. Batteries may also explode if damaged. Dispose of batteries according to local regulations. Please recycle when possible. Do not dispose as household waste. 18
22 15. Appendix GN 1000 Remote Handset Lifter (RHL) (optional accessory) The GN 1000 Remote Handset Lifter (RHL) is an optional accessory that automatically lifts and lowers your telephone s handset when making, answering or ending a call. English 15.1 Setting it up 15.1 Attach the RHL to the telephone handset cradle. Connect the RHL cord to AUX port on the bottom of the base unit Making/answering a call 15.2 Put on the headset, or press the Answer/End button if you are alreadywearing headset. The RHL will automatically lift the telephone handset Ending a call 15.3 Press the Answer/End button, or place the headset in the charge cradle.the RHL will automatically replacethe telephone handset, and the callwill be terminated. Note: Out of range. If headset is out of range for more than 1 min., any on-going call will be terminated. 19
23 Merci Nous vous remercions d avoir acheté l'oreillette multi-usages Jabra M5390. L'oreillette multi-usages Jabra M5390 est livrée avec la dongle Jabra A335w et la base multi-usages Jabra M5390. Cette combinaison unique vous permet d'utiliser une seule oreillette pour tous vos besoins de communication. L'oreillette multi-usages Jabra M5390 se connecte simultanément aux téléphones portables et aux téléphones fixes - ou aux téléphones portables et aux softphones sur PC. La base de l'oreillette et l'oreillette sont utilisées conjointement avec votre téléphone fixe. La dongle permet à l'oreillette de communiquer avec un softphone tel que Microsoft Office Communicator, Skype ou Cisco IP Communicator, etc. par le biais de votre ordinateur de bureau ou ordinateur portable. L'oreillette peut aussi être reliée directement à votre téléphone portable Bluetooth. En outre, l'oreillette et la dongle ont été optimisées pour la nouvelle technologie large bande et sont conformes aux spécifications TIA-920 qui garantissent une réception et une transmission de la voix claire et distincte (la large bande est possible uniquement entre la dongle et l'oreillette). Français Sommaire 1. Vue d'ensemble Positionnement de l'oreillette Configuration de votre téléphone fixe Configuration de votre téléphone portable Effectuer un appel depuis le téléphone fixe Répondre à un appel depuis le téléphone fixe Effectuer et répondre à un appel depuis le téléphone fixe Fonctions Réinitialisation/Appairage Utilisation de l'oreillette multi-usages Jabra M5390 avec plusieurs périphériques Bluetooth Fonctionnement des périphériques dans des scénarios multi-usages Basculer entre la base et la dongle Jabra A335w dans un scénario multi-usage Diagnostic des pannes et questions fréquentes Maintenance, sécurité et élimination Appendix GN 1000 Remote Handset Lifter (RHL) (optional accessory)
24 1. Vue d'ensemble Français Oreillette [1] Indicator visuel [2] Touche Réponse/Fin [3] Volume sonore haut et bas [4] Crochet [5] Touche Secret [6] Microphone [7] Touche Réinitialisation [8] Couvercle encliquetable (remplaçable) Unité de base [9] Support de chargement [10] Indicator visuel [11] Commutateur de tonalité claire [12] Port AUX [13] Port téléphonique [14] Port de l'oreillette [15] Adaptateur d'alimentation CA [16] Volume d'émission [17] Touche Réinitialisation [18]Commutateur oreillette Cordons et adaptateurs [19] Cordon de connexion [20] Adaptateur d'alimentation CA [21] Dongle [22] Chargeur de voyage [23] Câble USB pour chargeur de voyage!définition de «Taper, taper deux fois et appuyer» : Taper = Appuyer sur la touche pendant 0,8 sec. max. Appuyer = Appuyer sur la touche pendant plus de 0,8 sec et relâcher avant 1,5 sec. Une indication de tonalité se fait entendre. Taper deux fois = Taper deux fois en moins de 0,5 sec. 21
25 2. Positionnement de l'oreillette Positionnement sur l'oreille 2.1 Ouvrez le crochet articulé aussi grand que possible. 1) 2.2 Positionnez l'oreillette de façon à ce que le haut-parleur soit ajusté confortablement et que le microphone soit dirigé vers la bouche. Français Refermez le crochet articulé sur l'oreille. 2.4 Ajustez le crochet pour un port confortable. 2.5 Positionnement sur l'oreille gauche 2.5 Retirez l'articulation du crochet de la fente et insérez-la sur le côté opposé de l'oreillette indiqué par un L. Exécutez les étapes ci-dessus. 1) Remarque : L'oreillette est prête à être portée sur l'oreille droite. 22
26 3. Configuration de votre téléphone fixe Français 3.1 si votre téléphone est muni d'un port oreillette, allez directement à la section 3.2b. 3.1 Débranchez le cordon du combiné de votre téléphone et reliez-le au port sur l'unité de base marqué a Connectez le cordon de téléphone fourni au port de combiné à présent vide sur le téléphone et au port de l'unité de base marqué. 3.2b (Utilisation du port casque uniquement) Connectez le cordon de téléphone fourni au port casque sur le téléphone et au port de l'unité de base marqué Connectez l'adaptateur de secteur au port en bas de l'unité de base puis branchez-le à la prise de courant. Si l'oreillette est déconnectée, l'indicateur sur la base clignotera en vert. Remarque : Le port AUX est utilisé pour le décrocheur de combiné à distance (RHL). Veuillez consulter l'annexe. 23
27 sec 3.4 Placez l'oreillette sur le support de chargement et chargez-la pendant au moins 30 min. avant utilisation. Une charge complète prend environ 2 heures. Un indicateur visuel sur l'oreillette clignotera en vert pendant la charge de celle-ci et émettra une lumière verte en continu pour indiquer que la charge est terminée. Suivre la même procédure lors de l'utilisation du chargeur de voyage. 3.5 Allumez l'oreillette en appuyant sur la touche Réponse/Fin pendant 1 sec. (l'indicateur visuel clignotera quatre fois en bleu et l'oreillette émettra trois bips) ou en plaçant l'oreillette sur le support de chargement. Eteignez l'oreillette en appuyant sur la touche Réponse/Fin pendant 2 sec. (l'indicateur visuel clignotera quatre fois en bleu et l'oreillette émettra trois bips). Français Tonalité claire 3.6 Enlevez l'oreillette du support de chargement et essayez-la. 3.7 Soulevez le combiné du téléphone et attendez la tonalité dans votre oreillette Si celle-ci n est pas claire, voire absente, déplacez lentement le commutateur de tonalité claire au bas de l'unité de base via les 3 réglages. 3.9 Réglez le commutateur sur la position qui procure la tonalité la plus claire. 24
28 Français 3.10 Réglage du volume d'émission 3.10 Effectuez un appel (voir section 4) vers quelqu'un qui peut servir de personne test Réglez le volume sortant avec le contrôle du volume d'émission sur l'unité de base. Basculez entre les 3 réglages jusqu'à ce que la personne test confirme le volume approprié. 1) Réglage du volume entrant 3.12 Pendant un appel, réglez le volume entrant à l'aide du bouton de réglage sur l'oreillette Une tonalité dans l'oreillette indique quand le volume min./max. est atteint. 25 1) Remarque : Si vous pouvez entendre votre propre voix, le volume d'émission est probablement trop élevé. Réduisez le réglage du volume sur votre téléphone fixe (si cette fonction est disponible) et compensez en augmentant le volume sur l'oreillette.
29 4. Configuration de votre téléphone portable Configuration Appairer l'oreillette avec votre téléphone portable N.B. : Avant la première utilisation, veuillez charger votre oreillette (voir page 3.4). Avant d'utiliser l'oreillette multi-usages Jabra M5390 avec un téléphone portable, vous devez l appairer avec votre téléphone portable. Français Assurez-vous que l'oreillette est éteinte. Pendant le démarrage, appuyez sur la touche Réponse/Fin pendant trois secondes. Ou bien retirez le couvercle encliquetable et appuyez sur la touche de réinitialisation de l'oreillette pendant trois secondes. L'indicateur visuel de l'oreillette s'allumera en bleu fixe. (voir 9.1) Réglez votre téléphone Bluetooth pour qu il détecte l'oreillette multi-usages Jabra M5390 : o Suivez le manuel de l'utilisateur de votre téléphone. Généralement, les étapes sont les suivantes : «réglages», «connexion» ou bien le menu Bluetooth de votre téléphone, puis l'option «détection» ou «ajout» d un périphérique Bluetooth. o Votre téléphone détecte l'oreillette multi-usages Jabra M5390 puis vous demande si vous voulez appairer les deux. Acceptez en appuyant sur «Oui» ou «OK» (ou l équivalent) sur le téléphone et saisissez le mot de passe ou code PIN = 0000 (4 zéros). Votre téléphone confirme que l'appairage est terminé. En cas d échec, répétez les étapes précédentes. Certains téléphones portables requièrent une connexion manuelle après l'appairage. Notez que sur certains téléphones portables, l'oreillette doit être configurée comme «périphérique de confiance». N.B. : si, accidentellement, vous mettez l'oreillette en mode d appairage, tapez sur la touche Réponse/Fin pour quitter ce mode.. IMPORTANT : la même oreillette peut être appairée avec plusieurs téléphones portables. Or, si plusieurs téléphones portables appairés se trouvent allumés dans la portée de l'oreillette, celle-ci ne pourra pas se connecter à la base. Il n est pas possible d être connecté à plus d un seul téléphone portable et à la base de l'oreillette à la fois. Pour être en mesure de vous connecter à la base de l'oreillette, veillez donc à n avoir qu un seul téléphone portable appairé allumé et dans la portée de l'oreillette. 26
30 5. Effectuer un appel depuis le téléphone fixe Français Positionnez l'oreillette. 1) 5.2 Soulevez le combiné du téléphone ou appuyez sur le bouton de la ligne du téléphone s'il est connecté au port casque. Ensuite, tapez sur le bouton Réponse/Fin pour transférer l'appel à l'oreillette Attendez la tonalité puis composez le numéro. 5.4 Pour couper la communication, tapez sur le bouton Réponse/Fin sur l'oreillette et raccrochez le combiné, ou appuyez sur le bouton de fin d appel du téléphone si la base est raccordée directement au port casque du téléphone Effectuer un appel avec le combiné 5.5 Placez l'oreillette dans le support de chargement. 5.6 Utilisez le combiné comme d'habitude. 1) Remarque : Lorsque vous effectuez un appel avec le combiné du téléphone, vérifiez que l'oreillette est placée dans le support de chargement. Autrement, l'appel sera dirigé vers l'oreillette. 27
31 6. Répondre à un appel depuis le téléphone fixe ,1 Positionnez l'oreillette. 1) 6,2 Soulevez le combiné du téléphone ou appuyez sur le bouton de la ligne du téléphone s'il est connecté au port casque. Ensuite, tapez sur le bouton Réponse/Fin pour transférer l'appel à l'oreillette. Français 6.3 6,3 Pour couper la communication, tapez sur le bouton Réponse/Fin sur l'oreillette et raccrochez le combiné, ou appuyez sur le bouton de fin d appel du téléphone si la base est raccordée directement au port «casque» du téléphone. 6.4 Passer du combiné à l'oreillette 6.4 Lorsque vous effectuez un appel avec le combiné du téléphone, retirez l'oreillette du support de chargement. Tappez sur la touche Réponse/Fin et l'appel sera automatiquement dirigé vers l'oreillette. 1) 28
32 Français 6.5 Passer de l'oreillette au combiné 6.5 Pendant un appel utilisant l'oreillette, décrochez le combiné du téléphone et replacez l'oreillette sur le support de chargement. L'appel ne sera pas dirigé vers le combiné du téléphone tant que l'oreillette est dans le support de chargement. 1) Important : Ne pas raccrocher le combiné sur le téléphone car cela mettra fin à l'appel. 7. Effectuer et répondre à un appel depuis le téléphone fixe Émettre et terminer un appel depuis un téléphone portable Si vous effectuez un appel à partir de votre téléphone portable, l'appel sera automatiquement transféré à l'oreillette (en fonction des paramètres du téléphone, consultez le manuel utilisateur de votre téléphone portable pour trouver comment activer cette fonction). Si votre téléphone n assure pas cette fonction, consultez le mode d emploi pour savoir comment répondre à un appel à l aide d une oreillette. Pour terminer un appel, tapez sur la touche Réponse/Fin de l'oreillette, OU appuyez sur «End/ No» (ou l équivalent) sur votre téléphone portable. Prendre et terminer un appel entrant sur le téléphone portable Pour prendre un appel, tapez sur la touche Réponse/Fin de votre oreillette après la première sonnerie OU, si l'oreillette est placée dans la base, retirez-la simplement de celle-ci. Pour terminer un appel, tapez sur la touche Réponse/Fin de l'oreillette, OU appuyez sur «End/No» (ou l équivalent) sur votre téléphone portable ou placez l'oreillette dans la base. IMPORTANT : si vous répondez à un appel en utilisant le combiné de certains téléphones portables, l appel ne sera pas automatiquement transféré à l'oreillette. 29
33 Passer de l'oreillette au téléphone portable Vous pouvez passer de votre oreillette à votre téléphone portable au cours d un appel. Cela peut être utile si, par exemple le niveau de charge de la batterie de l'oreillette est faible. Servez-vous du menu de votre téléphone portable pour passer de l'oreillette au téléphone au cours d un appel (voir mode d emploi du téléphone portable). Passer du téléphone portable à l'oreillette Il est possible de passer de votre téléphone portable à l'oreillette au cours d un appel. Servez-vous du menu de votre téléphone portable pour passer du téléphone portable à l'oreillette au cours d un appel (voir mode d emploi du téléphone portable). Refuser un appel entrant Pour refuser un appel entrant, appuyez sur la touche Réponse/Fin de l'oreillette à la sonnerie du téléphone. Selon les paramètres de votre téléphone, le correspondant sera transféré sur votre messagerie vocale ou recevra la tonalité «occupé». Français Effectuer un appel par numérotation vocale Tapez sur la touche Réponse/Fin de l'oreillette pour entrer en mode de numérotation vocale. (Consultez le mode d emploi de votre téléphone portable pour plus d informations sur cette fonction.) Vous obtiendrez de meilleurs résultats si vous enregistrez l identité de numérotation vocale via votre oreillette. Rappeler le dernier numéro Double taper sur la touche Réponse/Fin de l'oreillette. Gérer plusieurs appels Avoir un appel dans l'oreillette Double taper sur la touche Réponse/Fin mettra l'appel en cours en attente et effectuera un appel vers le dernier numéro de téléphone composé. Avoir un appel tout en recevant un appel entrant supplémentaire Taper sur la touche Réponse/Fin mettra fin à l'appel et répondra à l'appel entrant. Double taper sur la touche Réponse/Fin refusera l'appel entrant. Appuyer sur la touche Réponse/Fin pendant env. 1,5 sec pour placer l'appel en cours en attente et répondre à l'appel entrant. Avoir un appel en cours plus un appel en attente Taper sur la touche Réponse/Fin mettra fin à l'appel en cours et récupérera l'appel en attente. Appuyer sur la touche Réponse/Fin pendant env. 1,.5 sec. pour basculer entre les deux appels. Notez que ce comportement peut être différent selon le type de téléphone connecté. 30
34 Français Rester dans la portée Le son dans votre casque se détériore si vous allez hors portée. 1) Revenez dans la portée pour restituer la qualité sonore. Si vous vous éloignez trop de votre téléphone portable, l appel risque d être coupé ou bien redirigé vers votre téléphone portable depuis l'oreillette, en fonction du modèle de téléphone. Veuillez consulter le mode d emploi de votre téléphone portable pour plus d informations sur cette fonction. N'oubliez pas : pour une performance optimale, portez l'oreillette multi-usages Jabra M5390 et votre téléphone mobile du même côté ou dans la même ligne de visée. Vous obtiendrez généralement une meilleure performance s'il n y a aucun obstacle entre l'oreillette et le téléphone. 8. Fonctions Secret/Annulation de la fonction Secret 8.1 Appuyez sur la touche Secret de l'oreillette. Vous entendrez une tonalité double dans l'oreillette. 8.2 Pour annuler la fonction Secret, appuyez à nouveau sur celle-ci. Vous entendrez une tonalité double dans l'oreillette. 1) Remarque : Lorsque vous répondez à un appel avec le combiné du téléphone, vérifiez que l'oreillette est placée dans le support de chargement. Autrement, l'appel sera dirigé vers l'oreillette. 31
35 min Batterie faible 8.3 Env. 10 minutes avant que l'oreillette ne soit déchargée entièrement, l'indicateur visuel sur l'oreillette commencera à clignoter en rouge et vous entendrez une série de tonalités.si la batterie n'est plus alimentée, l'indicateur visuel sur l'oreillette s'éteindra automatiquement. Replacez l'oreillette sur le support de chargement et poursuivez l'appel en utilisant le combiné du téléphone. L'oreillette contient un indicateur de niveau de batterie. En tapant sur les touches de volume sonore haut et bas, l'indicateur visuel clignotera deux fois rapidement - en vert, jaune ou rouge, selon le niveau de la batterie. Français m/230 feet Hors de portée 8.4 Si vous êtes hors de portée (env. 70 m), touches les touches sauf la touche Réponse/Fin s'arrêteront de fonctionner jusqu'à ce que l'appareil soit de nouveau à portée. 2) Veuillez noter que la majorité des téléphones portables supportent uniquement une portée de 10 m. Si la fonction Secret de l'oreillette est activée au moment où elle sort de la portée, elle le sera également quand elle reviendra dans la portée de l'appareil. 2) Important : Si l'oreillette est hors de portée pendant plus d'1 min., la communication entre la base et l'oreillette sera coupée. 32
36 Français 8.5 Commutateur oreillette 8.5 Si l'oreillete est absente, le commutateur oreillette doit être activé pour pouvoir utiliser le combiné ou, si l'oreillette est utilisée avec un autre périphérique Bluetooth, le commutateur oreillette doit être activé pour pourvoir utiliser l'oreillette. Fonctions : Portée Temps de communication/en mode veille Protocole de communication 70 m oreillette/base - oreillette/ dongle 10 m pour la plupart des téléphones portables Jusqu'à 5 heures/jusqu'à 60 heures Bluetooth Bande de fréquences 2,4 GHz 33
37 9. Réinitialisation/Appairage 9.1 ~ 3 sec. 9.1 Au démarrage, maintenez la touche Réponse/Fin enfoncée pendant trois secondes. Ou bien retirez le couvercle encliquetable et appuyez sur la touche de réinitialisation de l'oreillette pendant trois secondes. L'indicateur visuel de l'oreillette s'allumera en bleu fixe. 1) Français 9.2 ~ 3 sec. 9.2 Puis appuyez sur le bouton de réinitialisation pendant 3 secondes. L'indicateur visuel de l'unité de base s'allumera en bleu fixe Assurez-vous que l'oreillette et la base se trouvent dans un rayon de 1 m l'un de l'autre. Lorsque l'appairage est réussi, les deux indicateurs visuels clignotent cinq fois en bleu et l'indicateur visuel sur l'unité de base passera au vert fixe. Pour effacer la liste d'appairage dans la base, appuyez et maintenez la touche de réinitialisation 1 m enfoncée sous la base pendant 5 secondes. Pour effacer la liste d'appairage dans l'oreillette, appuyez et maintenez la touche de réinitialisation enfoncée sur l'oreillette pendant 5 secondes. Notez qu'après la nouvelle configuration, une nouvelle séquence d'appairage doit être initiée. 1) Remarque : L'oreillette est livrée déjà appairée avec l'unité de base. L'appairage est uniquement nécessaire si une nouvelle oreillette doit être connectée à une unité de base existante (ou vice-versa). 34
38 10. Utilisation de l'oreillette multi-usages Jabra M5390 avec plusieurs périphériques Bluetooth Français Votre oreillette multi-usages Jabra T5390 peut être appairée avec jusqu'à 8 périphériques. Or, seulement deux appareils (appairés avec l'oreillette, allumés et dans la portée) peuvent être connectés à l'oreillette à la fois. Cela peut être n'importe quelle paire de périphérique Bluetooth (par ex. un téléphone portable et la base multi-usages Jabra T5390, ou la Dongle Jabra A335w et un téléphone portable ou deux téléphone portables). Ainsi, si l'oreillette est dans la portée de la base multi-usages Jabra M5390 ou de la Dongle Jabra A335w, seul un périphérique Bluetooth supplémentaire pourra être connecté à l'oreillette (appairé avec l'oreillette, allumée et à portée). L'oreillette est appairée par défaut à la base et à la dongle. Cela signifie que l'oreillette se connectera automatiquement à ces deux périphériques dans ses réglages d'usine si elle est à portée et allumée. Ainsi, si un téléphone portable doit être connecté à l'oreillette, la dongle ou la base doit être éteinte ou hors de portée. Il est aussi possible de connecter simultanément deux téléphones portables Bluetooth à l'oreillette multi-usages Jabra M5390. Dans ce cas, la base et la dongle doivent à la fois être déconnectées de l'oreillette. 11. Fonctionnement des périphériques dans des scénarios multi-usages A partir de la touche d'interface de l'oreillette, il est possible de faire fonctionner deux périphériques dans un scénario multi-usages (deux périphériques connectés à l'oreillette). Les opérations peuvent être réparties dans la gestion pour les appels entrants et sortants. Lorsque vous recevez un appel entrant de la part de l'un des périphériques connectés, celui-ci sera automatiquement le périphérique «cible» et il suffira d'appuyer sur le bouton pour répondre à l'appel. Une pression sur la touche annulera l'appel. Si vous souhaitez passer un appel sortant activé de l'oreillette, l'utilisateur doit manuellement cibler l'un des périphériques. Cibler un périphérique signifie que toutes les pressions de touche sur l'oreillette seront envoyées au périphérique choisi. Par exemple, si une numérotation vocale doit être activée sur deuxième périphérique connecté, l'utilisateur doit d'abord s'assurer que le périphérique donné est ciblé. Après ça, il suffit de taper sur la touche pour activer une commande de numérotation vocale. Pour pouvoir changer de cible entre les deux périphériques connectés, il faut appuyer sur la touche Réponse/Fin pendant env. 1,5 seconde. Après avoir effectué une action de permutation de cible, plusieurs indicateurs seront utilisés pour informer l'utilisateur du périphérique ciblé à présent ; en cas de permutation de cible vers la dongle Jabra A335w, l'indicateur lumineux (LED) de la dongle clignotera alors 5 fois rapidement en bleu-clair. En outre, le haut-parleur de l'oreillette indiquera «Dongle ciblée». En cas de permutation de cible vers la base de Jabra M5390, l'indicateur lumineux LED de la base clignotera rapidement 5 fois en bleu-clair. En outre, le haut-parleur de l'oreillette indiquera «Base ciblée». Lors de la permutation de cible vers un téléphone portable, le haut-parleur de l'oreillette indiquera Portable ciblé. Notez que cela ne s'applique qu'à des scénarios multi-usages. Si l'oreillette est uniquement connectée à un périphérique, alors ce périphérique sera automatiquement ciblé. Notez également que la fonction de Rappel du dernier numéro n'utilise pas le concept de cible. Si vous tappez deux fois sur la touche Réponse/Fin, la fonction de Rappel du dernier numéro sera automatiquement envoyée au périphérique connecté avec le dernier appel entrant (une fois connecté à l'oreillette). 35
39 N.B. : si plusieurs périphériques Bluetooth sont appairés avec l'oreillette, la fonction de numérotation vocale fonctionnera avec le périphérique qui a été appairé en dernier. 12. Basculer entre la base et la dongle Jabra A335w dans un scénario multi-usages Un scénario multi-usages caractéristique est d'avoir l'oreillette connectée à un téléphone portable ainsi qu'à la base ou à la dongle. Si vous souhaitez basculer entre la base et la dongle, tout en conservant la connexion du téléphone portale, appuyez et maintenez enfoncée la touche de volume sonore haut/bas pendant 4 secondes. Français 13. Diagnostic des pannes et questions fréquentes Q : Rien ne se produit lorsque j'essaye de régler la tonalité claire. R : Assurez-vous que la base est sous secteur (indicateur visuel sur l'unité de base passe au vert fixe). Puis établissez une liaison téléphonique entre la base et l'oreillette (les indicateurs visuels sur l'unité de base et l'oreillette clignotent en vert). Veillez aussi à ce que le téléphone soit activé (oreillette décrochée ou appuyez sur le bouton de la ligne). Q : Je m'entends parler. R : Votre niveau de volume d'émission (veuillez consulter la section 3.10) est probablement trop élevé. Baissez le volume d'émission (3->2, 2->1). Q : La qualité sonore dans l'oreillette est mauvaise ou mon interlocuteur ne m'entends pas. R : Assurez-vous d avoir réglé le commutateur de tonalité correctement. Pour ce faire, appelez quelqu'un pour régler le commutateur de tonalité. Q : Lorsque j'appuie sur la touche Réception/Fin, the GN 1000 RHL décroche, mais l'appel n'est pas connecté. R : Vérifiez que vous utilisez le port combiné du téléphone et pas le port casque (si votre télé phone en a un), lorsque vous utilisez un GN 1000 RHL pour un décrochage à distance. Q : J'ai changé de bureau au travail. Est-il possible de mettre mon oreillette sur une autre base? R : Oui, c'est possible. L'oreillette doit uniquement être appairée à la nouvelle base. Il suffit de suivre la procédure telle que décrite dans la section 9 de ce guide. Q : Je ne peux rien entendre dans mon oreillette lorsque j'utilise mon téléphone portable. R : - Augmentez le volume sur l'oreillette (ou le téléphone). - Comme le niveau sonore requis peut varier entre votre téléphone fixe et le téléphone portable, il peut être préférable de régler le niveau sur les téléphones. - Utilisez alors les réglages du niveau sonore de l'oreillette pour des réglages généraux (mais veillez à ce que l'oreillette soit appairée avec le téléphone portable). - Assurez-vous que le téléphone soit connecté à l'oreillette - Si ce n'est pas le cas, connectezle au menu Bluetooth du téléphone ou en appuyant sur la touche Réponse/Fin, suivez la procédure d'appairage (voir section 4 «Appairage de votre oreillette avec votre téléphone portable» dans ce guide). *Si le téléphone portable assure cette fonction. 36
Sumário ANATEL PORTUGUÊS ENGLISH
 ANATEL Sumário PORTUGUÊS 1. Introdução...5 2. Tecnologia sem fio Bluetooth...6 3. Entenda sobre seu Fone Bluetooth...7 3.1. Visão Geral...7 3.2. Para Carregar a Bateria...8 3.3. Para Ligar/Desligar os
Guião M. Descrição das actividades
 Proposta de Guião para uma Prova Grupo: Inovação Disciplina: Inglês, Nível de Continuação, 11.º ano Domínio de Referência: O Mundo do trabalho Duração da prova: 15 a 20 minutos 1.º MOMENTO Guião M Intervenientes
Guião A. Descrição das actividades
 Proposta de Guião para uma Prova Grupo: Ponto de Encontro Disciplina: Inglês, Nível de Continuação, 11.º ano Domínio de Referência: Um Mundo de Muitas Culturas Duração da prova: 15 a 20 minutos 1.º MOMENTO
RECHARGEABLE PORTABLE SOUND SYSTEM WITH USB-MP3 & VHF MIC
 RECHARGEABLE PORTABLE SOUND SYSTEM WITH USB-MP3 & VHF MIC SYSTEME DE SONORISATION PORTABLE RECHARGEABLE AVEC LECTEUR USB-MP3 & MICRO VHF SISTEMA DE SOM PORTÁTIL RECARREGÁVEL COM USB-MP3 & MICROFONE VHF
User Manual. Linksys PAP2 Broadband Phone Service. Linhagratuita grupo csdata
 User Manual Linksys PAP2 Broadband Phone Service Linhagratuita grupo csdata www.linhagratuita.com.br Please follow the step-by-step guide below to set up your Linksys PAP2 for use with Linhagratuita Broadband
Parts of the Solar Charger. Charging the Solar Battery. Using the Solar Lamp. Carry in hand. Shows how much light is left. Table light.
 Parts of the Solar Charger Solar Lamp LCD Panel 1 Solar Panel Cell Phone Charger Port Protective Cover Solar Charger Port Lamp Stand Adaptors On/Off Switch Cell Phone Charger Cable Charging the Solar Battery
Quick user guide. (réf )
") Quick user guide (réf. 34889) Download the app «mobile eye door +» How to SETUP, for the first time, your Chacon IP VDP Connect the cables with the same color to each other, of both units. Connect the
Quick user guide (réf. 34889) Download the app «mobile eye door +» How to SETUP, for the first time, your Chacon IP VDP Connect the cables with the same color to each other, of both units. Connect the
WATER MATTRESS MASSAGE SYSTEM 20439
 Page 1 of 10 WATER MATTRESS MASSAGE SYSTEM 20439 CONTENTS Massage System with Controller Please note: the above image shows a white unit and a blue unit. The white unit is supplied inside the blue unit
VGM. VGM information. ALIANÇA VGM WEB PORTAL USER GUIDE June 2016
 Overview The Aliança VGM Web portal is an application that enables you to submit VGM information directly to Aliança via our e-portal Web page. You can choose to enter VGM information directly, or to download
Lesson 6 Notes. Eu tenho um irmão e uma irmã Talking about your job. Language Notes
 Lesson 6 Notes Eu tenho um irmão e uma irmã Talking about your job Welcome to Fun With Brazilian Portuguese Podcast, the podcast that will take you from beginner to intermediate in short, easy steps. These
Sumário PORTUGUÊS ENGLISH
 Sumário PORTUGUÊS 1. Introdução...3 2. Tecnologia sem Fio Bluetooth...4 3. Iniciando seu Viva Voz Bluetooth Automotivo...5 3.2. Carregador...6 3.3. Ligar e Desligar o Viva Voz Bluetooth Automotivo...7
User Guide Manual de Utilizador
 2400 DPI OPTICAL GAMING MOUSE User Guide Manual de Utilizador 2014 1Life Simplify it All rights reserved. www.1-life.eu 2 2400 DPI OPTICAL GAMING MOUSE ENGLISH USER GUIDE...4 MANUAL DE UTILIZADOR PORTUGUÊS...18
GUIÃO A. Ano: 9º Domínio de Referência: O Mundo do Trabalho. 1º Momento. Intervenientes e Tempos. Descrição das actividades
 Ano: 9º Domínio de Referência: O Mundo do Trabalho GUIÃO A 1º Momento Intervenientes e Tempos Descrição das actividades Good morning / afternoon / evening, A and B. For about three minutes, I would like
11g Wireless Broadband Router (Roteador banda-larga sem fio- Wireless G) Quick Installation Guide
 Quick Installation Guide") LevelOne WBR-3408 11g Wireless Broadband Router (Roteador banda-larga sem fio- Wireless G) Quick Installation Guide English Português Table of Contents English... 3 Português... 16 2 English Package Contents
LevelOne WBR-3408 11g Wireless Broadband Router (Roteador banda-larga sem fio- Wireless G) Quick Installation Guide English Português Table of Contents English... 3 Português... 16 2 English Package Contents
Descrição das actividades
 Proposta de Guião para uma Prova Grupo: Em Acção Disciplina: Inglês, Nível de Continuação, 11.º ano Domínio de Referência: O Mundo do Trabalho Duração da prova: 15 a 20 minutos Guião D 1.º MOMENTO Intervenientes
ÍNDICE PORTUGUÊS INDEX ENGLISH
 ÍNDICE PORTUGUÊS 1. Introdução...2 2. Características...2 3. Avisos...3 4. Instalação...3 4.1 Alimentação por pilha AAA 4.2 Alimentação pela entrada USB 5. Utilizando o Produto...5 6. Solução de Problemas...5
Start Here Comece aqui Mise en route Empezar aquí
 Start Here Comece aqui Mise en route Empezar aquí 1 Install the software (required for full functionality). Instale o software (necessário para funcionalidade total). Installez le logiciel (requis pour
Welcome to Lesson A of Story Time for Portuguese
 Portuguese Lesson A Welcome to Lesson A of Story Time for Portuguese Story Time is a program designed for students who have already taken high school or college courses or students who have completed other
hdd enclosure caixa externa para disco rígido
 hdd enclosure caixa externa para disco rígido USER S GUIDE SPECIFICATONS HDD Support: SATA 2.5 Material: Aluminium and plastics Input connections: SATA HDD Output connections: USB 3.0 (up to 5.0Gbps)
SATA 3.5. hd:basic. hdd enclosure caixa externa para disco rígido
 SATA 3.5 hd:basic hdd enclosure caixa externa para disco rígido hd:basic USER S GUIDE SPECIFICATIONS HDD support: SATA 3.5 Material: Aluminium Input connections: SATA HDD Output connections: USB 2.0
DONKEY 19689. 2. Using a small cross-head (positive) screwdriver, undo the screw that secures the battery compartment door. Copyright ROMPA Ltd
 screwdriver, undo the screw that secures the battery compartment door. Copyright ROMPA Ltd") DONKEY 19689 CONTENTS 1 x switch-adapted Donkey This product requires, but does not include, 3 AA batteries and a switch See www.rompa.com for a comprehensive range of switches BEFORE USE 1. Locate the
DONKEY 19689 CONTENTS 1 x switch-adapted Donkey This product requires, but does not include, 3 AA batteries and a switch See www.rompa.com for a comprehensive range of switches BEFORE USE 1. Locate the
Inglês. Guião. Teste Intermédio de Inglês. Parte IV Interação oral em pares. Teste Intermédio
 Teste Intermédio de Inglês Parte IV Interação oral em pares Teste Intermédio Inglês Guião Duração do Teste: 10 a 15 minutos De 25.02.2013 a 10.04.2013 9.º Ano de Escolaridade D TI de Inglês Página 1/ 7
GUIÃO Domínio de Referência: CIDADANIA E MULTICULTURALISMO
 PROJECTO PROVAS EXPERIMENTAIS DE EXPRESSÃO ORAL DE LÍNGUA ESTRANGEIRA - 2005-2006 Ensino Secundário - Inglês, 12º ano - Nível de Continuação 1 1º Momento GUIÃO Domínio de Referência: CIDADANIA E MULTICULTURALISMO
HEY PRESTO NOW I CAN TALK SUPER INTERACTIVE SWITCH BOX 18731 (CUSTOMISED 18736)
") Page 1 of 9 Copyright ROMPA Ltd HEY PRESTO NOW I CAN TALK SUPER INTERACTIVE SWITCH BOX 18731 (CUSTOMISED 18736) PRODUCT DESCRIPTION Press the coloured buttons to control the colours and the flow of bubbles
Page 1 of 9 Copyright ROMPA Ltd HEY PRESTO NOW I CAN TALK SUPER INTERACTIVE SWITCH BOX 18731 (CUSTOMISED 18736) PRODUCT DESCRIPTION Press the coloured buttons to control the colours and the flow of bubbles
Télécommande standard non polarisée 0 039 01
 01 Télécommande standard non polarisée R Caractéristiques techniques Alimentation...:230 V± 50/60 Hz 10 ma Capacité des bornes : 2 X 1,5 mm 2 Fixation...:surrailoméga Encombrement.... : 4 modules (70 mm)
PAAES/UFU 2ª Etapa Subprograma 2011-2014
 SERVIÇO PÚBLICO FEDERAL MINISTÉRIO DA EDUCAÇÃO UNIVERSIDADE FEDERAL DE UBERLÂNDIA Pró-Reitoria de Graduação Diretoria de Processos Seletivos PAAES 2ª ETAPA SUBPROGRAMA 2011/2014 24 de fevereiro de 2013
ÍNDICE PORTUGUÊS INDEX ENGLISH
 ÍNDICE PORTUGUÊS 1. Características... 2 2. Conteúdo da Embalagem... 3 3. Como usar o Receptor de TV Digital... 3 4. Tela de Vídeo... 6 5.Requisitos Mínimos... 6 6. Marcas Compatíveis... 8 INDEX ENGLISH
Radio / CD. Honolulu CD50. Installation instructions Notice de montage Instrucciones de instalación Instruções de de montagem
 Radio / D Honolulu D50 Installation instructions Notice de montage Instrucciones de instalación Instruções de de montagem Installation instructions Notice de montage Instrucciones de instalación Instruções
MARQUE: MICROSOFT REFERENCE: NATURAL ERGO 4000 CODIC:
 MARQUE: MICROSOFT REFERENCE: NATURAL ERGO 4000 CODIC: 4327829 NOTICE ENG: Microsoft wired keyboard Teclado com fio da Microsoft Clavier avec fil Microsoft Teclado alámbrico de Microsoft ENG: Install the
VGM. VGM information. ALIANÇA VGM WEB PORTAL USER GUIDE September 2016
 Overview The Aliança VGM Web portal is an application that enables you to submit VGM information directly to Aliança via our e-portal Web page. You can choose to enter VGM information directly, or to download
GUIÃO A. What about school? What s it like to be there/here? Have you got any foreign friends? How did you get to know them?
 GUIÃO A Prova construída pelos formandos e validada pelo GAVE, 1/7 Grupo: Chocolate Disciplina: Inglês, Nível de Continuação 11.º ano Domínio de Referência: Um Mundo de Muitas Culturas 1º Momento Intervenientes
SISTEMA AUTO-NIVELADOR DE FARÓIS
 INSTRUÇÕES DE MONTAGEM (EN) INSTALL MOUNTING INSTRUCTIONS (ES) INSTRUCCIONES DE MONTAJE (FR) GUIDE D'INSTALLATION SISTEMA AUTO-NIVELADOR DE FARÓIS P/ KITS HID (EN) Auto Leveling System for HID KITS (ES)
Versão: 1.0. Segue abaixo, os passos para o processo de publicação de artigos que envolvem as etapas de Usuário/Autor. Figura 1 Creating new user.
 Órgão: Ministry of Science, Technology and Innovation Documento: Flow and interaction between users of the system for submitting files to the periodicals RJO - Brazilian Journal of Ornithology Responsável:
1. Product Name. 2. Product Code. 3. Colour. 4. Brief Description. 5. Contents. Peek A Boo Bear. Light brown bear the colour of the blanket may vary
 1. Product Name Peek A Boo Bear 2. Product Code 20837 3. Colour Light brown bear the colour of the blanket may vary 4. Brief Description Activate your switch to make this adorable bear play peek a boo.
START HERE PTB: COMECE AQUI FRA: MISE EN ROUTE ITA: PER COMINCIARE PTG: INICIAR AQUI ESP: EMPEZAR AQUÍ
 START HERE PTB: COMECE AQUI FRA: MISE EN ROUTE ITA: PER COMINCIARE PTG: INICIAR AQUI ESP: EMPEZAR AQUÍ Install the software (required for full webcam functionality). Instale o software (necessário para
A machine that blows bubbles at the press of your switch (not included)
") 1. Product Name Bubbles 2. Product Code 20139 3. Colour As shown 4. Brief Description A machine that blows bubbles at the press of your switch (not included) 5. Contents Bubbles machine with cable attached
1. Product Name Bubbles 2. Product Code 20139 3. Colour As shown 4. Brief Description A machine that blows bubbles at the press of your switch (not included) 5. Contents Bubbles machine with cable attached
Platinum Electric Griddle. Children should be supervised to ensure that they do not play with the appliance.
 Platinum Children should be supervised to ensure that they do not play with the appliance. 1 2 ELECTRIC GRIDDLE 1. Receptacle for power probe 2. Side handle 3. Non-stick heating plate 4. Power cable with
MANUAL PARA ALTO-FALANTE PORTÁTIL
 MANUAL PARA ALTO-FALANTE PORTÁTIL DC-S025 Para o correto funcionamento, favor ler este manual com atenção antes de utilizá-lo. Não somos responsáveis por consequências causadas por falha ou descuido com
Stick Up Cam Battery
 Stick Up Cam Battery 1. Charge and insert the battery. Charge the provided battery. First, fully charge the battery by plugging it into a USB port using the provided orange cable. The battery is fully
Como testar componentes eletrônicos - volume 1 (Portuguese Edition)
") Como testar componentes eletrônicos - volume 1 (Portuguese Edition) Renato Paiotti Newton C. Braga Click here if your download doesn"t start automatically Como testar componentes eletrônicos - volume 1
Como testar componentes eletrônicos - volume 1 (Portuguese Edition) Renato Paiotti Newton C. Braga Click here if your download doesn"t start automatically Como testar componentes eletrônicos - volume 1
Prova Oral de Inglês Duração da Prova: 20 a 25 minutos 2013/2014. 1.º Momento. 4 (A), are you a health-conscious person?
, are you a health-conscious person?") Prova Oral de Inglês Duração da Prova: 20 a 25 minutos 2013/2014 GUIÃO A Disciplina: Inglês, Nível de Continuação 11.º ano Domínio de Referência: O Mundo do Trabalho 1.º Momento Intervenientes e Tempos
Prova Oral de Inglês Duração da Prova: 20 a 25 minutos 2013/2014 GUIÃO A Disciplina: Inglês, Nível de Continuação 11.º ano Domínio de Referência: O Mundo do Trabalho 1.º Momento Intervenientes e Tempos
Serviços: API REST. URL - Recurso
 Serviços: API REST URL - Recurso URLs reflectem recursos Cada entidade principal deve corresponder a um recurso Cada recurso deve ter um único URL Os URLs referem em geral substantivos URLs podem reflectir
Magnetic Charging Dock
 Manual do usuário Magnetic Charging Dock Índice Introdução...3 Carregamento facilitado...3 Utilizando a Plataforma de carregamento magnética...4 Utilizando os apoios...4 Carregando seu celular...4 Informações
BUTTONS & CONTROLS BOTÕES E CONTROLOS
 by BUTTONS & CONTROLS BOTÕES E CONTROLOS TALK* FALAR * PREVIOUS / NEXT* A NTERIOR / SE G U I NTE* POWER BUTTON & LED BOTÃO DE LIGAR E LED PAIRING BUTTON BOTÃO DE EMPARELHAMENTO LINE IN ENTRADA DE LINHA
NOVO SISTEMA DE CORREIO ELETRONICO PARA OS DOMINIOS ic.uff.br & dcc.ic.uff.br
 NOVO SISTEMA DE CORREIO ELETRONICO PARA OS DOMINIOS ic.uff.br & dcc.ic.uff.br A partir de 28/07/2004 (quarta-feira), ás 17:30 hs estaremos trocando nossos servidores de correio para ambos os domínios ic.uff.br
Wi-Fi Range Extender Add-on Device Quickstart Guide
 Wi-Fi Range Extender Add-on Device Quickstart Guide Model No. WRP1220 What s inside: 1x Wi-Fi Range Extender 1x Power Adapter All Home8 add-on devices have to work with Home8 systems. português Passo 1:
Click the + sign to add new server details. Clique no sinal de "+" para adicionar novos detalhes do servidor. Enter a friendly name for your BI Server
 Click the + sign to add new server details Clique no sinal de "+" para adicionar novos detalhes do servidor Enter a friendly name for your BI Server Digite um nome amigável para o seu BI Server Enter the
1. Product Name. 2. Product Code. 3. Colour. 4. Brief Description. 5. Contents. 6. Snoezelen Stimulations. Switch Adapted Fibre Optic Lamp
 1. Product Name Switch Adapted Fibre Optic Lamp 2. Product Code 20709 3. Colour Clear base; white fibres 4. Brief Description Activate your switch to activate the light through the fibres and in the base.
FAIRTRADE LABELLING ORGANIZATIONS INTERNATIONAL
 A: Tous les acteurs de la filière du Commerce Equitable certifiés pour la mangue, la banane, la pulpe d araza / Produtores e Comerciantes certificados da manga, da banana e da polpa de araza de CJ Tous
OkiLAN 6120i Installation
 OkiLAN 6120i Installation The OkiLAN 6120i Print Server enables Ethernet network users to connect to a network-configured printer. It supports 10/100-megabit networks, TCP/IP Direct Printing and Server-Based
Operator Manual Thermoplan AG, Subject to change REV-0
 1 Overview Control panel Foamer head Cup platform Liner pouch 8 Overview Heating basin Milk foam tube Level controller Milk container Cover Hood 9 Putting into operation Plug the appliance into a suitable
MANUAL PARA ALTO-FALANTE PORTÁTIL
 MANUAL PARA ALTO-FALANTE PORTÁTIL DC-S021 Para o correto funcionamento, favor ler este manual com atenção antes de utilizá-lo. Não somos responsáveis por consequências causadas por falha ou descuido com
Aqui pode escolher o Sistema operativo, e o software. Para falar, faça download do Cliente 2.
 TeamSpeak PORTUGUES ENGLISH Tutorial de registo num servidor de TeamSpeak Registration tutorial for a TeamSpeak server Feito por [WB ].::B*A*C*O::. membro de [WB ] War*Brothers - Non Dvcor Dvco Made by:
DS100 Dual Monitor Desk Stand, Vertical
 USA 1-800-888-88 Europe +31 (0)33-600 DS100 Dual Monitor Desk Stand, Vertical ASSEMBLY INSTRUCTIONS INSTRUCCIONES DE INSTALACIÓN NOTICE D ASSEMBLAGE INSTRUÇÕES DE MONTAGEM 1 A B C 1x 2x 2x 8x 8x 7-100mm
Comportamento Organizacional: O Comportamento Humano no Trabalho (Portuguese Edition)
") Comportamento Organizacional: O Comportamento Humano no Trabalho (Portuguese Edition) John W. Newstrom Click here if your download doesn"t start automatically Comportamento Organizacional: O Comportamento
Comportamento Organizacional: O Comportamento Humano no Trabalho (Portuguese Edition) John W. Newstrom Click here if your download doesn"t start automatically Comportamento Organizacional: O Comportamento
Accessing the contents of the Moodle Acessando o conteúdo do Moodle
 Accessing the contents of the Moodle Acessando o conteúdo do Moodle So that all the available files in the Moodle can be opened without problems, we recommend some software that will have to be installed
GUIÃO F. Grupo: Minho. 1º Momento. Intervenientes e Tempos. Descrição das actividades
 GUIÃO F Prova construída pelos formandos e validada pelo GAVE, 1/7 Grupo: Minho Disciplina: Inglês, Nível de Continuação 11.º ano Domínio de Referência: Um Mundo de Muitas Culturas 1º Momento Intervenientes
Memory Module MMF-02. Modulo de Memoria MMF-02. Módulo de Memória MMF-02 CFW70X
 Motors Automation Energy Transmission & Distribution Coatings Memory Module MMF-02 Modulo de Memoria MMF-02 Módulo de Memória MMF-02 CFW70X Installation, Configuration and Operation Guide Guía de Instalación,
Guia de Instalação Rápida TBW-101UB TBW-102UB
 Guia de Instalação Rápida TBW-101UB TBW-102UB Índice Português... 1. Antes de Iniciar... 2. Como instalar... 3. Usando o Adaptador Bluetooth... 1 1 2 4 Troubleshooting... 5 (Version 05.30.2006) 1. Antes
Wi-Fi Camera Add-on Device Quickstart Guide
 Wi-Fi Camera Add-on Device Quickstart Guide Model No. IPC1200 What s inside: 1x Wi-Fi Camera 1x Power Adapter 1x Extension Cable Mounting Accessories All Home8 add-on devices have to work with Home8 systems.
português Passo 1: Monte seu hardware Passo 2: Configure seu Smartphone
 português Passo 1: Monte seu hardware Desembale todo hardware a uma distância de 3 metros de seu router doméstico. Conecte o Shuttle de Segurança ao router activado para DHCP com o incluso Cabo de Ethernet.
 Additional details >>> HERE
 Motor PTC Kit. Kit PTC del Motor. Kit PTC do Motor SSW-07 / SSW-08
 Motors Automation Energy Transmission & Distribution Coatings Motor PTC Kit Kit PTC del Motor Kit PTC do Motor SSW-07 / SSW-08 Installation, Configuration and Operation Guide Guía de Instalación, Configuración
Infrared Motion Sensor Add-on Device Quickstart Guide
 Infrared Motion Sensor Add-on Device Quickstart Guide Model No. PIR1301 What s inside: 1x Infrared Motion Sensor 1x Double-Sided Tape 1x Battery (CR123A) All Home8 add-on devices have to work with Home8
As 100 melhores piadas de todos os tempos (Portuguese Edition)
") As 100 melhores piadas de todos os tempos (Portuguese Edition) Click here if your download doesn"t start automatically As 100 melhores piadas de todos os tempos (Portuguese Edition) As 100 melhores piadas
As 100 melhores piadas de todos os tempos (Portuguese Edition) Click here if your download doesn"t start automatically As 100 melhores piadas de todos os tempos (Portuguese Edition) As 100 melhores piadas
Logitech G303 Daedalus Apex Setup Guide Guide d installation
 Setup Guide Guide d installation Contents / Contenu English................. Español................. 9 Français................. 6 Português............... 12 www.logitech.com/support/g0 2 1 On 2 USB
Instalação do encosto. Recursos. Como usar os tubos adaptadores. Estrutura do produto. Sistema de Som
 MANUAL Instalação do encosto Sistema de Som Recursos Disponível em preto, cinza Hastes de montagem ajustáveis para encaixe em qualquer assento Hastes ajustáveis a partir de 4 polegadas de distância a 8
Fire + CO Alarm Sensor Add-on Device Quickstart Guide
 Fire + CO Alarm Sensor Add-on Device Quickstart Guide Model No. SNH1300 What s inside: 1x Fire + CO Alarm Sensor 2x Double-Sided Tapes 1x Battery (CR123A) Mounting Accessories All Home8 add-on devices
1. Product Name. 2. Product Code. 3. Colour. 4. Brief Description. 5. Contents. Switch Adapted Clip On Fan. Colours may vary
 1. Product Name Switch Adapted Clip On Fan 2. Product Code 20489 3. Colour Colours may vary 4. Brief Description Connects to your switch for switch activation. 5. Contents Fan with cable with 3.5mm jack
2 Categorias Categories Todas as categorias de actividade são apresentadas neste espaço All activity categories are presented in this space
 1 Próximas Actividades Next Activities Visualiza as próximas actividades a ter inicio, com a indicação do tempo restante Displays upcoming activities and indicating the remaining time 2 Categorias Categories
PROGRAM FOR 3 DAYS in Faial and S. Jorge Islands, Azores
 PROGRAM FOR 3 DAYS in Faial and S. Jorge Islands, Azores THIS PROGRAM AIMS TO TOAST OUR CUSTOMERS WITH THE OPPORTUNITY TO DISCOVER AND EXPLORE THE FAIAL AND S. JORGE ISLANDS. WE HAVE A WIDE RANGE OF CULTURAL
manualdepsiquiatriainfant il manual de psiquiatria infantil
 manualdepsiquiatriainfant il manual de psiquiatria infantil These guides possess a lot information especially advanced tips such as the optimum settings configuration for manualdepsiquiatriainfantil manual
Manual do usuário. User s Manual JS052. Super band - guitarra sem fio PS2 / PS3 / Wii Super band - wireless guitar PS2 / PS3 / Wii
 Super band - guitarra sem fio Manual do usuário User s Manual Super band - guitarra sem fio PS2 / PS3 / Wii Super band - wireless guitar PS2 / PS3 / Wii 1 JS052 ÍNDICE CARACTERÍSTICAS DO PRODUTO...03 peças
Aprendi A Fazer Sexo Na Bíblia (Portuguese Edition)
") Aprendi A Fazer Sexo Na Bíblia (Portuguese Edition) Salomão Silva Click here if your download doesn"t start automatically Aprendi A Fazer Sexo Na Bíblia (Portuguese Edition) Salomão Silva Aprendi A Fazer
Aprendi A Fazer Sexo Na Bíblia (Portuguese Edition) Salomão Silva Click here if your download doesn"t start automatically Aprendi A Fazer Sexo Na Bíblia (Portuguese Edition) Salomão Silva Aprendi A Fazer
Manual do Usuário User Manual
 www.multilaser.com.br Manual do Usuário User Manual Índice/ Index ÍNDICE PORTUGUÊS Introdução...3 Descrição...3 Receptor...3 Transmissor...4 Configurando a Babá Eletrônica Baby Sound...4 1 Inserindo as
Métodos Formais em Engenharia de Software. VDMToolTutorial
 Métodos Formais em Engenharia de Software VDMToolTutorial Ana Paiva apaiva@fe.up.pt www.fe.up.pt/~apaiva Agenda Install Start Create a project Write a specification Add a file to a project Check syntax
Instructions. Instruções
 Instructions ENGLISH Instruções PORTUGUÊS This document is to help consumers in understanding basic functionality in their own language. Should you have any difficulty using any of the functions please
Guião N. Descrição das actividades
 Proposta de Guião para uma Prova Grupo: 006 Disciplina: Inglês, Nível de Continuação, 11.º ano Domínio de Referência: Um Mundo de Muitas Culturas Duração da prova: 15 a 20 minutos 1.º MOMENTO Guião N Intervenientes
Transformando Pessoas - Coaching, PNL e Simplicidade no processo de mudancas (Portuguese Edition)
") Transformando Pessoas - Coaching, PNL e Simplicidade no processo de mudancas (Portuguese Edition) Felippe / Marcelo Click here if your download doesn"t start automatically Transformando Pessoas - Coaching,
Transformando Pessoas - Coaching, PNL e Simplicidade no processo de mudancas (Portuguese Edition) Felippe / Marcelo Click here if your download doesn"t start automatically Transformando Pessoas - Coaching,
Gestão da comunicação - Epistemologia e pesquisa teórica (Portuguese Edition)
") Gestão da comunicação - Epistemologia e pesquisa teórica (Portuguese Edition) Maria Cristina Castilho Costa, Maria Aparecida Baccega Click here if your download doesn"t start automatically Download and
Gestão da comunicação - Epistemologia e pesquisa teórica (Portuguese Edition) Maria Cristina Castilho Costa, Maria Aparecida Baccega Click here if your download doesn"t start automatically Download and
Leica Sprinter 50 / 150 / 150M / 250M Push the Button
 Leica Sprinter 50 / 150 / 150M / 250M Push the Button Leica Sprinter 50 / 150 Construction Levels Product Offering Sprinter 50 (Standard / US) Art. No. 762628 / 764686 Sprinter 50, 2.0 mm, electronic level
WWW.ADINOEL.COM Adinoél Sebastião /// Inglês Tradução Livre 1/2014
 PASSO A PASSO DO DYNO Ao final desse passo a passo você terá o texto quase todo traduzido. Passo 1 Marque no texto as palavras abaixo. (decore essas palavras, pois elas aparecem com muita frequência nos
SAP911. Acondicionador de aire portátil Ar condicionado portátil Portable Air Conditioner. Manual do utilizador
 ES PT EN SAP911 Acondicionador de aire portátil Ar condicionado portátil Portable Air Conditioner ES Manual del usuario PT Manual do utilizador EN User Manual ES Gracias por elegir este acondicionador
Wi-Fi 3-in-1 Trio Sensor Add-on Device Quickstart Guide
 Wi-Fi 3-in-1 Trio Sensor Add-on Device Quickstart Guide Model No. WTS3100 What s inside: 1 x Wi-Fi 3-in-1 Trio Sensor 7 x Double-sided Tapes 4 x Mounting Screws 1 x Battery (CR123A) All Home8 add-on devices
LIGHT PANEL CONTENTS Light Panel Power supply Fixtures (brackets, screws)
") Page 1 of 8 LIGHT PANEL 20367 CONTENTS Light Panel Power supply Fixtures (brackets, screws) ABOUT THIS PRODUCT The Light Panel may be used on a table top as a free-standing object, or mounted either horizontally
Page 1 of 8 LIGHT PANEL 20367 CONTENTS Light Panel Power supply Fixtures (brackets, screws) ABOUT THIS PRODUCT The Light Panel may be used on a table top as a free-standing object, or mounted either horizontally
Manual de instruções para Caixa Coletora Johnson Pump
 Manual de instruções para Caixa Coletora Johnson Pump Em caso dúvidas na instalação após a leitura do manual, favor entrar em contato com nosso departamento técnico através do telefone: (11) 3477-5655
1 a M5 x 12mm. Neo-Flex LCD Stand A B C ASSEMBLY INSTRUCTIONS INSTRUCCIONES DE INSTALACIÓN NOTICE D ASSEMBLAGE INSTRUÇÕES DE MONTAGEM.
 Neo-Flex LCD Stand ASSEMBLY INSTRUCTIONS INSTRUCCIONES DE INSTALACIÓN NOTICE D ASSEMBLAGE INSTRUÇÕES DE MONTAGEM 5" (127 mm) height range Rango de ajuste en altura: 5 (127 mm) Ajustement en hauteur sur
How are you? Activity 01 Warm up. Activity 02 Catch! Objective. Procedure. Objective. Preparation. Procedure. To warm-up and practice greetings.
 Activity 01 Warm up Objective To warm-up and practice greetings. 1. Make sure you re in the room before the Ss. 2. Greet Ss as they enter the room using How are you?, How are you doing?, What s up?. 3.
Meditacao da Luz: O Caminho da Simplicidade
 Meditacao da Luz: O Caminho da Simplicidade Leonardo Boff Click here if your download doesn"t start automatically Meditacao da Luz: O Caminho da Simplicidade Leonardo Boff Meditacao da Luz: O Caminho da
Farmacologia na Pratica de Enfermagem (Em Portuguese do Brasil)
") Farmacologia na Pratica de Enfermagem (Em Portuguese do Brasil) Click here if your download doesn"t start automatically Farmacologia na Pratica de Enfermagem (Em Portuguese do Brasil) Farmacologia na Pratica
Farmacologia na Pratica de Enfermagem (Em Portuguese do Brasil) Click here if your download doesn"t start automatically Farmacologia na Pratica de Enfermagem (Em Portuguese do Brasil) Farmacologia na Pratica
manual controle xbox 360 portugues
 manual controle xbox 360 portugues Print and Online Should you be particular with knowing everything about this, you need to find these details. MANUAL CONTROLE XBOX 360 PORTUGUES The following option
Easy Linux! FUNAMBOL FOR IPBRICK MANUAL. IPortalMais: a «brainware» company www.iportalmais.pt. Manual
 IPortalMais: a «brainware» company FUNAMBOL FOR IPBRICK MANUAL Easy Linux! Title: Subject: Client: Reference: Funambol Client for Mozilla Thunderbird Doc.: Jose Lopes Author: N/Ref.: Date: 2009-04-17 Rev.:
1. Product Name. 2. Product Code. 3. Colour. 4. Brief Description. 5. Contents. 6. Snoezelen Stimulations. Fibre Optic UFO
 1. Product Name Fibre Optic UFO 2. Product Code 16692 3. Colour Transparent base*; white fibres * Base may be silver-coloured, subject to availability 4. Brief Description Captivating, fine fibre optics.
LINK 2. Timeless Design Design Intemporel Diseño Intemporal. Simple Lines Lignes Simples Líneas simples. White Colour Couleur Blanc Color Blanco
 LINK DREAM LINE Design Intemporal Timeless Design Design Intemporel Diseño Intemporal Linhas Simples Simple Lines Lignes Simples Líneas simples Cor Branca White Colour Couleur Blanc Color Blanco FIL_02_2018
Como Mudar a Senha do Roteador Pelo IP o.1.1. Configure e Altere a Senha do seu Roteador acessando o IP Acesse o Site e Confira!
 Como Mudar a Senha do Roteador Pelo IP 192.168.o.1.1. Configure e Altere a Senha do seu Roteador acessando o IP 192.168.1.1. Acesse o Site e Confira! If you are using the IP address 192.168.0.1.1, take
Getting started with Première utilisation Logitech Stereo Speakers Z110
 Getting started with Première utilisation Logitech Stereo Speakers Z110 Getting started with Première utilisation Logitech Stereo Speakers Z110 2 2 1 English Basic setup You will need to adjust the volume
Descrição das actividades
 Proposta de Guião para uma Prova Grupo: Água Disciplina: Inglês, Nível de Continuação, 11.º ano Domínio de Referência: O Mundo do Trabalho Duração da prova: 15 a 20 minutos Guião E 1.º MOMENTO Intervenientes
MANUAL DE INSTRUÇÕES RELÓGIOS GUESS 1 FEMININOS
 MANUAL DE INSTRUÇÕES RELÓGIOS GUESS 1 FEMININOS FEMININOS 2 FEMININOS Parabéns pela aquisição do seu novo relógio GUESS. Desenvolvido com tecnologia avançada de eletrônicos, o mecanismo é manufaturado
Vendors Enquiries for RFP 003/2015
 Date: 22/10/2015 Vendors Enquiries for RFP 003/2015 1) Question I am afraid the terms of the RFP cannot be complied by none of the companies we work with, the terms have limited the underwriters ability