A B C D G H 1800W. SalonDry 'n Straight
|
|
|
- Lorenzo Antunes Santiago
- 6 Há anos
- Visualizações:
Transcrição
1 HP4867
2
3 1 A B C D E F SalonDry 'n Straight 1800W G H I
4
5 English 6 Français 13 Português do Brasil HP4867
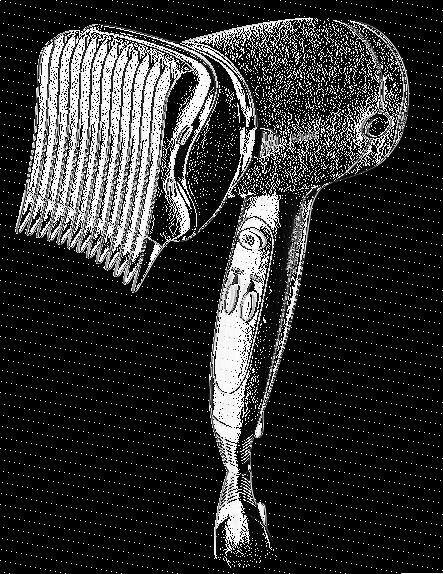
6 6 English Introduction The Salon Dry n Straight from Philips has been specially designed to dry and straighten your hair at the same time. The straightening attachment allows you to dry and straighten your hair quickly and effectively every day, giving you perfectly straight, healthy and shiny hair in the easiest way. You can visit our website at for more information about this product or other Philips products. General description (Fig. 1) A Straightening attachment B Air outlet grille C Release buttons D Removable air inlet grille E Concentrator F Cool shot button G Airflow slide switch H Temperature slide switch I Hanging loop Important Read this user manual carefully before you use the appliance and save it for future reference. Check if the voltage indicated on the appliance corresponds to the local mains voltage before you connect the appliance. Check the condition of the mains cord regularly. Do not use the appliance if the plug, the mains cord or the appliance itself is damaged. If the mains cord is damaged, you must have it replaced by Philips, a service centre authorised by Philips or similarly qualified persons in order to avoid a hazard. Keep the appliance away from water. Do not use it near or over water contained in baths, washbasins, sinks etc. When you use the appliance in a bathroom, unplug it after use. The proximity of water presents a risk, even when the appliance is switched off. For additional protection, we advise you to install a residual current device (RCD) in the electrical circuit that supplies the bathroom. This
7 English RCD must have a rated residual operating current not higher than 30mA. Ask your installer for advice. This appliance is not intended for use by persons (including children) with reduced physical, sensory or mental capabilities, or lack of experience and knowledge, unless they have been given supervision or instruction concerning use of the appliance by a person responsible for their safety. Children should be supervised to ensure that they do not play with the appliance. Never block the air grilles. If the appliance overheats, it switches off automatically. Unplug the appliance and let it cool down for a few minutes. Before you switch the appliance on again, check the grilles to make sure they are not blocked by fluff, hair, etc. Always switch off the appliance before you put it down, even if it is only for a moment. Always unplug the appliance after use. Do not wind the mains cord round the appliance. You may notice a characteristic odour when you use this hairdryer. This odour is caused by the ions that are generated and is not harmful to the human body. Do not probe the ion generator with metal objects. Do not use the appliance on artificial hair. Never use any accessories or parts from other manufacturers or that Philips does not specifically recommend. If you use such accessories or parts, your guarantee becomes invalid. Do not insert metal objects into the air grilles to avoid electric shock. Electromagnetic fields (EMF) This Philips appliance complies with all standards regarding electromagnetic fields (EMF). If handled properly and according to the instructions in this user manual, the appliance is safe to use based on scientific evidence available today.
8 8 English Using the appliance Drying The hairdryer is equipped with an automatic ion function that is always on when the hairdryer is operating. The negative ions neutralise static electricity in the hair, making it sleek, manageable and shiny. 1 Put the plug in the wall socket. 2 Select the desired airflow setting to switch on the appliance. Set the slide switch to airflow setting II for ultraquick drying. Set the slide switch to airflow setting I for drying short hair or styling your hair. 3 Set the temperature slide switch to the cool, warm or hot setting. 6 Hot setting The hot setting allows you to dry showerwet hair very quickly and safely until it is damp. 5 Warm setting The warm setting is especially suitable for drying damp hair until it is almost dry. 4 Cool setting The cool setting allows you to gently dry hair that is almost dry and helps to seal in shine. Tip: Press the cool shot button and direct the cool airflow at your hair to fix your style and to add shine. 4 Dry your hair by making brushing movements with the hairdryer at a small distance from the hair. Attachments Concentrator The concentrator enables you to direct the airflow straight at your hair while you dry it. 1 Snap the concentrator onto the appliance. 2 To put the concentrator in the required position, press both release buttons and turn the concentrator.
9 English 3 Dry your hair by making brushing movements with the hairdryer at a small distance from your hair. 4 To disconnect the concentrator, press both release buttons simultaneously (1) and pull the concentrator off the appliance (2). (Fig. 2) Straightening attachment The straightening attachment is specially designed to straighten your hair while you dry it. For optimum care, the operating temperature of the hairdryer is limited when the straightening attachment is attached. 1 Snap the straightening attachment onto the appliance. 2 To put the straightening attachment in the required position, press both release buttons and turn the straightening attachment. 3 Put the tips of the straightening attachment on your scalp at the roots of the lock to catch the hair in the comb. 4 Pull the straightening attachment downwards through the lock of hair. (Fig. 3) Note: Always hold the tip of the lock when you pull the straightening attachment through it., The pivoting head optimally guides the hair through the straightening attachment., The flocked area at the top of the straightening attachment adds shine to the hair after the comb has straightened it. 5 Repeat steps 2 to 4 with other locks until you have straightened and dried all your hair. 6 To disconnect the straightening attachment, press both release buttons simultaneously (1) and pull the straightening attachment off the appliance (2) (Fig. 4).
10 10 English Cleaning and maintenance Always unplug the appliance before you clean it. Do not immerse the appliance in water or any other liquid, nor rinse it under the tap. 1 Clean the appliance with a dry cloth. 2 Remove the attachments from the appliance before you clean them. 3 Clean the concentrator with a moist cloth or rinse it under the tap. 4 Clean the straightener with a moist cloth. 5 Make sure the attachments are dry before you use or store them. Storage Always unplug the appliance before you store it. Do not wind the mains cord round the appliance. 1 Put the appliance in a safe place and let it cool down. 2 You can store the appliance by hanging it from its hanging loop. Environment Do not throw away the appliance with the normal household waste at the end of its life, but hand it in at an official collection point for recycling. By doing this, you help to preserve the environment (Fig. 5). Guarantee and service If you need information or if you have a problem, please visit the Philips website at or contact the Philips Customer Care Centre in your country (you find its phone number in the worldwide guarantee leaflet). If there is no Customer Care Centre in your country, go to your local Philips dealer or contact the Service Department of Philips Domestic appliances and Personal Care BV.
11 Troubleshooting If problems arise with your hairdryer and you are unable to solve them with the information below, contact the nearest Philips service centre or the Philips Customer Care Centre in your country. Problem Cause Solution The appliance does not work at all. Perhaps the socket to which the appliance is connected is not live. The appliance may have overheated and switched itself off. The appliance may not be suitable for the voltage to which it is connected. The mains cord of the appliance may be damaged. Make sure the socket is live. English 11 Unplug the appliance and let it cool down for a few minutes. Before you switch on the appliance again, check the grilles to make sure they are not blocked by fluff, hair, etc. Make sure that the voltage indicated on the type plate of the appliance corresponds to the local mains voltage. If the mains cord is damaged, you must have it replaced by Philips, a service centre authorised by Philips or similarly qualified persons in order to avoid a hazard.
12 12 English Problem Cause Solution The hot temperature setting is not hotter than the warm temperature setting. The hair is not straightened properly. When the straightening attachment is attached, the appliance switches off during use. The airflow through the straightening attachment is blocked because there is too much hair in the attachment. For optimum care, the operating temperature of the hairdryer is limited when the straightening attachment is attached. When you remove the straightening attachment, the hot setting will be hotter than the warm setting again. Always hold the tip of the lock when you pull the straightening attachment through it. Straighten thinner locks of hair.
13 Français 13 Introduction Le Salon Dry n Straight de Philips a été spécialement conçu pour sécher et lisser vos cheveux en même temps. Le fer à lisser vous permet de sécher et lisser vos cheveux tous les jours rapidement et efficacement. Vos cheveux sont lisses, brillants et sains en un tour de main! Visitez notre site Web à l adresse pour obtenir de plus amples informations sur ce produit ou sur d autres produits Philips. Description générale (fig. 1) A Fer à lisser B Grille de sortie d air C Boutons de déverrouillage D Grille d entrée d air amovible E Concentrateur F Bouton du flux d air froid G Interrupteur du flux d air H Thermostat I Crochet de suspension Important Lisez attentivement ce mode d emploi avant d utiliser l appareil et conservezle pour un usage ultérieur. Avant de brancher l appareil, vérifiez que la tension indiquée sur l appareil correspond à la tension secteur locale. Vérifiez régulièrement le cordon d alimentation. N utilisez jamais l appareil si la fiche, le cordon d alimentation ou l appareil luimême est endommagé. Si le cordon d alimentation est endommagé, il doit être remplacé par Philips, un Centre Service Agréé ou un technicien qualifié afin d éviter tout accident. Tenez l appareil à l écart de l eau. Ne l utilisez pas près d une baignoire, d un lavabo ou d un évier. Si vous utilisez l appareil dans la salle de bain, débranchezle après usage car la proximité de l eau peut présenter un risque pour l utilisateur même si l appareil est éteint.
14 14 Français Pour plus de sécurité, il est conseillé de brancher l appareil sur une prise de courant protégée par un disjoncteur différentiel de 30 ma dans la salle de bain. Demandez conseil à votre électricien. Cet appareil n est pas destiné à être utilisé par des personnes (notamment des enfants) dont les capacités physiques, sensorielles ou intellectuelles sont réduites, ou par des personnes manquant d expérience ou de connaissances, à moins que cellesci ne soient sous surveillance ou qu elles aient reçu des instructions quant à l utilisation de l appareil par une personne responsable de leur sécurité. Veillez à ce que les enfants ne puissent pas jouer avec l appareil. N obstruez jamais les grilles. En cas de surchauffe, l appareil s éteint automatiquement. Débranchezle et laissezle refroidir pendant quelques minutes. Avant de remettre l appareil sous tension, vérifiez que les grilles ne sont pas obstruées par des cheveux, de la poussière, etc. Éteignez toujours l appareil avant de le poser, même pour un court instant. Débranchez toujours l appareil après utilisation. N enroulez pas le cordon d alimentation autour de l appareil. Lorsque vous utilisez le sèchecheveux, vous pouvez remarquer une odeur caractéristique. Cette odeur est due aux ions générés et n est absolument pas nocive. Ne mettez pas le diffuseur d ions en contact avec des objets métalliques. N utilisez pas l appareil sur cheveux artificiels. N utilisez jamais d accessoires, ni de pièces d autres fabricants ou qui n ont pas été spécifiquement recommandés par Philips. Votre garantie ne sera pas valable en cas d utilisation de tels accessoires ou pièces. N insérez jamais d objets métalliques dans les grilles afin d éviter toute électrocution. Champs électromagnétiques (CEM) Cet appareil Philips est conforme à toutes les normes relatives aux champs électromagnétiques (CEM). Il répond aux règles de sécurité établies sur la base des connaissances scientifiques actuelles s il est
15 Français 15 manipulé correctement et conformément aux instructions de ce mode d emploi. Utilisation de l appareil Séchage En cours d utilisation, le système ionisant automatique du sèchecheveux est toujours activé. Les ions négatifs neutralisent l électricité statique des cheveux, les rendant ainsi lisses, faciles à coiffer et brillants. 1 Branchez le cordon d alimentation sur la prise secteur. 2 Mettez l appareil en marche en sélectionnant le flux d air de votre choix. Réglez l interrupteur sur la position II pour un séchage ultrarapide. Réglez l interrupteur sur la position I pour le séchage de cheveux courts ou pour une mise en forme. 3 Positionnez le thermostat sur le réglage froid, modéré ou chaud. 6 Chaud Le réglage chaud permet de sécher des cheveux mouillés rapidement et en toute sécurité jusqu à ce qu ils soient juste humides. 5 Modéré Le réglage modéré convient particulièrement au séchage des cheveux humides jusqu à ce qu ils soient presque secs. 4 Froid Le réglage froid permet de sécher en douceur les cheveux presque secs et à leur donner de la brillance. Conseil : Appuyez sur le bouton du flux d air froid et dirigez le flux d air froid vers vos cheveux pour fixer votre mise en forme et obtenir des cheveux plus brillants. 4 Séchez vos cheveux en déplaçant le sèchecheveux du haut vers le bas en le tenant à une courte distance de vos cheveux.
16 16 Français Accessoires Concentrateur Le concentrateur vous permet de diriger le flux d air vers vos cheveux pendant que vous les sécher. 1 Fixez le concentrateur sur l appareil. 2 Pour placer le concentrateur dans la position souhaitée, appuyez sur les deux boutons de déverrouillage, puis faitesle pivoter. 3 Lors du séchage, déplacez le sèchecheveux du haut vers le bas en le tenant à courte distance de vos cheveux. 4 Pour détacher le concentrateur, appuyez sur les deux boutons de déverrouillage en même temps (1), puis retirezle de l appareil (2). (fig. 2) Fer à lisser Le fer à lisser est spécifiquement conçu pour lisser vos cheveux pendant que vous les séchez. Pour une protection optimale, la température de fonctionnement du sèchecheveux est limitée lorsque le fer à lisser est fixé sur l appareil. 1 Fixez le fer à lisser sur l appareil. 2 Pour placer le fer à lisser dans la position souhaitée, appuyez sur les deux boutons de déverrouillage, puis faitesle pivoter. 3 Posez les dents du fer à lisser sur votre cuir chevelu et insérez une mèche dans le sabot depuis la racine. 4 Faites glisser le fer à lisser le long de la mèche. (fig. 3) Remarque : Veillez à toujours tenir le bout de la mèche de cheveux lorsque vous la lisser à l aide du fer., La tête pivotante vous permet de guider de manière très précise vos cheveux lors du passage du fer à lisser., La surface floquée sur la partie supérieure du fer à lisser vous permet de faire briller vos cheveux après les avoir lissé.
17 5 Répétez les étapes 2 à 4 sur d autres mèches jusqu à ce que vos cheveux soient complètement lisses et secs. 6 Pour détacher le fer à lisser, appuyez sur les deux boutons de déverrouillage en même temps (1), puis retirezle de l appareil (2) (fig. 4). Nettoyage et entretien Français 17 Débranchez toujours l appareil avant de le nettoyer. Ne plongez jamais l appareil dans l eau, ni dans d autres liquides et ne le rincez pas. 1 Nettoyez l appareil avec un chiffon sec. 2 Retirez les accessoires de l appareil avant de les nettoyer. 3 Nettoyez le concentrateur avec un chiffon humide ou rincezle à l eau. 4 Nettoyez le fer à lisser avec un chiffon humide. 5 Assurezvous que les accessoires sont secs avant de les utiliser ou de les stocker. Rangement Débranchez toujours l appareil avant de le ranger. N enroulez pas le cordon d alimentation autour de l appareil. 1 Posez l appareil dans un endroit sûr et laissezle refroidir. 2 Vous pouvez ranger l appareil en l accrochant par son crochet de suspension. Environnement Lorsqu il ne fonctionnera plus, ne jetez pas l appareil avec les ordures ménagères, mais déposezle à un endroit assigné à cet effet, où il pourra être recyclé. Vous contribuerez ainsi à la protection de l environnement (fig. 5).
18 18 Français Garantie et service Si vous souhaitez obtenir des informations supplémentaires ou si vous rencontrez un problème, visitez le site Web de Philips à l adresse ou contactez le Service Consommateurs Philips de votre pays (vous trouverez le numéro de téléphone correspondant sur le dépliant de garantie internationale). S il n existe pas de Service Consommateurs Philips dans votre pays, renseignezvous auprès de votre revendeur local ou contactez le «Service Department of Philips Domestic Appliances and Personal Care BV». Dépannage Si vous rencontrez des problèmes avec votre sèchecheveux et que vous ne pouvez pas les résoudre à l aide des informations cidessous, adressezvous à un Centre Service Agréé Philips ou au Service Consommateurs Philips de votre pays. Problème Cause Solution L appareil ne fonctionne pas. La prise sur laquelle l appareil est branché n est peutêtre pas alimentée. L appareil était peutêtre en surchauffe et s est arrêté automatiquement. L appareil n est peutêtre pas connecté sur la tension correcte. Vérifiez si la prise est alimentée. Débranchez l appareil et laissezle refroidir pendant quelques minutes. Avant de remettre l appareil sous tension, vérifiez que les grilles ne sont pas obstruées par des cheveux, de la poussière, etc. Assurezvous que la tension indiquée sur l appareil correspond bien à la tension de votre secteur.
19 Problème Cause Solution Le réglage de la température chaude est inférieur au réglage de la température modérée. Les cheveux ne sont pas lissés correctement. Lorsque le fer à lisser est fixé, l appareil s éteint pendant l utilisation. Le cordon d alimentation de l appareil est peutêtre endommagé. Le flux d air est bloqué à travers le fer à lisser, car la mèche est trop épaisse. Français 19 Si le cordon d alimentation est endommagé, il doit être remplacé par Philips, un Centre Service Agréé ou un technicien qualifié afin d éviter tout accident. Pour une protection optimale, la température de fonctionnement du sèchecheveux est limitée lorsque le fer à lisser est fixé. Lorsque vous retirez le fer à lisser, le réglage chaud sera à nouveau supérieur au réglage modéré. Veillez à toujours tenir le bout de la mèche de cheveux lorsque vous la lisser à l aide du fer. Lissez des mèches moins épaisses.
20 20 Português do Brasil Introdução O Salon Dry n Straight da Philips foi especialmente projetado para secar a alisar os cabelos ao mesmo tempo. O pente alisador seca e alisa os cabelos de forma rápida e eficiente todos os dias, deixandoos perfeitamente lisos, saudáveis e brilhantes com total facilidade. Visite nosso site em para obter mais informações sobre este e outros produtos Philips. Descrição geral (fig. 1) A Pente alisador B Grade de saída de ar C Botões de liberação D Grade de entrada de ar removível E Concentrador F Botão do jato de ar frio G Controle deslizante do fluxo de ar H Controle deslizante de temperatura I Argola para pendurar Importante Leia este manual atentamente antes de usar o aparelho e guardeo para consultas futuras. Antes de ligar o aparelho, verifique se a voltagem indicada no aparelho corresponde à voltagem do local. Verifique regularmente o fio. Não utilize o aparelho se o plugue, o fio e/ou o próprio aparelho estiverem danificados. Se o fio estiver danificado, deverá ser substituído pela Philips, por uma das assistências técnicas autorizadas da Philips ou por técnicos igualmente qualificados para evitar situações de risco. Mantenha o aparelho longe da água. Não coloqueo próximo ou sobre a água contida em banheiras, bacias, pias, etc. Quando usar o aparelho no banheiro, tireo da tomada após o uso. A proximidade da água é um risco, mesmo quando o aparelho está desligado. Para obter proteção adicional, recomendamos instalar um dispositivo de corrente residual (RCD) no circuito elétrico do banheiro. O RCD
21 Português do Brasil 21 deve ter uma corrente de operação residual não superior a 30 ma. Peça informações ao instalador profissional. Este aparelho não deve ser usado por pessoas (inclusive crianças) com capacidades físicas, mentais ou sensoriais reduzidas ou pouca experiência e conhecimento, a menos que sejam supervisionadas ou instruídas sobre o uso do aparelho por uma pessoa responsável por sua segurança. Crianças pequenas devem ser supervisionadas para que não brinquem com o aparelho. Nunca obstrua as grades de ar. Se o aparelho superaquecer, ele se desligará automaticamente. Desconecteo e deixeo esfriar por alguns minutos. Antes de ligálo novamente, verifique as grades para ter certeza de que não estão bloqueadas com felpos, cabelos, etc. Antes de colocar o secador de lado, mesmo que seja apenas por breves instantes, desligueo. Sempre desligue o aparelho após o uso. Não enrole o fio em volta do aparelho. Você poderá perceber um odor característico quando usar este secador de cabelos. Esse odor é causado pelos íons gerados e não é prejudicial ao corpo humano. Não toque no gerador de íons com objetos de metal. Não use o aparelho em cabelos artificiais. Nunca use acessórios ou peças de outros fabricantes ou que não sejam especificamente recomendados pela Philips. O uso dos mesmos invalida a garantia. Não insira objetos de metal nas grades de ar para evitar choque elétrico. Campos eletromagnéticos Este aparelho Philips atende a todos os padrões relacionados a campos eletromagnéticos. Se manuseado adequadamente e de acordo com as instruções deste manual do usuário, a utilização do aparelho é segura baseandose em evidências científicas atualmente disponíveis.
22 22 Português do Brasil Utilização do aparelho Secagem O secador vem equipado com uma função de íon automática que está sempre ligada quando o secador está em operação. Os íons negativos neutralizam a eletricidade estática nos cabelos, fazendo com que fiquem lisos, maleáveis e brilhantes. 1 Conecte o plugue à tomada elétrica. 2 Selecione o ajuste de fluxo de ar desejado para ligar o aparelho. Ajuste o controle deslizante para o fluxo de ar II para uma secagem ultrarápida. Ajuste o controle deslizante para o fluxo de ar I para secar cabelos curtos ou modelar os cabelos. 3 Ajuste o controle deslizante de temperatura para o fluxo de ar frio, morno ou quente. 6 Quente O ajuste quente permite secar muito rapidamente e com segurança cabelos recémsaídos do banho até que fiquem úmidos. 5 Morno O ajuste morno é especialmente adequado para secar cabelos úmidos até que fiquem quase secos. 4 Frio O ajuste frio permite que você seque com suavidade cabelos quase secos, além de ajudar a dar um brilho incrível. Dica: Pressione o botão do jato de ar frio e direcione o fluxo de ar para os cabelos para fixar o penteado e dar brilho. 4 Seque os cabelos efetuando movimentos de escovação com o secador a uma pequena distância dos cabelos. Acessórios Concentrador O concentrador permite direcionar o fluxo de ar diretamente sobre os cabelos durante a secagem.
23 1 Encaixe o concentrador no aparelho. 2 Para colocar o concentrador na posição correta, pressione os botões de liberação e gireo. 3 Seque o cabelo efetuando movimentos de escovação com o secador a uma pequena distância dos cabelos. 4 Para desconectálo, pressione os botões de liberação simultaneamente (1) e puxeo do aparelho (2). (fig. 2) Pente alisador O pente alisador foi especialmente projetado para alisar os cabelos durante a secagem. Para um cuidado perfeito, a temperatura operacional do secador é limitada quando o pente alisador está encaixado. 1 Encaixe o pente alisador no aparelho. Português do Brasil 23 2 Para colocar o pente alisador na posição correta, pressione os botões de liberação e gireo. 3 Enfie as pontas do pente alisador rentes ao couro cabeludo para alisar a mecha de cabelo desde a raiz. 4 Deslize o pente alisador para baixo ao longo da mecha. (fig. 3) Nota: Sempre segure a ponta da mecha quando deslizar o pente alisador., A cabeça giratória guia o cabelo pelo pente alisador., A área porosa na parte superior do alisador dá um brilho extra aos cabelos depois que o pente os alisa. 5 Repita as etapas de 2 a 4 com outras mechas até secar a alisar todo o cabelo. 6 Para desconectar o pente alisador, pressione os botões de liberação simultaneamente (1) e puxeo do aparelho(2) (fig. 4).
24 24 Português do Brasil Limpeza e manutenção Sempre desligue o aparelho da tomada antes de limpálo. Não mergulhe o aparelho na água nem em outro líquido e não laveo em água corrente. 1 Limpe o secador com um pano seco. 2 Retire os acessórios do secador antes de limpálos. 3 Limpe o concentrador com um pano úmido ou laveo em água corrente. 4 Limpe o pente alisador com um pano úmido. 5 Verifique se os acessórios estão completamente secos antes de usálos ou guardálos. Para guardar a aparelho Sempre desligue o aparelho da tomada antes de guardálo. Não enrole o fio em volta do aparelho. 1 Coloque o secador em local seguro e deixeo esfriar. 2 Você pode guardálo pendurandoo pela argola. Meio ambiente Não descarte o aparelho com o lixo doméstico no final de sua vida útil. Leveo a um posto de coleta oficial para que possa ser reciclado. Com esse ato, você ajuda a preservar o meio ambiente (fig. 5). Garantia e assistência técnica Se necessitar de informações ou tiver algum problema, visite a página da Philips em ou contate o Atendimento ao Cliente Philips do seu país (os números de telefone encontramse no folheto da garantia mundial). Se não existir um Atendimento ao Cliente Philips no seu país, dirijase a um representante local da Philips ou contate o
25 Departamento de Assistência Técnica de Eletrodomésticos e Cuidados Pessoais Philips. Resolução de problemas Se surgir um problema com o secador e você não conseguir solucionálo com as informações a seguir, entre em contato com a assistência técnica autorizada da Philips mais próxima ou com o Atendimento ao Cliente Philips do seu país. Problema Causa Solução O secador não funciona. Talvez a tomada à qual o aparelho está conectado não esteja alimentada. O secador pode ter superaquecido e desligado automaticamente. O secador pode não ser adequado à voltagem do local onde está ligado. Português do Brasil 25 Verifique se a tomada está alimentada. Desconecte o aparelho e deixeo esfriar por alguns minutos. Antes de ligálo novamente, verifique as grades para ter certeza de que não estão bloqueadas com felpos, cabelos, etc. Certifiquese de que a voltagem indicada na placa do modelo do secador corresponde à voltagem do local onde o secador está sendo utilizado.
26 26 Português do Brasil Problema Causa Solução O ajuste de temperatura quente não é mais quente do que o ajuste de temperatura morna. O cabelo não foi alisado corretamente. Quando o pente alisador está encaixado, o aparelho desliga durante o uso. O fio do secador pode estar danificado. Quando a mecha de cabelo no pente alisador é muito grossa, o fluxo de ar é bloqueado. Se o fio estiver danificado, deverá ser substituído pela Philips, por uma das assistências técnicas autorizadas da Philips ou por técnicos igualmente qualificados para evitar situações de risco. Para um cuidado perfeito, a temperatura operacional do secador é limitada quando o pente alisador está encaixado. Quando o pente alisador for removido, o ajuste quente será mais quente do que o ajuste morno novamente. Sempre segure a ponta da mecha quando deslizar o pente alisador. Alise mechas mais finas.
27 27
28 28
29 29
30 30
31 31
32 32
33 33
34 34
35 35
36 36
37 37
38 38
39 39
40 40
41 41
42
43 43
44 u
HP4931, HP
 HP4931, HP4930 2 3 4 5 English Introduction Congratulations on your purchase and welcome to Philips! To fully benefit from the support that Philips offers, register your product at www.philips. com/welcome.
 Register your product and get support at www.philips.com/welcome HP8180/80 HP8180/81 HP8182/80 HP8182/81 PT-BR Manual do utilizador PT-BR Parabéns pela aquisição e seja bem-vindo à Philips! Para aproveitar
Hairdryer. Register your product and get support at HP4962/22 HP4961/22. Manual do utilizador
 Register your product and get support at www.philips.com/welcome Hairdryer HP4962/22 HP4961/22 PT Manual do utilizador Português Parabéns pela aquisição e seja bem-vindo à Philips! Para aproveitar todos
Hairdryer. Register your product and get support at HP8100/04. PT-BR Manual do Usuário
 Register your product and get support at www.philips.com/welcome Hairdryer HP8100/04 PT-BR Manual do Usuário a b c d Português Parabéns pela aquisição e seja bem-vindo à Philips! Para aproveitar todos
HP4897, HP4892, HP4891, HP4890
 HP4897 HP4892 HP4891 HP4890 1 2 3 4 5 6 7 8 9 10 ENGLISH Introduction Philips Salon Pro is a powerful hairdryer with a professional design and performance. Moreover this hairdryer has features that protect
Staightener. Manual do utilizador. Register your product and get support at HP8309/00 HP8310/00
 Register your product and get support at www.philips.com/welcome Staightener HP8309/00 HP8310/00 PT-BR Manual do utilizador d e c b a PT-BR Parabéns pela aquisição e seja bem-vindo à Philips! Para aproveitar
3 Select the desired setting to switch on the
 HP4940 1 2 3 4 5 6 ENGLISH Introduction Congratulations on your purchase and welcome to Philips! To fully benefit from the support that Philips offers, register your product at www.philips.com/welcome.
Register your product and get support at Straightener HP8333. Manual do Usuário
 Register your product and get support at www.philips.com/welcome Straightener HP8333 PT-BR Manual do Usuário e f d c b a Português Parabéns pela aquisição e seja bem-vindo à Philips! Para aproveitar todos
Straightener. Register your product and get support at HP8297. PT-BR Manual do Usuário
 Register your product and get support at www.philips.com/welcome Straightener HP8297 PT-BR Manual do Usuário a b cd e g f h i Português Parabéns pela aquisição e seja bem-vindo à Philips! Para aproveitar
Hairdryer. Register your product and get support at HP4867/00. Manual do utilizador
 Register your product and get support at www.philips.com/welcome Hairdryer HP4867/00 PT Manual do utilizador b c d e i h g f a Português Parabéns pela compra do seu produto e bem-vindo à Philips! Para
Straightener. PT-BR Manual do Usuário. Register your product and get support at HP8361/00
 Register your product and get support at www.philips.com/welcome Straightener HP8361/00 PT-BR Manual do Usuário a b c d e + -- --- f g h i j k l PT-BR Parabéns pela aquisição e seja bem-vindo à Philips!
Hairdryer HP4984 HP4983 HP4982 HP4981 HP Register your product and get support at. Manual do utilizador
 Register your product and get support at www.philips.com/welcome Hairdryer HP4984 HP4983 HP4982 HP4981 HP4980 PT Manual do utilizador 7k j 7l i a h b c d e f g Português 1 Importante Leia cuidadosamente
Register your product and get support at HP8665/80 HP8665/81. Mode d emploi
 Register your product and get support at www.philips.com/welcome HP8665/80 HP8665/81 FR-CA Mode d emploi A B C D E F G H I PT-BR 1 Introdução Parabéns pela aquisição e seja bem-vindo à Philips! Para aproveitar
Hairdryer. Register your product and get support at HP4935/00. Manual do utilizador
 Register your product and get support at www.philips.com/welcome Hairdryer HP4935/00 PT Manual do utilizador Português Parabéns pela compra do seu produto e bem-vindo à Philips! Para tirar o máximo partido
Hairdryer. Register your product and get support at HP8183 HP8182 HP8181 HP8180. Manual do utilizador
 Register your product and get support at www.philips.com/welcome Hairdryer HP8183 HP8182 HP8181 HP8180 PT Manual do utilizador Português Parabéns pela compra do seu produto e bem-vindo à Philips! Para
Hairdryer HP4993 HP4992 HP4991 HP4990. Register your product and get support at PT Manual do utilizador
 Register your product and get support at www.philips.com/welcome Hairdryer HP4993 HP4992 HP4991 HP4990 Manual do utilizador e f g d h b a c i j k Português Parabéns pela compra do seu produto e bem-vindo
Hairdryer. Register your product and get support at HP8296/00. Manual do utilizador
 Register your product and get support at www.philips.com/welcome Hairdryer HP8296/00 PT Manual do utilizador c d b e g a f Português Parabéns pela compra do seu produto e bem-vindo à Philips! Para tirar
Register your product and get support at Straightener HP8339. PT-BR Manual do Usuário
 Register your product and get support at www.philips.com/welcome Straightener HP8339 PT-BR Manual do Usuário l a b c d e f g h i j k Português 1 Introdução Parabéns pela aquisição e seja bem-vindo à Philips!
Hairdryer. Register your product and get support at. HP4935/00. Manual do utilizador
 Register your product and get support at www.philips.com/welcome Hairdryer HP4935/00 Manual do utilizador Português Parabéns pela compra do seu produto e bem-vindo à Philips! Para tirar o máximo partido
Hairdryer. Register your product and get support at HP8203 HP8202 HP8201 HP8200. Manual do utilizador
 Register your product and get support at www.philips.com/welcome Hairdryer HP8203 HP8202 HP8201 HP8200 PT Manual do utilizador Português Parabéns pela compra do seu produto e bem-vindo à Philips! Para
HP8180
 Register your product and get support at www.philips.com/welcome HP8180 PT Manual do utilizador Português Parabéns pela compra do seu produto e bem-vindo à Philips! Para tirar o máximo partido da assistência
Hairdryer. Register your product and get support at HP8183 HP8182 HP8181 HP8180. Manual do utilizador
 Register your product and get support at www.philips.com/welcome Hairdryer HP8183 HP8182 HP8181 HP8180 PT Manual do utilizador Português Parabéns pela compra do seu produto e bem-vindo à Philips! Para
Straightener. Register your product and get support at HP4686/22. Manual do utilizador
 Register your product and get support at www.philips.com/welcome Straightener HP4686/22 PT Manual do utilizador d e f c b a Português Parabéns pela compra do seu produto e bem-vindo à Philips! Para tirar
Staightener. Register your product and get support at HP8309/00 HP8310/00. Manual do utilizador
 Register your product and get support at www.philips.com/welcome Staightener HP8309/00 HP8310/00 PT Manual do utilizador d e c b a Português Parabéns pela compra do seu produto e bem-vindo à Philips! Para
Register your product and get support at HP8350. Manual do utilizador
 Register your product and get support at www.philips.com/welcome HP8350 PT Manual do utilizador Português Parabéns pela compra do seu produto e bem-vindo à Philips! Para tirar o máximo partido da assistência
Straightener. Register your product and get support at HP8341/00. Manual do utilizador
 Register your product and get support at www.philips.com/welcome Straightener HP8341/00 PT Manual do utilizador a b c d e f g h i Português Parabéns pela compra do seu produto e bem-vindo à Philips! Para
HP4668 B C A D J K L E F G I
 HP4668 B C A D J 1 2 3 4 5 6 7 K L E F G I H English Introduction The new Philips SalonStraight Seduce provides ultrafast and supersmooth straightening results. The EHD (Even Heat Distribution) Technology
HD1100 series. User manual
 1 HD1100 series User manual 2 3 4 5 6 4239.000.8216.2 English Introduction Congratulations on your purchase and welcome to Philips! To fully benefit from the support that Philips offers, register your
02/ REV.0 SOMENTE PARA USO DOMÉSTICO. Manual de Instruções
 /12 803-09-05 778125 REV.0 SOMENTE PARA USO DOMÉSTICO Manual de Instruções INTRODUÇÃO Parabéns pela escolha de um produto Philco. Para garantir o melhor desempenho deste produto, ler atentamente as instruções
Hairdryer HP8180. Register your product and get support at PT Manual do utilizador
 Register your product and get support at www.philips.com/welcome Hairdryer HP8180 PT Manual do utilizador Português Parabéns pela compra do seu produto e bem-vindo à Philips! Para tirar o máximo partido
08/ REV. 0. Manual de Instruções
 08/12 899-09-05 780557 REV. 0 Manual de Instruções INTRODUÇÃO Parabéns pela escolha do Secador de Cabelos Beauty Gloss. Para garantir o melhor desempenho do produto, ler atentamente as recomendações a
Straightener. Register your product and get support at HP4666/22. Manual do utilizador
 Register your product and get support at www.philips.com/welcome Straightener HP4666/22 PT Manual do utilizador Português Parabéns pela compra do seu produto e bem-vindo à Philips! Para tirar o máximo
Importante. 13. Não ultrapassar a capacidade máxima do recipiente. 14. Não utilizar o Espremedor de Citrinos por períodos muito longos.
 Importante 1.Leia todas as instruções cuidadosamente antes de usar o espremedor de citrinos Orima. 2. Este aparelho pode ser usado por crianças de 8 anos ou mais e pessoas com reduzidas capacidades físicas,
LIGHT PANEL CONTENTS Light Panel Power supply Fixtures (brackets, screws)
") Page 1 of 8 LIGHT PANEL 20367 CONTENTS Light Panel Power supply Fixtures (brackets, screws) ABOUT THIS PRODUCT The Light Panel may be used on a table top as a free-standing object, or mounted either horizontally
Page 1 of 8 LIGHT PANEL 20367 CONTENTS Light Panel Power supply Fixtures (brackets, screws) ABOUT THIS PRODUCT The Light Panel may be used on a table top as a free-standing object, or mounted either horizontally
Styler. Register your product and get support at HP4681/00. Manual do utilizador
 Register your product and get support at www.philips.com/welcome Styler HP4681/00 PT Manual do utilizador a h g b c f e d Português Parabéns pela compra do seu produto e bem-vindo à Philips! Para tirar
Platinum Electric Griddle. Children should be supervised to ensure that they do not play with the appliance.
 Platinum Children should be supervised to ensure that they do not play with the appliance. 1 2 ELECTRIC GRIDDLE 1. Receptacle for power probe 2. Side handle 3. Non-stick heating plate 4. Power cable with
Straightener. Register your product and get support at. PT Εγχειρίδιο χρήσης
 Register your product and get support at www.philips.com/welcome Straightener Εγχειρίδιο χρήσης 1 2 Português Parabéns pela sua compra e bem-vindo à Philips! Para tirar o máximo partido da assistência
MARQUE: BABYLISS REFERENCE: ST292E CODIC:
 MARQUE: BABYLISS REFERENCE: ST292E CODIC: 4004221 Made in China 9 8 3 10 1 4 2 6 5 BaByliss Paris S.A. Avenue Aristide Briand, 99 B.P. 72 92123 Montrouge Cedex FRANCE www.babyliss.com FRANÇAIS Lisseur
Straightener. Register your product and get support at HP8297. Manual do utilizador
 Register your product and get support at www.philips.com/welcome Straightener HP8297 PT Manual do utilizador a b cd e g f h i Português Parabéns pela compra do seu produto e bem-vindo à Philips! Para tirar
ESCOVA COMPLETE BEAUTY RB-SC272
 1 MANUAL DE INSTRUÇÕES ESCOVA COMPLETE BEAUTY RB-SC272 2 Índice 1. CUIDADOS... 3 2. LIMPEZA... 5 3. MODO DE USAR... 5 4. DETALHES DO PRODUTO... 6 5. CARACTERÍSTICAS TÉCNICAS... 6 6. TERMOS DE GARANTIA...
English 6 Português do Brasil 11 HP8300/00
 HP8300/00 2 3 1 A B C D 4 English 6 Português do Brasil 11 HP8300/00 6 English Introduction Congratulations on your purchase and welcome to Philips! The new Philips Simply SalonStraight has everything
ESCOVA 360 BEAUTY RB-SC563B
 1 MANUAL DE INSTRUÇÕES ESCOVA 360 BEAUTY RB-SC563B 2 Índice 1. CUIDADOS... 3 2. LIMPEZA... 5 3. MODO DE USAR... 5 4. DETALHES DO PRODUTO... 6 5. CARACTERÍSTICAS TÉCNICAS... 7 6. TERMOS DE GARANTIA... 7
Straightener. Register your product and get support at HP8360/00. Manual do utilizador
 Register your product and get support at www.philips.com/welcome Straightener HP8360/00 PT Manual do utilizador Português Parabéns pela compra do seu produto e bem-vindo à Philips! Para tirar o máximo
Desumidificador de ar
 MANUAL DO USUÁRIO USER MANUAL Desumidificador de ar Baby Care Português 4// Manual do Usuário Parabéns! Você acaba de adquirir mais um produto com a qualidade Multilaser! O Desumidificador de Ar Multilaser
01/ REV.0. Secador de Cabelos
 01/13 962-09-05 781950 REV.0 www.philco.com.br MANUALDE DE INSTRUÇÃO MANUAL INSTRUÇÃO Secador de Cabelos INTRODUÇÃO Parabéns pela escolha do Secador de cabelos Philco Para garantir o melhor desempenho
ESCOVA ROTATIVA. Manual de Instruções. Ari Jr TRATAMENTO. Alexandre F Fernando SOMENTE PARA USO DOMÉSTICO
 0 Liberação do Arquivo Ari Jr SOMENTE PARA USO DOMÉSTICO /14 1234-09-05 785812 REV.0 ESCOVA ROTATIVA Manual de Instruções PROJ. MATERIAL QUANTIDADE DES. VERIF. Ari Jr Alexandre F TRATAMENTO TOL. Ñ ESPECIF.
Curler. Register your product and get support at HP8600/00. Manual do utilizador
 Register your product and get support at www.philips.com/welcome Curler HP8600/00 PT Manual do utilizador a b c d e f g h i j Português Parabéns pela compra do seu produto e bem-vindo à Philips! Para tirar
ML-1600 SECADOR DE PAREDE
 ML-1600 SECADOR DE PAREDE Antes de utilizar pela primeira vez o produto, leia as recomendações e instruções de uso. Delas dependem o perfeito funcionamento do produto e sua segurança, assim como a de terceiros.
MARQUE: CALOR REFERENCE: CV8730C0 CODIC:
 MARQUE: CALOR REFERENCE: CV8730C0 CODIC: 4157303 NOTICE FR EN DE NL IT ES PT TR EL DA NO SV FI AR FA INFINI PRO AC F B IONIC CERAMIC IONIC KERATINE & SHINE C D A E G depending on model a b c H 6 mm 8 mm
Manual de Instruções E NÃO PODERÁ SER UTILIZADO POR TERCEIROS ESTE DESENHO É PROPRIEDADE EXCLUSIVA DA BRITÂNIA ELETRODOMÉSTICOS LTDA.
 Nº MODIFICAÇÃO POR 0 Liberação de Arquivo Ari Jr 09/13 1065-09-05 799939 REV 0 SOMENTE PARA USO DOMÉSTICO SECADOR DE CABELOS ESTE DESENHO É PROPRIEDADE EXCLUSIVA DA BRITÂNIA ELETRODOMÉSTICOS LTDA. E NÃO
Escova Rotativa Beauty Shine
 MANUAL DE INSTRUÇÕES Escova Rotativa Beauty Shine INTRODUÇÃO Parabéns pela escolha de mais um produto de nossa linha. Para garantir o melhor desempenho de seu produto, o usuário deve ler atentamente as
PRANCHA BEAUTY 3 IN 1 RB-PC0009 MANUAL DE INSTRUÇÕES
 PRANCHA BEAUTY 3 IN 1 RB-PC0009 MANUAL DE INSTRUÇÕES Índice 1. CUIDADOS... 3 2. LIMPEZA... 4 3. MODO DE USAR... 5 4. DETALHES DO PRODUTO... 6 5. CARACTERÍSTICAS TÉCNICAS... 7 6. TERMOS DE GARANTIA... 7
Liss
 N MODIFICAÇÃO POR 0 Liberação de Arquivo. Ari Jr. 1 Inserido tabela de problema, causa, solução Kaue 23-03-2012 2 Alteração na página 4 Dieli 19-06-2012 3 Inclusão de frases de segurança sobre cuidados
ÍNDICE PORTUGUÊS INDEX ENGLISH
 ÍNDICE PORTUGUÊS 1. Características do Produto...2 2. Aplicação...2 3. Manual de Operação...2 4. Diferença entre os adaptadores AC e DC...3 5. Utilizando o Adaptador DC 12V...3 6. Utilizando o Adaptador
Secador de Cabelo PH Manual de Instruções. Kaue. Alexandre Thamy. Kaue. Liberação de Arquivo. PODERÁ SER UTILIZADO POR TERCEIROS
 N MODIFICAÇÃO POR 0 Liberação de Arquivo. Kaue ESTE DESENHO É PROPRIEDADE EXCLUSIVA DA BRITÂNIA ELETRODOMÉSTICOS LTDA. E NÃO PODERÁ SER UTILIZADO POR TERCEIROS 07/11 725-09-05 775939 REV.0 SOMENTE PARA
Always here to help you. Register your product and get support at www.philips.com/welcome QG3330. User manual
 Always here to help you Register your product and get support at www.philips.com/welcome QG3330 User manual 1 QG3330 PORTUGUÊS DO BRASIL 4 4 PORTUGUÊS DO BRASIL Introdução Parabéns pela sua compra e bem-vindo
Hair Styler. Register your product and get support at HP4698/22. Manual do utilizador
 Register your product and get support at www.philips.com/welcome Hair Styler HP4698/22 PT Manual do utilizador e f h g i j d c o p n m l b q k a r s t v u Português Parabéns pela compra do seu produto
SECADOR EXCLUSIVE HAIR RB-SC364 MANUAL DE INSTRUÇÕES
 SECADOR EXCLUSIVE HAIR RB-SC364 MANUAL DE INSTRUÇÕES Índice 1. CUIDADOS... 3 2. LIMPEZA... 4 3. MODO DE USAR... 5 4. DETALHES DO PRODUTO... 6 5. CARACTERÍSTICAS TÉCNICAS... 7 6. TERMOS DE GARANTIA... 7
MARQUE: BABYLISS REFERENCE: E751E CODIC:
 MARQUE: BABYLISS REFERENCE: E751E CODIC: 4209494 NOTICE Made in China Made in China 1 3 4 2 6 5 Fig. 1 Fig. 2 Fig. 3 Fig. 4 Fig. 5 Fig. 6 BABYLISS 99 avenue Aristide Briand - 92120 Montrouge - France www.babyliss.com
Register your product and get support at HP8618/00. Manual do utilizador
 Register your product and get support at www.philips.com/welcome HP8618/00 PT-BR Manual do utilizador HP8618 a b l k j c d i e f g h 2-4CM 5/8/10 sec. C C Português 1 Parabéns! Parabéns pela aquisição
This page should not be printed.
 Nº MODIFICAÇÃO POR DATA 0 Liberação de Arquivo Julia M. 09-09-2015 This page should not be printed. This document is property of Britânia AND CAN NOT BE USED BY A THIRD PARTY PROJ. DATA MATERIAL QUANTIDADE
Styler. Register your product and get support at HP4680/00. Manual do utilizador
 Register your product and get support at www.philips.com/welcome Styler HP4680/00 PT Manual do utilizador d g e f h c b a j k l m n i o p r q s Português Parabéns pela compra do seu produto e bem-vindo
HP8180
 Register your product and get support at www.philips.com/welcome HP8180 PT Manual do utilizador Português Parabéns pela compra do seu produto e bem-vindo à Philips! Para tirar o máximo partido da assistência
This page should not be printed.
 Nº MODIFICAÇÃO POR DATA 0 Liberação de Arquivo Ari Jr. 23-06-2011 This page should not be printed. This document is property of Britannia AND CAN NOT BE USED BY A THIRD PARTY DES. VERIF. APROV. Ari Jr
ASPIRADOR DE PÓ VCL-002
 Manual de Instruções ASPIRADOR DE PÓ VCL-002 Leia atentamente as informações contidas neste manual antes de usar o aparelho. INFORMAÇÕES DE SEGURANÇA: Antes de utilizar o aparelho, leia atentamente as
MANUAL DE INSTRUÇÕES SECADOR DE CABELOS AT-1081 / 1263D
 MANUAL DE INSTRUÇÕES SECADOR DE CABELOS AT-1081 / 1263D POR FAVOR, LEIA ESTE MANUAL ATENTAMENTE ANTES DE UTILIZAR O PRODUTO Você acabou de adquirir um produto ETERNY, da mais alta qualidade. Agradecemos
Operator Manual Thermoplan AG, Subject to change REV-0
 1 Overview Control panel Foamer head Cup platform Liner pouch 8 Overview Heating basin Milk foam tube Level controller Milk container Cover Hood 9 Putting into operation Plug the appliance into a suitable
Beauty. Secador de cabelo EB02(127V) / EB03(220V)
 / EB03(220V)") Beauty Secador de cabelo EB02(127V) / EB03(220V) Parabéns, agora você possui um SECADOR MULTILASER BEAUTY com alta performance e qualidade, garantindo ótimos resultados na secagem de seu cabelo. Antes
Beauty Secador de cabelo EB02(127V) / EB03(220V) Parabéns, agora você possui um SECADOR MULTILASER BEAUTY com alta performance e qualidade, garantindo ótimos resultados na secagem de seu cabelo. Antes
Beauty. Secador de cabelo Bivolt EB01
 Beauty Secador de cabelo Bivolt EB01 Parabéns, agora você possui um SECADOR DE CABELO MULTILASER BEAUTY com alta performance, garantindo ótimos resultados na secagem de seu cabelo. Antes da utilização,
Atividade extra. Questão 01. Lingua Estrangeira Inglês
 Atividade extra Questão 01 http://www.sxc.hu/photo/1406799 We hear a list of problems affecting the environment almost every day: pollution, acid rain, global warming, and the destruction of rain forest,
SECADOR PRETTY HAIR RB-SC604
 1 MANUAL DE INSTRUÇÕES SECADOR PRETTY HAIR RB-SC604 2 Índice 1. CUIDADOS... 3 2. LIMPEZA... 5 3. MODO DE USAR... 5 4. DETALHES DO PRODUTO... 7 5. CARACTERÍSTICAS TÉCNICAS... 7 6. TERMOS DE GARANTIA...
1 INSTRUÇÕES IMPORTANTES DE SEGURANÇA
 [M03 27052010] 1 INSTRUÇÕES IMPORTANTES DE SEGURANÇA É muito importante que você leia atentamente todas as instruções contidas neste manual antes de utilizar o produto, pois elas garantirão sua segurança.
This page should not be printed.
 Nº MODIFICAÇÃO POR DATA 0 Liberação de Arquivo Julia 02-12-2015 This page should not be printed. This document is property of Britânia AND CAN NOT BE USED BY A THIRD PARTY PROJ. DATA MATERIAL QUANTIDADE
Register your product and get support at HP8605. Manual do utilizador
 Register your product and get support at www.philips.com/welcome HP8605 PT Manual do utilizador HP8605 a b c d e f g h i j 10 sec. Português 1 Parabéns Parabéns pela compra do seu produto e bem-vindo
HAIR DRYER CERAMIC HD 6760
 HAIR DRYER CERAMIC HD 6760 F G E D B C A 2 Segurança Durante a colocação em funcionamento do aparelho, por favor, respeite as seguintes indicações: 7 Este aparelho destina-se apenas ao uso doméstico. 7
HAIR DRYER CERAMIC HD 3700
 HAIR DRYER CERAMIC HD 3700 PT F E G D B C A 3 PORTUGUÊS 20-22 4 HAIR DRYER HD 3700 Segurança Durante a colocação em funcionamento do aparelho, por favor, respeite as seguintes indicações: 7 Este aparelho
SalonStraight Freestyle HP4681
 SalonStraight Freestyle HP4681 1 2 3 4 5 6 7 8 English Introduction The new Philips SalonStraight Freestyle helps you style your hair in any way you want, for every haircut. The ceramiccoated plates ensure
SONDA DE ÁGUA QUENTE SANITÁRIA
 SONDA DE ÁGUA QUENTE SANITÁRIA PT Avisos preliminares Estas instruções são parte integrante do manual do aparelho no qual o KIT é instalado. Consulte este manual para as ADVERTÊNCIAS GERAIS e REGRAS FUNDAMENTAIS
WI FI INTERACTIVE MAT SWITCH SET 19939
 Page 1 of 6 WI FI INTERACTIVE MAT SWITCH SET 19939 CONTENTS 1 x Control Box with 9V battery 9 x carpet switches: 1 x pink vinyl 1 x purple carpet 1 x blue non-slip mat 1 x green Soft & Silky 1 x light
ÍNDICE PORTUGUÊS INDEX ENGLISH. Índice/ Index
 Índice/ Index ÍNDICE PORTUGUÊS Introdução... 3 2. Conhecendo o Hidromassageador para Pés... 3 3. Como Usar o Hidromassageador para Pés... 3 Modo de Funcionamento... 4 Esvaziando o Hidromassageador para
08/ / REV.1. Secador de Cabelos RETRÁTIL Ph2000 TURBO ÍON SOMENTE PARA USO DOMÉSTICO. Manual de Instruções
 08/09 497-05/00 077374 REV.1 Secador de Cabelos RETRÁTIL Ph2000 TURBO ÍON SOMENTE PARA USO DOMÉSTICO Manual de Instruções INTRODUÇÃO Parabéns pela escolha do Secador Philco. Para garantir o melhor desempenho
HP4984, HP4983, HP4982, HP4981, HP4980
 HP4984, HP4983, HP4982, HP4981, HP4980 1 K J L I A H B C D E F G English 6 Français 13 Português do Brasil 20 32 38 HP4984, HP4983, HP4982, HP4981, HP4980 6 English Introduction The Philips SalonDry
HAIR DRYER IONIC HD 6862
 HAIR DRYER IONIC HD 6862 PT G F E D B C A 3 PORTUGUÊS 25-28 4 SEGURANÇA Durante a colocação em funcionamento do aparelho, por favor, respeite as seguintes indicações: 7 Este aparelho destina-se apenas
Straightener HP8333. Register your product and get support at PT-BR Manual do Usuário
 Register your product and get support at www.philips.com/welcome Straightener HP8333 PT-BR Manual do Usuário e f d c b a Português Parabéns pela aquisição e seja bem-vindo à Philips! Para aproveitar todos
MANUAL DE INSTRUÇÕES MODELADOR CABELO HAS 5582
 MANUAL DE INSTRUÇÕES MODELADOR CABELO HAS 5582 INSTRUÇÕES DE SEGURANÇA Leia atentamente o manual de instruções do aparelho antes de colocá-lo em funcionamento. Mantenha o manual guardado em local seguro
MARQUE: PHILIPS REFERENCE: BT7204/15 CODIC:
 MARQUE: PHILIPS REFERENCE: BT0/ CODIC: 0 NOTICE Register your product and get support at www.philips.com/welcome General description (Fig.) BT0x 6 0..0 6 0.0 6 ENGLISH.00.66. 6 Cutting element Vacuum system
MANUAL DE INSTRUÇÕES PRANCHA ALISADORA CERÂMICA AT-610
 MANUAL DE INSTRUÇÕES PRANCHA ALISADORA CERÂMICA AT-610 POR FAVOR, LEIA ESTE MANUAL ATENTAMENTE ANTES DE UTILIZAR O PRODUTO Você acabou de adquirir um produto ETERNY, da mais alta qualidade. Agradecemos
FORNO ELÉTRICO VCC-8028
 Manual de Instruções FORNO ELÉTRICO VCC-8028 SOMENTE PARA USO DOMÉSTICO Leia atentamente as informações contidas neste manual antes de usar o aparelho. INFORMAÇÕES DE SEGURANÇA: 1. Antes de utilizar o
CURLS & VOLUME HAIR STYLER HS 3120 PORTUGUÊS
 CURLS & VOLUME HAIR STYLER HS 3120 PORTUGUÊS A B C D E F 1 2 3 SEGURANÇA Por favor, leia na íntegra manual de instruções antes de usar este aparelho! Siga todas as instruções de segurança para evitar
MARQUE: MICROSOFT REFERENCE: NATURAL ERGO 4000 CODIC:
 MARQUE: MICROSOFT REFERENCE: NATURAL ERGO 4000 CODIC: 4327829 NOTICE ENG: Microsoft wired keyboard Teclado com fio da Microsoft Clavier avec fil Microsoft Teclado alámbrico de Microsoft ENG: Install the
Taking a Temperature
 Taking a Temperature Body heat is measured by taking a temperature with a thermometer. An increase in temperature, called a fever, may be a sign of infection. The common scale used to measure body temperature
VGM. VGM information. ALIANÇA VGM WEB PORTAL USER GUIDE June 2016
 Overview The Aliança VGM Web portal is an application that enables you to submit VGM information directly to Aliança via our e-portal Web page. You can choose to enter VGM information directly, or to download
This page should not be printed.
 Nº MODIFICAÇÃO POR DATA 0 Liberação de Arquivo Ari Jr. 27-10-2016 This page should not be printed. This document is property of Britannia AND CAN NOT BE USED BY A THIRD PARTY DES. VERIF. APROV. Ari Jr
Pesquisa Qualitativa do Início ao Fim (Métodos de Pesquisa) (Portuguese Edition)
 (Portuguese Edition)") Pesquisa Qualitativa do Início ao Fim (Métodos de Pesquisa) (Portuguese Edition) Robert K. Yin Click here if your download doesn"t start automatically Pesquisa Qualitativa do Início ao Fim (Métodos de
Pesquisa Qualitativa do Início ao Fim (Métodos de Pesquisa) (Portuguese Edition) Robert K. Yin Click here if your download doesn"t start automatically Pesquisa Qualitativa do Início ao Fim (Métodos de
SOUTHPAW WEIGHTED SHOE POCKETS MEDIUM 18792
 SOUTHPAW WEIGHTED SHOE POCKETS MEDIUM 18792 CONTENTS 2 x shoe pockets (blue) (each 11cmL x 7cmW) 2 x 4oz weights (each 6.5cmL x 5.5cmW) 2 x 6oz weights (each 7.5cmL x 5.5cmW) 2 x 8oz weights (each 9cmL
Manual de Instruções. Secador Profissional Dobrável Voyage. Leia atentamente antes de usar PROFESSIONAL.
 Manual de Instruções Secador Profissional Dobrável Voyage PROFESSIONAL YR1000A (127V) YR1000B (220V) Leia atentamente antes de usar www.lizz.com.br 11 3181 2244 2 Manual de Instruções Manual de Instruções