WS Serra sabre a bateria 12V PT P04 12V Reciprocating Saw EN P12
|
|
|
- Isaac Imperial
- 5 Há anos
- Visualizações:
Transcrição

1 WS Serra sabre a bateria 12V PT P04 12V Reciprocating Saw EN P12

2


3 Fig.A Fig.B1 Fig.B2 7 Fig.C1 Fig.C2 Fig.D Fig.E
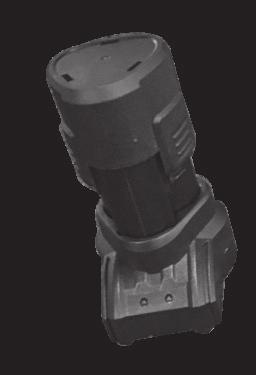
4 LISTA DE COMPONENTES 1. Lâmina 2. Áreas das pegas manuais 3. Botăo de trava 4. Fecho do conjunto de bateria 5. Bateria* 6. Interruptor Liga/Desliga 7. Dispositivo para soltar e prender a lâmina de serra 8. Placa de apoio * Nem todos os acessórios ilustrados ou descritos são fornecidos em todas as versões (consulte conteúdo informado na embalagem do produto). DADOS TÉCNICOS Voltagem Velocidade sem carga 12 V /min Comprimento do curso 13mm (0.5 ) Capacidade máxima de corte Bateria Carga de bateria Peso da máquina Madeira 50mm (2.0 ) Aço 5mm (0.2 ) 1.5Ah Bateria de lítio Entrada: V~50/60Hz, 70W Saída: 15V 1.7A 1.2kg (2.7lbs) Isolamento duplo /II ACESSÓRIOS lâmina para cortar madeira 1 Recomendamos que compre todos os acessórios no fornecedor onde tenha adquirido a ferramenta. Escolha os acessórios de acordo com o trabalho que pretende executar. Para mais detalhes, consulte a embalagem desta. 4 PT
5 AVISOS GERAIS DE SEGURANÇA DE FERRAMENTAS ELÉTRICAS ATENÇÃO Leia atentamente as seguintes instruções. A não observância destas instruções pode causar choque elétrico, incêndio e/ ou lesões graves. Guarde estas instruções para referência futura. Os termos ferramenta elétrica utilizados em todos os avisos constantes destas instruções referem-se à sua ferramenta elétrica acionada por corrente elétrica (com cabo de alimentação) ou ferramenta elétrica acionada por bateria (sem cabo de alimentação). 1) LOCAL DE TRABALHO a) Mantenha o local de trabalho limpo e bem arrumado. Áreas com pouca iluminação e desordenadas podem provocar acidentes. b) Não utilize o aparelho em locais onde existam líquidos, gases ou poeiras inflamáveis e onde exista o risco de explosão. As ferramentas elétricas produzem faíscas que podem inflamar poeiras ou gases. c) Mantenha as pessoas e particularmente as crianças afastadas da ferramenta elétrica durante o seu funcionamento. Qualquer distração pode fazê-lo perder o controle da ferramenta. 2) SEGURANÇA ELÉTRICA a) O Plugue da ferramentas elétricas deve encaixar bem na tomada de alimentação. Nunca modifique plugues, seja de que maneira for. Não utilize nenhuma adaptação com ferramentas elétricas que tenham ligação à terra. Plugues e cabos não devem ser modificadas e tomadas de corrente adequadas reduzem o risco de choque elétrico b) Evite o contato do corpo com superfícies ligadas à terra como tubos, aquecedores, fogões e frigoríficos. Existe um aumento do risco de choque elétrico se o seu corpo estiver em contato com a terra. c) Não exponha este equipamento à chuva ou humidade. A infiltração de água num aparelho elétrico aumenta o risco de choque elétrico. d) Utilize corretamente o cabo de alimentação. Nunca utilize o cabo para transportar, puxar ou desligar o aparelho da tomada de corrente. Mantenha o cabo afastado de fontes de calor, óleos, arestas afiadas ou peças em movimento. Cabos danificados ou modificados aumentam o risco de choque elétrico. e) Quando trabalhar com uma ferramenta elétrica ao ar livre, use um cabo de extensão adequado para utilização no exterior. A utilização de um cabo adequado para uso exterior reduz o risco de choque elétrico. f) Se não puder evitar a utilização de uma ferramenta elétrica num local húmido, utilize uma fonte de alimentação protegida contra corrente residual. A utilização de um dispositivo com proteção contra corrente residual reduz o risco de choque elétrico. 3) SEGURANÇA DE PESSOAS a) Esteja atento, observe o que está fazendo e seja prudente sempre que trabalhar com uma ferramenta elétrica. Não utilize nunca uma ferramenta elétrica quando estiver cansado ou sob a influência de drogas, álcool ou medicamentos. Um momento de desatenção quando se utiliza uma ferramenta elétrica pode causar lesões graves. b) Utilize equipamentos de segurança. Use sempre óculos de proteção. Equipamentos de segurança, tais como máscaras protetoras, sapatos de sola antiderrapante, capacetes ou proteções auriculares devidamente utilizados reduzem o risco de lesões. c) Evite o arranque acidental da ferramenta. Certifique-se de que o comutador de alimentação está desligado antes de ligar a ferramenta à fonte de alimentação e/ou à bateria, antes de pega-la ou antes de a transportar. Se mantiver o dedo no interruptor ou acionar o aparelho enquanto este estiver ligado podem ocorrer acidentes. d) Remova quaisquer chaves de ajuste ou de porcas antes de ligar a ferramenta elétrica. Chaves de porcas ou de ajuste fixadas a peças móveis da ferramenta podem causar lesões. e) Não exceda as suas próprias capacidades. Mantenha sempre o corpo em posição firme e de equilíbrio, o que lhe permite controlar melhor a ferramenta elétrica em situações imprevistas. f) Mantenha o cabelo, vestuário e luvas afastados de peças em movimento. Mantenha o cabelo, vestuário longe de peças em PT 5
6 movimento. Tecidos soltos, joias e cabelo comprido podem se prender em peças em movimento.. g) Se forem fornecidos dispositivos para a montagem de unidades de extração ou recolha de resíduos, Assegurese de que são montados e utilizados adequadamente. A utilização destes dispositivos pode reduzir os perigos relacionados com a presença de resíduos. h) A familiaridade e uso frequente da ferramenta não exclui a atenção aos princípios de segurança. A falta de cautela pode causar fraturas serias em uma questão de segundos 4) UTILIZAÇÃO E MANUTENÇÃO DA FERRAMENTA ELÉTRICA a) Não force a ferramenta. Utilize a ferramenta elétrica apropriada para cada aplicação. A utilização da ferramenta elétrica apropriada executa o trabalho de forma melhor e mais segura, à velocidade para a qual foi concebida. b) Não force a ferramenta. Utilize a ferramenta elétrica apropriada para cada aplicação. A utilização da ferramenta elétrica apropriada executa o trabalho de forma melhor e mais segura, à velocidade para a qual foi concebida. c) Desconectar a ferramenta da fonte de energia e/ou remover a bateria antes de fazer ajustes, trocar acessórios, ou ao armazenar a ferramenta. Estas medidas de segurança preventivas reduzem o risco de acidentes com a ferramenta. d) Quando não estiver usando a ferramenta elétrica, guarde-a fora do alcance das crianças e não deixe que esta seja utilizada por pessoas que não a conheçam, nem tenham lido as instruções. As ferramentas eléctricas são perigosas nas mãos de utilizadores inexperientes. e) Faça a manutenção de ferramentas elétricas e acessórios. Verifique quaisquer desalinhamentos, encaixes de peças móveis, quebras e outras condições que possam afetar o funcionamento. Se esta ferramenta estiver avariada, mande-a reparar antes a utilizar. Muitos acidentes são causados pela manutenção deficiente de ferramentas elétricas. f) Mantenha as ferramentas de corte limpas e afiadas. As ferramentas de corte ou discos de serra com manutenção adequada e arestas de corte (ou destes) afiadas têm menos probabilidades bloquear e são mais fáceis de controlar. g) Utilize a ferramenta elétrica, acessórios, brocas, etc. em conformidade com estas instruções e da forma prevista para este tipo específico de ferramenta, tendo em conta as condições presentes e o trabalho a executar. A utilização de ferramentas elétricas para aplicações diferentes daquelas a que se destinam pode levar a situações de perigo. h) Mantenha o punho e superfícies de contato, secos e limpos de óleo ou graxa. A falta dos mesmos não permite o manuseio e controle da ferramenta em situações inesperadas. 5) UTILIZAÇÃO E MANUTENÇÃO DE FERRAMENTA ALIMENTADA POR CONJUNTO DE BATERIAS a) Recarregue o conjunto de baterias apenas com o carregador especificado pelo fabricante. Um carregador para determinado tipo de conjunto de bateria pode levar ao risco de incêndio se utilizado com outro tipo de baterias. b) Utilize ferramentas elétricas apenas com os tipos de conjuntos de baterias especificamente designados. A utilização de quaisquer outros tipos de conjuntos de baterias pode levar a riscos de lesão ou incêndio. c) Quando não estiver utilizando o conjunto de baterias, mantenha-o afastado de objetos metálicos como clipes, moedas, chaves, pregos, parafusos ou outros objetos metálicos de pequena dimensão, que possam fechar o contato entre os terminais. O curto-circuito de terminais de bateria pode provocar incêndios ou queimaduras. d) Em condições inadequadas, o eletrólito das baterias pode vazar. Evite o contato. Se ocorrer algum contato acidental, lave com água. Se o líquido entrar em contato com os olhos, procure imediatamente aconselhamento médico. O líquido das baterias pode provocar irritações na pele ou queimaduras. e) Não use a bateria removível e ou ferramenta danificadas ou modificadas. Baterias danificadas e/ou estragadas podem apresentar comportamentos inesperados resultando em incêndio, explosão ou ferimento f) Não deixe a bateria removível ou ferramenta expostas a fogo ou temperaturas elevadas. A exposição a temperaturas elevadas acima de 130 graus podem provocar explosão. g) Siga as instruções de carregamento e não carregue a bateria ou ferramenta em 6 PT
7 uma temperatura fora da especificada no manual de instruções. (Carregar inadequadamente pode provocar incêndios) 6) ASSISTÊNCIA TÉCNICA a) A sua ferramenta eléctrica só deve ser reparada por um técnico de assistência qualificado e devem ser apenas utilizadas peças de substituição genuínas, mantendo assim a segurança da ferramenta. Procure um centro de serviço autorizado. b) Nunca faça reparos de baterias danificadas. Manutenção de baterias deve ser feita somente pela fabricante ou centro de serviço autorizado AVISOS DE SEGURANÇA DA SERRA MULTI USOS 1. Segure a ferramenta agarrando as superfícies isoladas ao executar uma operação onde a ferramenta cortante pode entrar em contato com fios elétricos escondidos ou com o seu próprio cabo eléctrico. O contato com um fio com corrente fará com que as peças de metal expostas da ferramenta fiquem com corrente e provoque choque ao operador. 2. Use grampo ou outra forma prática de fixar e apoiar a peça de trabalho em uma plataforma estável. Segurar a peça de trabalho com as mãos ou contra o corpo a deixa instável e pode levar à perda de controle. INSTRUÇÕES DE SEGURANÇA PARA A BATERIA a) Não desmonte nem abra as baterias. b) Não provoque curto-circuito na bateria. Não guarde indiscriminadamente as baterias numa caixa ou numa gaveta onde possam entrar em contato entre si ou com objetos metálicos, provocando curtocircuito. Quando a bateria não estiver sendo utilizada, mantenha-a afastada de outros objetos de metal, como os clips, moedas, chaves, pregos, parafusos ou outros pequenos objetos que podem promover uma ligação de um terminal ao outro. Se ocorrer a ligação dos dois terminais, pode provocar queimaduras ou incêndio. c) Não exponha a bateria ao calor ou ao fogo. Evite o seu armazenamento em locais expostos à luz solar direta. d) Não submeta a bateria a choques ou pancadas. e) No caso de fuga de líquidos, não permita que os líquidos entrem em contato com a pele ou com os olhos. Em caso de contato, lave a área afetada com bastante água e procure aconselhamento médico. f) Em caso de ingestão de uma pilha ou bateria, procure imediatamente ajuda médica. g) Mantenha a bateria limpa e seca. h) Se os terminais da bateria estiverem sujos, limpe-os com um pano limpo e seco. i) A bateria precisa de ser carregada antes de ser utilizada. Consulte sempre as instruções e utilize a forma correta de carregamento. j) Não deixe a bateria carregando quando não precisar de utilizar. k) Após períodos prolongados de armazenamento, poderá ser necessário carregar e descarregar a bateria várias vezes para obter o desempenho máximo. l) A bateria oferece o melhor desempenho quando é utilizada à temperatura ambiente normal (20ºC ± 5 C). m) Quando eliminar baterias, mantenha as baterias de diferentes sistemas eletromecânicos separadas entre si. n) A recarga da bateria apenas deve ser efetuada com o carregador especificado pela WORX. Não utilize qualquer outro carregador além do especificamente fornecido para utilização com o equipamento. Um carregador que seja adequado para um tipo de bateria pode criar um risco de incêndio quando utilizado com outro tipo de bateria. o) Não utilize qualquer bateria não concebida para ser utilizada com o equipamento. p) Mantenha a bateria fora do alcance de crianças. q) Guarde a documentação original do produto para referência futura. r) Retire a bateria do equipamento quando o mesmo não estiver a ser utilizado. s) Elimine o equipamento de forma correta. PT 7
8 AVISOS GERAIS DE SEGURANÇA PARA SEU CARREGADOR DE BATERIA AVISO Leia todos os avisos de segurança e todas as instruções. Não seguir os avisos e instruções pode resultar em choque elétrico, incêndio e/ou lesão séria. Guarde todos os avisos e instruções para referência futura. - Este equipamento não deve ser usado por pessoas (incluindo crianças) com capacidades físicas, sensoriais ou mentais reduzidas ou que tenham falta de experiência e de conhecimento, a menos que tenham recebido supervisão ou instrução com relação ao uso do equipamento por uma pessoa responsável por sua segurança. - Crianças devem ser supervisionadas para assegurar que não brinquem com o equipamento. Se o cabo de alimentação estiver danificado, deverá ser substituído pelo fabricante, seu agente de serviço ou pessoas qualificadas de forma semelhante para evitar perigo. de objetos estranhos e proteja-os contra poeira e umidade. Armazene em local seco e sem acúmulo de gelo. 14. Ao carregar baterias, assegure que o carregador de bateria esteja em local bem ventilado e longe de materiais inflamáveis. As baterias podem aquecer durante a carga. Não sobrecarregue as baterias. Assegure que as baterias e os carregadores não sejam deixados sem supervisão durante a carga. 15. Não recarregue baterias não recarregáveis, pois elas podem superaquecer e partir. 16. Uma vida útil mais longa e um melhor desempenho podem ser obtidos se a bateria for carregada quando a temperatura do ar estiver entre 18 C e 24 C. Não carregue a bateria a temperaturas do ar abaixo de 4,5 C ou acima da 40,5 C. Isso é importante, pois pode evitar sérios danos à bateria. INSTRUÇÕES DE SEGURANÇA ADICIONAIS PARA SEU CARREGADOR DE BATERIA 1. Antes de carregar, leia as instruções. 2. Não carregue uma bateria com vazamento. 3. Não use carregadores para serviços diferentes daqueles para os quais são designados. 4. Antes de carregar, assegure que seu carregador corresponda à alimentação local de CA. 5. Para uso interno ou não exponha à chuva. 6. O dispositivo de carga deve ser protegido contra umidade. 7. Não use o dispositivo de carga em ambiente externo. 8. Não provocar curto-circuito dos contatos da bateria ou do carregador. 9. Respeite a polaridade +/- ao carregar. 10. Não abra a unidade e mantenha fora do alcance de crianças. 11. Não carregue baterias de outros fabricantes ou de modelos inadequados. 12. Assegure que a conexão entre o carregador de bateria e a bateria esteja posicionada corretamente e não esteja obstruída por corpos estranhos. 13. Mantenha os encaixes do carregador de bateria livre 8 PT
9 SÍMBOLOS Para reduzir o risco de ferimentos o usuário deve ler o manual de instruções Usar proteção para os ouvidos Usar proteção ocular Usar máscara contra o pó Aviso Não jogar fora as baterias, Eliminar baterias gastas em local adequado ou entregue-as num ponto de reciclagem. Não queimar Não expor as baterias à chuva ou água Apenas para utilização no interior Isolamento duplo INSTRUÇÕES DE FUNCIONAMENTO NOTA: Antes de utilizar a ferramenta, leia atentamente o manual de instruções. UTILIZAÇÃO CONFORME AS DISPOSIÇÕES O aparelho é destinado para realizar sobre uma base firme, cortes e recortes em madeira, plástico, metal, placas de cerâmica e borracha. PROCEDIMENTO DE CARGA(Ver Fig. A) Aviso: a) Não utilize nenhum carregador de bateria que não seja o carregador fornecido com essa ferramenta ou outro original com o mesmo código. b) Se a bateria estiver muito quente, é preciso retirar a bateria do carregador e esperar que a mesma esfrie antes de carregar novamente c) A bateria da sua nova ferramenta não está carregada, portanto é preciso carregar a bateria totalmente quando for utilizar pela primeira vez. d) Carregue a bateria totalmente ou pelo menos mais de 50% da carga antes de guardá-la. Caso a ferramenta não for utilizada por um longo período de tempo, carregue a bateria a cada período de 3-6 meses. 1) Conecte o carregador em uma tomada elétrica apropriada. 2) Coloque a bateria no carregador. 3) Quando o processo de carregamento de bateria estiver completo, retire o carregador da tomada e a bateria do carregador. AVISO: Quando a bateria ficar sem carga após uma utilização contínua ou devido à exposição à luz solar direta ou a uma qualquer fonte de calor, deixe a ferramenta esfriar antes de proceder ao carregamento da bateria. T2A Fusível Terminal positivo Terminal negativo INDICADOR DE CARGA Luz Ligada /Desligada Indicação Vermelho continuo Verde continuo Em carga Carregamento concluído PT 9
10 B) COMO RETIRAR OU INSTALAR O CONJUNTO DE BATERIAS (VER FIG. B1, B2) a) REMOVER A BATERIA (VER FIG. B1) Primeiro, pressione o Botão de Liberação da Bateria para baixo firmemente e, em seguida, deslize a Bateria para fora da ferramenta. b) INSTALAR A BATERIA (VER FIG. B2) Deslize a Bateria totalmente carregada novamente na ferramenta com força suficiente até ouvir o clique de encaixe na posição correta. FUNCIONAMENTO 1. INICIANDO A OPERAÇÃO (Ver Fig. C1, C2) O botão trava é usado para evitar o início não intencional da operação. Para iniciar a operação da ferramenta, primeiro, pressione o botão trava para baixo e mantenha-o nessa posição, em seguida, pressione o Interruptor Liga/Desliga e libere o botão trava para iniciar a operação. O Interruptor Liga/Desliga também funciona como um seletor de variação de velocidade que proporciona mais velocidade conforme o aumento da pressão de acionamento. A velocidade é controlada pela pressão de acionamento do interruptor. Por motivos de segurança, não é possível travar o interruptor de ligar /desligar do aparelho. Este deve ser constantemente pressionado durante o funcionamento. 2. FIXAÇĂO DA LÂMINA (Ver Fig. D) Gire a alavanca de liberação da fixação da lâmina, insira a haste da lâmina na fixação da lâmina passando pela proteção da lámina até que pare. Assegure que o pequeno furo na lâmina esteja sobre o pino na fixação, em seguida, libere a alavanca. Puxe a lâmina para cima para assegurar que esteja travada na posição correta. Para remover a lâmina, siga essas instruções na ordem inversa. Aviso: Os dentes da lâmina são muito afiados. Para obter melhores resultados de corte, assegure-se de que utiliza uma lâmina adequada para o material e qualidade de corte que precisa. É possível realizar cortes extremamente próximos a pisos, paredes e outras áreas difíceis. Insira a haste da lâmina na fixação da lâmina com os dentes da lâmina voltados para cima (o oposto da posição de trabalho normal). Isso fará cortes mais próximos da superfície de trabalho. 3. PLACA DE APOIO A placa de apoio deve ser posicionada firmemente contra o material que está sendo cortado para reduzir a possibilidade de que a serra vibre, a lâmina pule e a lâmina quebre. 4. CORTE DE MADEIRA (Ver Fig. E) É possível fazer cortes extremamente próximos a pisos, paredes e outras áreas difíceis. Insira a haste da lâmina na fixação da lâmina com os dentes da lâmina voltados para cima (o oposto da posição de trabalho normal). Isso fará cortes mais próximos da superfície de trabalho. Sempre assegure que a peça de trabalho esteja firmemente fixada para evitar movimentação. 5. CORTE DE METAL Essa serra tem diferentes capacidades de corte de metal, dependendo do tipo de lâmina que está sendo usado e do metal que está sendo cortado. SEMPRE fixe o trabalho para evitar que escorregue. Utilize uma lâmina de dentes mais finos para metais ferrosos e uma lâmina de dentes grossos para metais não ferrosos. Ao cortar metais em chapas de espessura fina, SEMPRE fixe uma madeira em ambos os lados da chapa. Isso resultará em um corte limpo sem excesso de vibração ou rasgo do metal. NÃO force a lâmina de corte. Forçar a lâmina reduzirá a vida da lâmina e causará sua quebra. NOTA: Recomendamos que você espalhe um filme de óleo fino ou outro refrigerante ao longo da linha de corte à frente da serra. Isso permitirá uma operação mais fácil e ajudará a estender a vida da lâmina. Ao cortar alumínio, use querosene. 6. DESCARTE DE UMA BATERIA DESCARREGADA Para preservar os recursos naturais, recicle ou descarte a bateria corretamente. Essa bateria é de lítio-íon. Consulte a autoridade local de descarte para obter informações em relação às opções disponíveis de reciclagem e/ou descarte. Descarregue sua bateria por meio da operação da serra, em seguida, remova a bateria do compartimento na serra e cubra as conexões da bateria com fita adesiva resistente para evitar curto circuito e liberação de energia. Não tente abrir ou remover qualquer um dos componentes. DICAS DE TRABALHO PARA SUA SERRA SABRE SEM FIO Utilize sempre uma lâmina adequada ao material e à espessura do material a ser cortado. A qualidade do corte irá melhorar conforme o aumento do número de dentes da serra. Assegure-se sempre de que a peça de trabalho esteja fixa ou presa para impedir o movimento. No caso de painéis grandes, apoie-os perto da linha de corte. Qualquer movimento do material pode afetar a qualidade do corte. A lâmina efetua o corte no sentido para cima e pode lascar a superfpicie superior ou as bordas da peça 10 PT
11 de trabalho durante o corte, assegure-se de que essa superfície seja uma superfície não visível quando terminar o seu trabalho. MANUTENÇÃO Remova a bateria antes de fazer qualquer ajuste, regulagem, instalação ou manutenção. A sua ferramenta não requer qualquer lubrificação ou manutenção adicional. A ferramenta não têm peças susceptíveis de serem substituídas pelo usuário. Nunca utilize água ou produtos químicos para limpar a sua ferramenta. Limpe-a com um pano macio. Guarde sempre a sua ferramenta num local seco. Mantenha as ranhuras de ventilação do motor devidamente limpas. Mantenha todos os controles de funcionamento sem poeira. Se observar a ocorrência de faíscas nas ranhuras de ventilação, isso é normal e não danificará a sua ferramenta. PARA FERRAMENTAS A BATERIA O intervalo da temperatura ambiente para o uso e o armazenamento da ferramenta e da bateria é de 0ºC a 45ºC. O intervalo da temperatura ambiente recomendado para o dispositivo de carga durante o carregamento é de 0ºC a 40ºC. PT 11
12 COMPONENT LIST 1. Blade 2. Hand grip areas 3. Lock off button 4. Battery pack release button 5. Battery pack* 6. On/Off switch 7. Blade clamp release lever 8. Pivoting foot plate * Not all the accessories illustrated or described are included in standard delivery. TECHNICAL DATA Voltage No-load speed 12 V /min Stock length 13mm (0.5 ) Max cutting capacity Machine weight Battery type Charging rate Wood 50mm (2.0 ) Steel 5mm (0.2 ) 1.5Ah Li-ion Battery Input: V~50/60Hz, 70W Output: 15V 1.7A 1.2kg (2.7lbs) Protection class /II ACESSÓRIOS Wood cutting blade 1 We recommend that you purchase your accessories listed in the above list from the same store that sold you the tool. Refer to the accessory packaging for further details. Store personnel can assist you and offer advice. 12 EN
13 GENERAL POWER TOOL SAFETY WARNINGS WARNING Read all safety warnings, instructions, illustrations and specifications provided with this power tool. Failure to follow all instructions listed below may result in electric shock, fire and/or serious injury. Save all warnings and instructions for future reference. The term power tool in the warnings refers to your mains-operated (corded) power tool or battery-operated (cordless) power tool. 1) Work area safety a) Keep work area clean and well lit. Cluttered or dark areas invite accidents. b) Do not operate power tools in explosive atmospheres, such as in the presence of flammable liquids, gases or dust. Power tools create sparks which may ignite the dust or fumes. c) Keep children and bystanders away while operating a power tool. Distractions can cause you to lose control. 2) ELECTRICAL SAFETY a) Power tool plugs must match the outlet. Never modify the plug in any way. Do not use any adapter plugs with earthed (grounded) power tools. Unmodified plugs and matching outlets will reduce risk of electric shock. b) Avoid body contact with earthed or grounded surfaces, such as pipes, radiators, ranges and refrigerators. There is an increased risk of electric shock if your body is earthed or grounded. c) Do not expose power tools to rain or wet conditions. Water entering a power tool will increase the risk of electric shock. d) Do not abuse the cord. Never use the cord for carrying, pulling or unplugging the power tool. Keep cord away from heat, oil, sharp edges or moving parts. Damaged or entangled cords increase the risk of electric shock. e) When operating a power tool outdoors, use an extension cord suitable for outdoor use. Use of a cord suitable for outdoor use reduces the risk of electric shock. f) If operating a power tool in a damp location is unavoidable, use a residual current device (RCD) protected supply. Use of an RCD reduces the risk of electric shock. 3) PERSONAL SAFETY a) Stay alert, watch what you are doing and use common sense when operating a power tool. Do not use a power tool while you are tired or under the influence of drugs, alcohol or medication. A moment of inattention while operating power tools may result in serious personal injury. b) Use personal protective equipment. Always wear eye protection. Protective equipment such as dust mask, non-skid safety shoes, hard hat, or hearing protection used for appropriate conditions will reduce personal injuries. c) Prevent unintentional starting. Ensure the switch is in the off-position before connecting to power source and/or battery pack, picking up or carrying the tool. Carrying power tools with your finger on the switch or energising power tools that have the switch on invites accidents. d) Remove any adjusting key or wrench before turning the power tool on. A wrench or a key left attached to a rotating part of the power tool may result in personal injury. e) Do not overreach. Keep proper footing and balance at all times. This enables better control of the power tool in unexpected situations. f) Dress properly. Do not wear loose clothing or jewellery. Keep your hair and clothing away from moving parts. Loose clothes, jewellery or long hair can be caught in moving parts. g) If devices are provided for the connection of dust extraction and collection facilities, ensure these are connected and properly used. Use of dust collection can reduce dust-related hazards. h) Do not let familiarity gained from frequent use of tools allow you to become complacent and ignore tool safety principles. A careless action can cause severe injury within a fraction of a second. 4) POWER TOOL USE AND CARE a) Do not force the power tool. Use the correct power tool for your application. The correct power tool will do the job better and safer at the rate for which it was designed. b) Do not use the power tool if the switch does not turn it on and off. Any power tool that cannot be controlled with the switch is dangerous and EN 13
14 must be repaired. c) Disconnect the plug from the power source and/or remove the battery pack, if detachable, from the power tool before making any adjustments, changing accessories, or storing power tools. Such preventive safety measures reduce the risk of starting the power tool accidentally. d) Store idle power tools out of the reach of children and do not allow persons unfamiliar with the power tool or these instructions to operate the power tool. Power tools are dangerous in the hands of untrained users. e) Maintain power tools and accessories. Check for misalignment or binding of moving parts, breakage of parts and any other condition that may affect the power tool s operation. If damaged, have the power tool repaired before use. Many accidents are caused by poorly maintained power tools. f) Keep cutting tools sharp and clean. Properly maintained cutting tools with sharp cutting edges are less likely to bind and are easier to control. g) Use the power tool, accessories and tool bits etc. in accordance with these instructions, taking into account the working conditions and the work to be performed. Use of the power tool for operations different from those intended could result in a hazardous situation. h) Keep handles and grasping surfaces dry, clean and free from oil and grease. Slippery handles and grasping surfaces do not allow for safe handling and control of the tool in unexpected situations. 5) Battery tool use and care a) Recharge only with the charger specified by the manufacturer. A charger that is suitable for one type of battery pack may create a risk of fire when used with another battery pack. b) Use power tools only with specifically designated battery packs. Use of any other battery packs may create a risk of injury and fire. c) When battery pack is not in use, keep it away from other metal objects, like paper clips, coins, keys, nails, screws or other small metal objects, that can make a connection from one terminal to another. Shorting the battery terminals together may cause burns or a fire. d) Under abusive conditions, liquid may be ejected from the battery; avoid contact. If contact accidentally occurs, flush with water. If liquid contacts eyes, additionally seek medical help. Liquid ejected from the battery may cause irritation or burns. e) Do not use a battery pack or tool that is damaged or modified. Damaged or modified batteries may exhibit unpredictable behaviour resulting in fire, explosion or risk of injury. f) Do not expose a battery pack or tool to fire or excessive temperature. Exposure to fire or temperature above 130 C may cause explosion. g) Follow all charging instructions and do not charge the battery pack or tool outside the temperature range specified in the instructions. Charging improperly or at temperatures outside the specified range may damage the battery and increase the risk of fire. 6) SERVICE a) Have your power tool serviced by a qualified repair person using only identical replacement parts. This will ensure that the safety of the power tool is maintained. b) Never service damaged battery packs. Service of battery packs should only be performed by the manufacturer or authorized service providers. RECIPROCATING SAW SAFETY WARNINGS 1. Hold reciprocating saw by insulated gripping surfaces, when performing an operation where the cutting accessory may contact hidden wiring. Cutting accessory contacting a live wire may make exposed metal parts of the power tool live and could give the operator an electric shock. 2. Use clamps or another practical way to secure and support the workpiece to a stable platform. Holding the work by hand or against your body leaves it unstable and may lead to loss of control. SAFETY WARNINGS FOR BATTERY PACK a) Do not dismantle, open or shred cells or battery pack. b) Do not short-circuit a battery pack. Do 14 EN
15 not store battery packs haphazardly in a box or drawer where they may shortcircuit each other or be short-circuited by conductive materials. When battery pack is not in use, keep it away from other metal objects, like paper clips, coins, keys, nails, screws or other small metal objects, that can make a connection from one terminal to another. Shorting the battery terminals together may cause burns or a fire. c) Do not expose battery pack to heat or fire. Avoid storage in direct sunlight. d) Do not subject battery pack to mechanical shock. e) In the event of battery leaking, do not allow the liquid to come into contact with the skin or eyes. If contact has been made, wash the affected area with copious amounts of water and seek medical advice. f) Seek medical advice immediately if a cell or battery pack has been swallowed. g) Keep battery pack clean and dry. h) Wipe the battery pack terminals with a clean dry cloth if they become dirty. i) Battery pack needs to be charged before use. Always refer to this instruction and use the correct charging procedure. j) Do not maintain battery pack on charge when not in use. k) After extended periods of storage, it may be necessary to charge and discharge the battery pack several times to obtain maximum performance. l) Battery pack gives its best performance when it is operated at normal room temperature (20 C ± 5 C). m) When disposing of battery packs, keep battery packs of different electrochemical systems separate from each other. n) Recharge only with the charger specified by manufacturer. Do not use any charger other than that specifically provided for use with the equipment. A charger that is suitable for one type of battery pack may create a risk of fire when used with another battery pack. o) Do not use any battery pack which is not designed for use with the equipment. p) Keep battery pack out of the reach of children. q) Retain the original product literature for future reference. r) Remove the battery from the equipment when not in use. s) Dispose of properly. GENERAL SAFETY WARNINGS FOR BATTERY CHARGER WARNING Read all safety warnings and all instructions. Failure to follow the warnings and instructions may result in electric shock, fire and/or serious injury. Save all warnings and instructions for future reference. - This appliance is not intended for use by persons (including children) with reduced physical, sensory or mental capabilities, or lack of experience and knowledge, unless they have been given supervision or instruction concerning use of the appliance by a person responsible for their safety. - Children should be supervised to ensure that they do not play with the appliance. If the supply cord is damaged, it must be replaced by the manufacturer, its service agent or similarly qualified persons in order to avoid a hazard. ADDITIONAL SAFETY INSTRUCTIONS FOR YOUR BATTERY CHARGER 1. Before charging, read the instructions. 2. Do not charge a leaking battery. 3. Do not use chargers for works other than those for which they are designed. 4. Before charging, ensure your charger is matching the local AC supply. 5. For indoor use, or do not expose to rain. 6. The charging device must be protected from moisture. 7. Do not use the charging device in the open. 8. Do not short out the contacts of battery or charger. 9. Respect the polarity +/- when charging. 10. Do not open the unit and keep out of the reach of children. 11. Do not charge the batteries of other manufactures or ill-suited models. 12. Ensure that the connection between the battery charger and battery is correctly positioned and is not obstructed by foreign bodies. EN 15
16 13. Keep battery charger s slots are free of foreign objects and protect against dirt and humidity. Store in a dry and frost-free place. 14. When charging batteries, ensure that the battery charger is in a well-ventilated area and away from inflammable materials. Batteries can get hot during charging. Do not overcharge any batteries. Ensure that batteries and chargers are not left unsupervised during charging. 15. Do not recharge non-rechargeable batteries, as they can overheat and break. 16. Longer life and better performance can be obtained if the battery pack is charged when the air temperature is between 18 C and 24 C. Do not charge the battery pack in air temperatures below 4.5 C, or above 40.5 C. This is important as it can prevent serious damage to the battery pack. SYMBOLS To reduce the risk of injury, user must read instruction manual Wear ear protection Wear eye protection Wear dust mask Warning Do not dispose of batteries, Return exhausted batteries to your local collection or recycling point. Do not burn Do not expose to rain or water For indoor use only Double insulation T2A Fuse Positive terminal Negative terminal 16 EN
17 OPERATING INSTRUCTIONS NOTE: Before using the tool, read the instruction book carefully. INTENDED USE The machine is intended for sawing wood, plastic, metal and building materials while resting firmly on the workpiece. CHARGING PROCEDURE(See Fig. A) NOTE: a) Do not use any charger other than that specifically provided for use with the equipment. b) If the battery pack is very hot you must remove your battery pack from the charger and allow time for the battery to cool down before recharging. c) The battery in your new tool is not charged when it leaves the plant. Therefore it must be full charged before using the first time. d) Please charge the battery to reach full or no less than half charge before storage. If the tool will not be used for long periods of time, charge the battery every 3-6 months. 1) Plug the charger into an appropriate outlet. 2) Place the battery pack into the charger 3) When charging is completed, unplug the charger and remove the battery pack. WARNING: When battery charge runs out after continuous use or exposure to direct sunlight or heat, allow time for the battery to cool down before recharging to achieve the full charge. CHARGING INDICATOR Light ON/OFF Status Red on Green on Charging Fully Charged B) INSTALLING AND REMOVING THE BATTERY PACK (SEE FIG. B1, B2) a) TO REMOVE THE BATTERY PACK (SEE FIG. B1) Depress the Battery Pack Release Button firmly first and then slide the Battery Pack out from your tool. b) TO INSTALL THE BATTERY PACK (SEE FIG. B2) Slide the fully charged Battery Pack onto the tool with sufficient force until it clicks into position. OPERATION 1. STARTING OPERATION (See Fig. C1, C2) The lock off button is used to prevent unintentional starting. For starting operation of the machine, first depress the lock off button and hold it in position, then press the On/Off switch and release the lock off button to start operation. The On/Off Switch is also a variable speed switch that delivers higher speed with increased trigger pressure. Speed is controlled by the amount of switch trigger depression For safety reasons the lock off button of the machine cannot be locked; it must remain pressed during the entire operation. 2. BLADE FITTING (See Fig. D) Rotate the blade clamp release lever, insert the blade shank into the blade clamp through the blade guard until it stops. Ensure the small hole in the blade is on the pin in the clamp then release the lever. Pull up on blade to make sure that it is locked in. To remove a blade, carry out these instructions in reverse order. Warning: Blade teeth are very sharp. For best cutting results ensure you use a saw blade suited to the material and cut quality you need. It is possible to make cuts extremely close to floors, walls and other difficult areas. Insert the blade shank into the blade clamp with the blade teeth facing up (opposite to normal working position). This will make cuts closer to the work surface. 3. PIVOTING FOOT PLATE The pivoting foot plate must be held firmly against the material being cut to reduce saw vibration, blade jumping and blade breakage. 4. WOOD CUTTING (See Fig. E) It is possible to make cuts extremely close to floors, walls and other difficult areas. Insert the blade shank into the blade clamp with the blade teeth facing up (opposite to normal working position). This will make cuts closer to the work surface. Always ensure the work-piece is firmly clamped to prevent movement. 5. METAL CUTTING This saw has different metal cutting capacities depending upon the type of blade being used and metal being cut. ALWAYS clamp the work down to prevent it from slipping. Use a finer blade for ferrous metals and a coarse blade for non-ferrous metals. EN 17
18 When cutting thin gauge sheet metals, ALWAYS clamp wood on both sides of the sheet. This will give you a clean cut without excess vibration or tearing of the metal. DO NOT force the cutting blade. Forcing the blade will reduce blade life and cause the blade to break. NOTE: We recommend that you spread a thin film of oil or other coolant along the line of cut ahead of the saw. This will allow easier operation and help extend blade life. When cutting aluminum, use kerosene. 6. DISPOSAL OF AN EXHAUSTED BATTERY PACK To preserve natural resources, please recycle or dispose of the battery pack properly. This battery pack contains Li-ion batteries. Consult your local waste authority for information regarding available recycling and/or disposal options. Discharge your battery pack by operating your saw, then remove the battery pack from the saw housing and cover the battery pack connections with heavy duty adhesive tape to prevent short circuit and energy discharge. Do not attempt to open or remove any of the components. see sparks through the ventilation slots. This is normal and will not damage your power tool. FOR BATTERY TOOLS The ambient temperature range for the use and storage of tool and battery is 0 C-45 C. The recommended ambient temperature range for the charging system during charging is 0 C-40 C WORKING HINTS FOR YOUR CORDLESS RECIPROCATING SAW Always use a blade suited to the material and material thickness to be cut. The quality of cut will improve as the number of blade teeth increase. Always ensure the workpiece is firmly held or clamped to prevent movement. Support large panels close to the cut line. Any movement of the material may affect the quality of the cut. The blade cuts on the upward stroke and may chip the uppermost surface or edges of your work piece when cutting, ensure your uppermost surface is a non-visible surface when your work is finished. MAINTENANCE Remove the battery pack from the tool before carrying out any adjustment, servicing or maintenance. Your tool requires no additional lubrication or maintenance. There are no user serviceable parts in your power tool. Never use water or chemical cleaners to clean your power tool. Wipe clean with a dry cloth. Always store your power tool in a dry place. Keep the motor ventilation slots clean. Keep all working controls free of dust. Occasionally you may 18 EN
19
20 Importado por: Positec Importação de Ferramentas Limitada Rua Luiz Spiandorelli Neto 30 Sala Valinhos/SP SAC: Fabricado na China
confiáveis para usuários profissionais. Medida da rosca do eixo de saída elétrica
 D28111 D28112 1 2 3 4 3 5 5 8 7 6 6 3 6 9 6 B1 B2 13 12 10 11 12 10 11 2 A 12 10 11 B C1 C2 15 15 4 D / confiáveis para usuários profissionais. Medida da rosca do eixo de saída elétrica 3 Regras Gerais
SEGURANÇA COM SERRA TICO TICO J U A R E Z S A B I N O D A S I LV A J U N I O R T É C N I C O D E S E G U R A N Ç A D O T R A B A L H O
 SEGURANÇA COM SERRA TICO TICO J U A R E Z S A B I N O D A S I LV A J U N I O R T É C N I C O D E S E G U R A N Ç A D O T R A B A L H O ÁREA DE TRABALHO Mantenha sua área de trabalho limpa e bem iluminada.
Carregador de cortador de relva robô 28v PT
 WA3744 1 2 a b A B C 1. Adaptador de potência 2. Conector Acessórios ilustrados ou descritos não estão totalmente abrangidos no fornecimento. Recomendamos-lhe que compre todos os acessórios no fornecedor
WS3231 WS3231U. Atornillador eléctrico PT P04 Screw gun EN P09
 WS3231 WS3231U Atornillador eléctrico PT P04 Screw gun EN P09 Fig.A Fig.B Fig.C Fig.D LISTA DE COMPONENTES 1. Mandril 2. Controle de ajuste de torque 3. Seletor de sentido de rotação (direita ou esquerda)
MANUAL DE INSTRUÇÕES FURADEIRA DE IMPACTO TOOLMIX FI 411
 MANUAL DE INSTRUÇÕES FURADEIRA DE IMPACTO TOOLMIX FI 411 COMPONENTES 1 Gatilho 2 Botão de trava 3 Controle de direção (reversão) 4 Controle de variação de velocidade 5 Punho 6 Mandril 7 Chave seletora
Carregador de baterias PT P04 Battery Charger EN P09 WA3739
 Carregador de baterias PT P04 Battery Charger EN P09 WA3739 5 1 2 3 4 2 1 1 2 2 A B 1. LED INDICADOR DE CARGA COMPLETA 2. CARREGADOR 3. BOTÃO DO CONJUNTO DE BATERIA 4. BATERIA 5. ADAPTADOR Nem todos os
LIGHT PANEL CONTENTS Light Panel Power supply Fixtures (brackets, screws)
") Page 1 of 8 LIGHT PANEL 20367 CONTENTS Light Panel Power supply Fixtures (brackets, screws) ABOUT THIS PRODUCT The Light Panel may be used on a table top as a free-standing object, or mounted either horizontally
Page 1 of 8 LIGHT PANEL 20367 CONTENTS Light Panel Power supply Fixtures (brackets, screws) ABOUT THIS PRODUCT The Light Panel may be used on a table top as a free-standing object, or mounted either horizontally
MANUAL DE INSTRUÇÕES. Cat. N KR470, KR505, KR506 ADVERTÊNCIA: LEIA ESTAS INSTRUÇÕES ANTES DE USAR O PRODUTO.
 Furadeira de Impacto MANUAL DE INSTRUÇÕES Cat. N KR470, KR505, KR506 3 4 1 2 ADVERTÊNCIA: LEIA ESTAS INSTRUÇÕES ANTES DE USAR O PRODUTO. 7 8 5 A 6 B 2 Aplicação Sua Furadeira de impacto Black & Decker
Max Min
 PT EN P07 P17 WX252 2 1 8 3 4 5 7 6 A 2 B 1 C D1 D2 D3 E F Max 10 9 8 7 6 5 4 3 2 1 Min G 1. MANDRIL 2. TAMPA DESLIZANTE SUPERIOR 3. INTERRUPTOR DE AVANÇO/RECUO 4. INDICADOR DE CARREGAMENTO 5. SOQUETE
WX128 WX128.1 WX128.2 WX128.3 WX128.4 WX128.9
 PT EN P07 P15 WX128 WX128.1 WX128.2 WX128.3 WX128.4 WX128.9 1 2 3 4 5 9 8 6 7 A1 A2 A3 B1 1 2 B2 C1 2 1 C2 C3 D F E 1. MANDRIL 2. COMUTADOR DE TORQUE 3. COMUTADOR DE VELOCIDADE MECÂNICO (1 E 2) 4. ROTAÇÃO
Serra multi-uso com bateria de 12V de íons de lítio 12V Li-Ion multi-purposed saw P05 P15 WX540.3
 Serra multi-uso com bateria de 12V de íons de lítio 12V Li-Ion multi-purposed saw PT EN P05 P15 WX540.3 5 4 3 2 1 6 7 9 10 11 12 a A B C Position VI 0-90 O Position I D E1 E2 4 15 8 E3 F G1 2 1 15 G2
Desumidificador de ar
 MANUAL DO USUÁRIO USER MANUAL Desumidificador de ar Baby Care Português 4// Manual do Usuário Parabéns! Você acaba de adquirir mais um produto com a qualidade Multilaser! O Desumidificador de Ar Multilaser
*Nem todos os acessórios ilustrados ou descritos são fornecidos em todas as versões V~50/60Hz Tensão nominal 3.6V. Número de rotações nominal
 LISTA DE COMPONENTES 1. Empunhadura emborrachada 2. Interruptor Liga/Desliga (No/Off) e Direita/Esquerda 3. Luz LED 4. Mandril de encaixe para acessórios 5. Entrada para carregador de bateria 6. Indicador
Manual de Instruções. PARAFUSADEIRA A BATERIA PB 636 b. ADVERTÊNCIA: Leia atentamente este manual antes de usar o produto.
 Manual de Instruções PARAFUSADEIRA A BATERIA PB 636 b ADVERTÊNCIA: Leia atentamente este manual antes de usar o produto. ÍNDICE SEÇÃO PÁGINA Introdução 3 Normas gerais de segurança 3 Uso e cuidados com
WS3100 WS3100U. Furadeira de impacto 500W PT P06 500W Impact drill EN P11
 WS3100 WS3100U Furadeira de impacto 500W PT P06 500W Impact drill EN P11 1 2 3 8 7 6 4 5 _ + Fig.A Fig.B Fig.C Fig.D Fig.E Fig.F Lista DE componentes 1. Limitador de profundidade 2. Comutador de função
ATENÇÃO Leia todas as instruções de montagem, página 4, para um trabalho seguro. Guarde todas as instruções para futuras consultas.
 0 ! ATENÇÃO Leia todas as instruções de montagem, página 4, para um trabalho seguro. Guarde todas as instruções para futuras consultas. Instruções Gerais de Segurança ADVERTÊNCIA! Leia e entenda todas
WS3145 WS3145U. Furadeira de impacto 750W PT P06 750W impact drill EN P11
 WS3145 WS3145U Furadeira de impacto 750W PT P06 750W impact drill EN P11 1 2 3 7 4 5 8 6 Fig.A Fig.B Fig.C _ + Fig.D Fig.E Fig.F Lista de componentes 1. Mandril com chave 2. Limitador da espessura 3. Seletor
SONDA DE ÁGUA QUENTE SANITÁRIA
 SONDA DE ÁGUA QUENTE SANITÁRIA PT Avisos preliminares Estas instruções são parte integrante do manual do aparelho no qual o KIT é instalado. Consulte este manual para as ADVERTÊNCIAS GERAIS e REGRAS FUNDAMENTAIS
Martelo Rotativo Sem Fios Cordless Rotary Hammer P07 P15 WX390 WX390.1 WX390.9
 Martelo Rotativo Sem Fios Cordless Rotary Hammer PT EN P07 P15 WX390 WX390.1 WX390.9 1 2 3 4 6 5 12 8 11 10 9 7 A1 A2 1 2 B C1 SDS-plus C2 D1 SDS-plus Hex Round 1 2 1 2 D2 D3 Hex Round D2 D3 Hex Round
WX372 WX372.1 WX372.2 WX372.3 WX372.4 WX372.5 WX372.7 WX372.8 WX372.9 WX372.10
 Furadeira de impacto a bateria Lithium-Ion cordless hammer drill PT EN P06 P15 WX372 WX372.1 WX372.2 WX372.3 WX372.4 WX372.5 WX372.7 WX372.8 WX372.9 WX372.10 1 2 3 4 9 5 8 7 6 A2 A1 1 2 B1 A3 3 2 1 C1
ATENÇÃO! Para reduzir o risco de acidentes, leia atentamente todas as instruções de utilização do produto.
 IMPORTANTE! ATENÇÃO! Leia atentamente todas as instruções deste manual. O uso inadequado do produto poderá resultar em sérios danos à saúde. ATENÇÃO! Para reduzir o risco de acidentes, leia atentamente
Parafusadeira/Furadeira sem fio 12V Lítio 12V Lithium Cordless Drill Driver
 WS2532 Parafusadeira/Furadeira sem fio 12V Lítio PT P04 12V Lithium Cordless Drill Driver EN P12 1 2 8 3 7 4 6 5 Fig.A1 Fig.A2 Fig.B Fig.C Fig.D LISTA DE COMPONENTES 1. Mandril 2. Comutador de torque 3.
SONDA CASCATA. Avisos preliminares CONTEÚDO FERRAMENTAS RECOMENDADAS NEXPOLAR
 SONDA CASCATA PT Avisos preliminares Estas instruções são parte integrante do manual do aparelho no qual o KIT é instalado. Consulte este manual para as ADVERTÊNCIAS GERAIS e REGRAS FUNDAMENTAIS DE SEGURANÇA.
WS3174 WS3174U. Furadeira de impacto 650W PT P04 650W Impact drill EN P09
 WS3174 WS3174U Furadeira de impacto 650W PT P04 650W Impact drill EN P09 1 2 3 6 4 5 7 Fig.A Fig.B Fig.C Fig.D Fig.E Fig.F LISTA DE COMPONENTES 1. Mandril com chave 2. Limitador da espessura 3. Seletor
1. Product Name. 2. Product Code. 3. Colour. 4. Brief Description. 5. Contents. Hip Hop Jumping Cushion. Colours may vary
 1. Product Name Hip Hop Jumping Cushion 2. Product Code 19229 3. Colour Colours may vary 4. Brief Description Provides hours of healthy fun for children. Has a strong padding and has no frame or edges.
SOUTHPAW WEIGHTED SHOE POCKETS MEDIUM 18792
 SOUTHPAW WEIGHTED SHOE POCKETS MEDIUM 18792 CONTENTS 2 x shoe pockets (blue) (each 11cmL x 7cmW) 2 x 4oz weights (each 6.5cmL x 5.5cmW) 2 x 6oz weights (each 7.5cmL x 5.5cmW) 2 x 8oz weights (each 9cmL
WS2533K2. Parafusadeira/Furadeira sem fio Lítio PT P04 Cordless Drill driver EN P12
 WS2533K2 Parafusadeira/Furadeira sem fio Lítio PT P04 Cordless Drill driver EN P12 1 2 8 3 4 5 7 6 Fig.A Fig.B1 Fig.B2 Fig.C Fig.D Fig.E1 Fig.E2 Fig.F Fig.G Fig.H1 Fig.H2 LISTA DE COMPONENTES 1. Mandril
Ferramentas Profissionais FURADEIRA DE IMPACTO PD-196VR MANUAL DO USUÁRIO
 FURADEIRA DE IMPACTO PD-196VR MANUAL DO USUÁRIO AGRADECEMOS POR VOCÊ TER COMPRADO UM PRODUTO RYOBI. Você adquiriu o que existe de melhor em ferramentas no mundo. Para garantir sua segurança e obter sua
WS3140K WS3140KU. Martelete SDS-plus 650W PT P06 650W Rotary hammer EN P11
 WS3140K WS3140KU Martelete SDS-plus 650W PT P06 650W Rotary hammer EN P11 11 1 2 3 5 4 9 6 7 10 8 Fig.A Fig.B Fig.C Fig.D Fig.E Fig.F Fig.G Fig.H Fig.I Lista de componentes 1. Acoplamento de trava do mandril
Manual de instruções para Caixa Coletora Johnson Pump
 Manual de instruções para Caixa Coletora Johnson Pump Em caso dúvidas na instalação após a leitura do manual, favor entrar em contato com nosso departamento técnico através do telefone: (11) 3477-5655
WI FI INTERACTIVE MAT SWITCH SET 19939
 Page 1 of 6 WI FI INTERACTIVE MAT SWITCH SET 19939 CONTENTS 1 x Control Box with 9V battery 9 x carpet switches: 1 x pink vinyl 1 x purple carpet 1 x blue non-slip mat 1 x green Soft & Silky 1 x light
PT EN P05 P17 WX254L.2 WX254.2
 PT EN P05 P17 WX254L.2 WX254.2 7 1 2 3 8 6 5 4 9 A B C1 C2 1 1 2 2 D E1 E2 F 1. CARCAÇA MÓVEL 2. INTERRUPTOR DE MOVIMENTO E CONTROLE DE BLOQUEIO 3. EMPUNHADURA EMBORRACHADA MACIA 4. INTERRUPTOR LIGA/DESLIGA
e Desbaste Manual de Instruções Leia antes de usar Imagens ilustrativas
 Discos de Corte e Desbaste Imagens ilustrativas Manual de Instruções Leia antes de usar Manual de instruções 1. Orientações Gerais ATENÇÃO: LEIA TODOS OS AVISOS DE SEGURANÇA E TODAS AS INSTRUÇÕES. Guarde
Manual de Instruções PARAFUSADEIRA A BATERIA PB 836. ADVERTÊNCIA: Leia atentamente este manual antes de usar o produto.
 Manual de Instruções PARAFUSADEIRA A BATERIA PB 836 ADVERTÊNCIA: Leia atentamente este manual antes de usar o produto. PB 836 SUPER TORK PROFISSIONAL manual.indd 1 06/02/2015 10:35:46 ÍNDICE SEÇÃO PÁGINA
MANUAL DE INSTRUÇÃO DO COMPRESSOR /COMPRESSOR INSTRUCTION MANUAL MARCA/BRAND GMCC MODELO/MODEL PA291X3CS-3MTU
 MANUAL DE INSTRUÇÃO DO COMPRESSOR /COMPRESSOR INSTRUCTION MANUAL MARCA/BRAND GMCC MODELO/MODEL PA291X3CS-3MTU ESCOPO DE APLICAÇÃO / APPLICATION SCOPE (REFRIGERANT:R410A) Temperatura de Descarga / Discharging
Staightener. Register your product and get support at HP8309/00 HP8310/00. Manual do utilizador
 Register your product and get support at www.philips.com/welcome Staightener HP8309/00 HP8310/00 PT Manual do utilizador d e c b a Português Parabéns pela compra do seu produto e bem-vindo à Philips! Para
SEGURANÇA NA ÁREA DE TRABALHO
 Lixadeira BRLX180 ATENÇÃO: Quando utilizar uma ferramenta elétrica, precauções básicas de segurança, incluindo as seguintes sempre devem ser seguidas para reduzir o risco de fogo, choque e ferimentos.
Hairdryer. Register your product and get support at HP8296/00. Manual do utilizador
 Register your product and get support at www.philips.com/welcome Hairdryer HP8296/00 PT Manual do utilizador c d b e g a f Português Parabéns pela compra do seu produto e bem-vindo à Philips! Para tirar
WG546E WG546E.2 WG546E.9
 Soprador/Varredor com Bateria de Lítio de 20V Cordless Li-Ion Blower/Sweeper PT EN P05 P10 WG546E WG546E.2 WG546E.9 1 4 3 2 9 8 5 6 7 A B Click! Click! 2 1 C D 1 C D 1 1 2 E F OFF ON 4 1 2 G I II 1. PUNHO
Aparador de cerca viva a Bateria 20V Li-Ion Cordless Hedge Trimmer P05 P13 PT EN WG259E WG259E.9
 Aparador de cerca viva a Bateria 20V Li-Ion Cordless Hedge Trimmer PT EN P05 P13 WG259E WG259E.9 2 5 6 7 8 4 3 1 9 A B C D E F1 F2 G1 G2 H 1. CONJUNTO DE BATERIAS 2. PUNHO 3. PUNHO FRONTAL 4. PROTEÇÃO
FORNO ELÉTRICO EPV-8009
 Manual de Instruções FORNO ELÉTRICO EPV-8009 SOMENTE PARA USO DOMÉSTICO Leia atentamente as informações contidas neste manual antes de usar o aparelho. INFORMAÇÕES DE SEGURANÇA: 1. Antes de utilizar o
WS2531. Parafusadeira/Furadeira sem fio 12V Lítio PT P04 12V Lithium Cordless Drill Driver EN P12
 WS2531 Parafusadeira/Furadeira sem fio 12V Lítio PT P04 12V Lithium Cordless Drill Driver EN P12 1 2 3 9 4 8 5 6 7 b a Fig.A Fig.B Fig.C Fig.D Fig.E Fig.F Fig.G LISTA DE COMPONENTES 1. Mandril 2. Comutador
PRENSA HIDRÁULICA. MODELO: TONELADAS Manual de Instruções
 PRENSA HIDRÁULICA MODELO: 206830 12 TONELADAS Manual de Instruções ANTES DE UTILIZAR O EQUIPAMENTO, LEIA AS NORMAS DE SEGURANÇA E SIGA TODAS AS INSTRUÇÕES CONTIDAS NESTE INFORMATIVO TÉCNICO. Imagem meramente
WS2600K2 WS2816K2. Taladro/atornillador a batería PT P04 Ni-Cd Cordless Drill Driver EN P12
 WS2600K2 WS2816K2 Taladro/atornillador a batería PT P04 Ni-Cd Cordless Drill Driver EN P12 1 2 11 4 10 5 9 6 7 8 Fig.A Fig.B Fig.C Fig.D Fig.E Fig.F LISTA DE COMPONENTES 1. Mandril 2. Comutador de torque
WS4151 WS4151U. Lixadeira oscilante PT P06 Palm sander EN P11
 WS4151 WS4151U Lixadeira oscilante PT P06 Palm sander EN P11 1 2 9 3 4 8 7 6 5 10 7 Fig.A Fig.B Fig.C 11 1 Fig.D Fig.E Fig.F Fig.G Lista de componentes 1. Interruptor Liga/Desliga 2. Empunhadura com punho
MANUAL DE INSTRUÇÃO DO COMPRESSOR /COMPRESSOR INSTRUCTION MANUAL MARCA/BRAND GMCC MODELO/MODEL PH310G2C-3KUU
 MANUAL DE INSTRUÇÃO DO COMPRESSOR /COMPRESSOR INSTRUCTION MANUAL MARCA/BRAND GMCC MODELO/MODEL PH310G2C-3KUU ESCOPO DE APLICAÇÃO / APPLICATION SCOPE (REFRIGERANT:R22) Temperatura de Descarga / Discharging
Manual de Instruções
 Manual de Instruções Modelo: Desidrat Cristal Obrigado por escolher os desumidificadores Incoterm. Para garantir o uso correto das operações, por favor, leia atentamente o manual de instruções e depois
Hairdryer. Register your product and get support at HP4935/00. Manual do utilizador
 Register your product and get support at www.philips.com/welcome Hairdryer HP4935/00 PT Manual do utilizador Português Parabéns pela compra do seu produto e bem-vindo à Philips! Para tirar o máximo partido
ASPIRADOR DE PÓ VCL-002
 Manual de Instruções ASPIRADOR DE PÓ VCL-002 Leia atentamente as informações contidas neste manual antes de usar o aparelho. INFORMAÇÕES DE SEGURANÇA: Antes de utilizar o aparelho, leia atentamente as
INFORMAÇÕES IMPORTANTES SOBRE SEGURANÇA CUIDADOS E MANUTENÇÃO
 Agradecemos a preferência por este produto. Leia todas as instruções antes de utilizar este produto e guarde este manual para referência futura. INFORMAÇÕES IMPORTANTES SOBRE SEGURANÇA Ao utilizar um aparelho
WS3160K WS3160KU. Martelete SDS-plus PT P05 Rotary Hammer EN P10
 WS3160K WS3160KU Martelete SDS-plus PT P05 Rotary Hammer EN P10 1 2 3 4 5 6 7 Fig.A Fig.B Fig.C Fig.D Fig.E Fig.F Fig.G1 Fig.G2 LISTA DE COMPONENTES 1. Mandril com encaixe SDS-Plus 2. Parafuso de travamento
Soprador/Varredor com bateria de lítio Cordless Li-Ion blower/sweeper P06 P15 PT EN WG549E WG549E.9
 Soprador/Varredor com bateria de lítio Cordless Li-Ion blower/sweeper PT EN P06 P15 WG549E WG549E.9 2 1 3 4 5 A 6 B C D E 1. PUNHO 2. INTERRUPTOR LIGA/DESLIGA (ON/OFF) 3. BOTÃO DE LIBERTAÇÃO DO TUBO 4.
Styler. Register your product and get support at HP4681/00. Manual do utilizador
 Register your product and get support at www.philips.com/welcome Styler HP4681/00 PT Manual do utilizador a h g b c f e d Português Parabéns pela compra do seu produto e bem-vindo à Philips! Para tirar
Soprador M4000. MANUAL DE INSTRUÇÕES IMPORTANTE: Leia antes de usar. DUPLA ISOLAÇÃO
 Soprador M4000 013218 DUPLA ISOLAÇÃO MANUAL DE INSTRUÇÕES IMPORTANTE: Leia antes de usar. ESPECIFICAÇÕES Devido a um contínuo programa de pesquisa e desenvolvimento, reservamo-nos o direito de alterar
Hairdryer. Register your product and get support at HP8183 HP8182 HP8181 HP8180. Manual do utilizador
 Register your product and get support at www.philips.com/welcome Hairdryer HP8183 HP8182 HP8181 HP8180 PT Manual do utilizador Português Parabéns pela compra do seu produto e bem-vindo à Philips! Para
Hairdryer. Register your product and get support at HP4962/22 HP4961/22. Manual do utilizador
 Register your product and get support at www.philips.com/welcome Hairdryer HP4962/22 HP4961/22 PT Manual do utilizador Português Parabéns pela aquisição e seja bem-vindo à Philips! Para aproveitar todos
Hairdryer HP4984 HP4983 HP4982 HP4981 HP Register your product and get support at. Manual do utilizador
 Register your product and get support at www.philips.com/welcome Hairdryer HP4984 HP4983 HP4982 HP4981 HP4980 PT Manual do utilizador 7k j 7l i a h b c d e f g Português 1 Importante Leia cuidadosamente
Importante. 13. Não ultrapassar a capacidade máxima do recipiente. 14. Não utilizar o Espremedor de Citrinos por períodos muito longos.
 Importante 1.Leia todas as instruções cuidadosamente antes de usar o espremedor de citrinos Orima. 2. Este aparelho pode ser usado por crianças de 8 anos ou mais e pessoas com reduzidas capacidades físicas,
Hairdryer. Register your product and get support at HP8100/04. PT-BR Manual do Usuário
 Register your product and get support at www.philips.com/welcome Hairdryer HP8100/04 PT-BR Manual do Usuário a b c d Português Parabéns pela aquisição e seja bem-vindo à Philips! Para aproveitar todos
Hairdryer HP4993 HP4992 HP4991 HP4990. Register your product and get support at PT Manual do utilizador
 Register your product and get support at www.philips.com/welcome Hairdryer HP4993 HP4992 HP4991 HP4990 Manual do utilizador e f g d h b a c i j k Português Parabéns pela compra do seu produto e bem-vindo
SUMÁRIO PORTUGUÊS INDEX ENGLISH
 SUMÁRIO PORTUGUÊS Componentes do produto...2 Sugestões de uso: pescoço, ombro, perna, braço, cintura...2 Os defeitos mais comuns e como resolvê-los...3 Utilização:...3 INDEX ENGLISH Product Components...6
ÍNDICE PORTUGUÊS INDEX ENGLISH
 ÍNDICE PORTUGUÊS 1. Características do Produto...2 2. Aplicação...2 3. Manual de Operação...2 4. Diferença entre os adaptadores AC e DC...3 5. Utilizando o Adaptador DC 12V...3 6. Utilizando o Adaptador
Straightener. Register your product and get support at HP4686/22. Manual do utilizador
 Register your product and get support at www.philips.com/welcome Straightener HP4686/22 PT Manual do utilizador d e f c b a Português Parabéns pela compra do seu produto e bem-vindo à Philips! Para tirar
Rev BR1
 AVISO LEGAL! DEVIDO A PERIGOS INERENTES ASSOCIADOS AOS PROCEDIMENTOS DE MANUTENÇÂO AUTOMOTIVA, O FABRICANTE E TODAS AS PARTES ENVOLVIDAS COM A DISTRIBUIÇÂO E / OU VENDA DESTE EQUIPAMENTO NÃO SE RESPONSABILIZAM,
Curler. Register your product and get support at HP8600/00. Manual do utilizador
 Register your product and get support at www.philips.com/welcome Curler HP8600/00 PT Manual do utilizador a b c d e f g h i j Português Parabéns pela compra do seu produto e bem-vindo à Philips! Para tirar
MANUAL DE INSTRUÇÕES BARBEADOR ELÉTRICO AT-3300
 MANUAL DE INSTRUÇÕES BARBEADOR ELÉTRICO AT-3300 POR FAVOR, LEIA ESTE MANUAL ATENTAMENTE ANTES DE UTILIZAR O PRODUTO Você acabou de adquirir um produto ETERNY, da mais alta qualidade. Agradecemos a sua
CUIDADOS E DICAS DE USO
 Parabéns pela escolha dos Produtos da MQ Professional. Para garantir o melhor desempenho de seu produto, leia atentamente as instruções a seguir. Recomenda-se guardar este Manual de Instruções para eventuais
GARANTIA LIMITADA SNIFF
 GARANTIA LIMITADA SNIFF Este produto, importado pela PET PANDA Comércio de Artigos para Animais, é garantido contra defeitos de material e de fabricação por um ano da data da compra, se utilizado de acordo
Staightener. Manual do utilizador. Register your product and get support at HP8309/00 HP8310/00
 Register your product and get support at www.philips.com/welcome Staightener HP8309/00 HP8310/00 PT-BR Manual do utilizador d e c b a PT-BR Parabéns pela aquisição e seja bem-vindo à Philips! Para aproveitar
MANUAL ALICATE DE COMPRESSÃO YQK
 Este manual possui avisos de segurança, precauções, montagem, operação, inspeção, manutenção e procedimentos de limpeza da ferramenta de crimpar terminais YQK, adquirida na empresa Sibratec. Estas são
Straightener. PT-BR Manual do Usuário. Register your product and get support at HP8361/00
 Register your product and get support at www.philips.com/welcome Straightener HP8361/00 PT-BR Manual do Usuário a b c d e + -- --- f g h i j k l PT-BR Parabéns pela aquisição e seja bem-vindo à Philips!
INFORMAÇÕES IMPORTANTES SOBRE SEGURANÇA
 Agradecemos a preferência por este produto. Leia todas as instruções antes de utilizar este produto e guarde este manual para referência futura. INFORMAÇÕES IMPORTANTES SOBRE SEGURANÇA Ao utilizar um aparelho
 Register your product and get support at www.philips.com/welcome HP8180/80 HP8180/81 HP8182/80 HP8182/81 PT-BR Manual do utilizador PT-BR Parabéns pela aquisição e seja bem-vindo à Philips! Para aproveitar
Hairdryer. Register your product and get support at HP8203 HP8202 HP8201 HP8200. Manual do utilizador
 Register your product and get support at www.philips.com/welcome Hairdryer HP8203 HP8202 HP8201 HP8200 PT Manual do utilizador Português Parabéns pela compra do seu produto e bem-vindo à Philips! Para
FORNO ELÉTRICO VCC-8028
 Manual de Instruções FORNO ELÉTRICO VCC-8028 SOMENTE PARA USO DOMÉSTICO Leia atentamente as informações contidas neste manual antes de usar o aparelho. INFORMAÇÕES DE SEGURANÇA: 1. Antes de utilizar o
ESTEIRA MASSAGEADORA Modelo: RM-EM9117
 ESTEIRA MASSAGEADORA Modelo: RM-EM9117 ĺndice INFORMAÇÕES IMPORTANTES SOBRE SEGURANÇA 1 INSTRUÇÕES DE USO 3 MANUTENÇÃO 3 ARMAZENAMENTO 4 LIMPEZA 4 INFORMAÇÕES IMPORTANTES SOBRE SEGURANÇA Ao usar produtos
1. Product Name. 2. Product Code. 3. Colour. 4. Brief Description. 5. Contents. Switch Adapted Clip On Fan. Colours may vary
 1. Product Name Switch Adapted Clip On Fan 2. Product Code 20489 3. Colour Colours may vary 4. Brief Description Connects to your switch for switch activation. 5. Contents Fan with cable with 3.5mm jack
ULA Manual original... 14
 5 6 7 4 ULA 14.4-18 3 2 1 Manual original... 14 PT PORTUGUÊS Manual original 14 1 Indicações gerais de segurança AVISO Ler as Instruções de Serviço para reduzir um risco de ferimentos e lesões. AVISO Ler
Straightener. Register your product and get support at HP4666/22. Manual do utilizador
 Register your product and get support at www.philips.com/welcome Straightener HP4666/22 PT Manual do utilizador Português Parabéns pela compra do seu produto e bem-vindo à Philips! Para tirar o máximo
Ferramentas Profissionais LIXADEIRA ORBITAL S-1200E MANUAL DO USUÁRIO
 LIXADEIRA ORBITAL S-1200E MANUAL DO USUÁRIO AGRADECEMOS POR VOCÊ TER COMPRADO UM PRODUTO RYOBI. Você adquiriu o que existe de melhor em ferramentas no mundo. Para garantir sua segurança e obter sua satisfação
Refrigerador de Vinho Termelétricos
 Refrigerador de Vinho Termelétricos Adega Modelo ADG03 1 Manual de Instrução Por favor, leia com cuidado e siga todas as normas de segurança e instruções de funcionamento antes de usar. I. Importantes
Straightener. Register your product and get support at HP8297. PT-BR Manual do Usuário
 Register your product and get support at www.philips.com/welcome Straightener HP8297 PT-BR Manual do Usuário a b cd e g f h i Português Parabéns pela aquisição e seja bem-vindo à Philips! Para aproveitar
500/1000 Kg. PA1000A 500/1000 Kg. PA1000D-18M
 Guincho Eléctrico 500/1000 Kg. PA1000A 500/1000 Kg. PA1000D18M Electric Hoist 500/1000 Kg. PA1000A 500/1000 Kg. PA1000D18M Instructions Manual Regras Gerais de Segurança Aviso Para reduzir o risco de acidente,
Straightener. Register your product and get support at HP8341/00. Manual do utilizador
 Register your product and get support at www.philips.com/welcome Straightener HP8341/00 PT Manual do utilizador a b c d e f g h i Português Parabéns pela compra do seu produto e bem-vindo à Philips! Para
Manual de Instruções FURADEIRA PARAFUSADEIRA A BATERIA FPI 918K. ADVERTÊNCIA: Leia atentamente este manual antes de usar o produto.
 Manual de Instruções FURADEIRA PARAFUSADEIRA A BATERIA FPI 918K ADVERTÊNCIA: Leia atentamente este manual antes de usar o produto. ÍNDICE SEÇÃO PÁGINA Introdução 3 Normas gerais de segurança 3 Uso e cuidados
PC821 MANUAL DO USUÁRIO
 PC821 MANUAL DO USUÁRIO INTRODUÇÃO Obrigado por adquirir o novo carregador portátil ONN. Com design elegante, prático de transportar, alta capacidade e carregamento rápido, este produto pode atender rapidamente
Instruções de Segurança
 - 0 - Instruções de Segurança! ADVERTÊNCIA Leia todas as advertências e instruções de segurança. Deixar de seguir todas as advertências e instruções pode resultar em descarga elétrica, incêndio e/ou ferimentos
WS3772 WS3772U. 850W Serra Tico-Tico PT P05 850W Jig Saw EN P11
 WS3772 WS3772U 850W Serra Tico-Tico PT P05 850W Jig Saw EN P11 14 1 2 3 4 13 5 6 12 11 7 10 9 8 17 16 15 Fig.A Fig.B Fig.C 10 Fig.D Fig.E Fig.F Fig.G1 Fig.G2 Fig.H Fig.I1 Fig.I2 Fig.J 18 Fig.K Fig.L LISTA
WS2500. Parafusadeira/Furadeira sem fio 12V Lítio PT P06 12V Lithium Cordless Drill Driver EN P14
 WS2500 Parafusadeira/Furadeira sem fio 12V Lítio PT P06 12V Lithium Cordless Drill Driver EN P14 1 2 3 9 4 8 5 6 7 6 7 A B Fig.A1 Fig.A2 Fig.B Fig.C Fig.D Fig.E Fig.F LISTA DE COMPONENTES 1. Mandril 2.
MANUAL DE INSTRUÇÕES APARADOR CABELO HSM/R 5638
 MANUAL DE INSTRUÇÕES APARADOR CABELO HSM/R 5638 INSTRUÇÕES DE SEGURANÇA Leia atentamente o manual de instruções do aparelho antes de colocá-lo em funcionamento. Mantenha o manual guardado em local seguro
RÁDIO PORTÁTIL. Modelo AC-128
 RÁDIO PORTÁTIL Modelo AC-128 Para prevenir ferimentos ou danos, antes de usar o aparelho leia e siga atentamente a todas as instruções contidas neste manual. INTRODUÇÃO O Rádio Portátil AC-128 é um produto
MÁQUINA DE CORTAR CABELO
 www.eterny.com.br MANUAL DE INSTRUÇÕES MÁQUINA DE CORTAR CABELO PROFISSIONAL ET37010A 127V - 12W PARABÉNS Parabéns pela sua compra! Este produto foi projetado para um funcionamento eficiente e seguro.
HP8180
 Register your product and get support at www.philips.com/welcome HP8180 PT Manual do utilizador Português Parabéns pela compra do seu produto e bem-vindo à Philips! Para tirar o máximo partido da assistência
42380/519. Manual de Instruções. Parafusadeira 3,6 V com. bateria de Ni-Cd. Manual de Instruções Nº SER. uso doméstico
 Manual de Instruções 42380/519 Parafusadeira 3,6 V com bateria de Ni-Cd Nº SER. uso doméstico ATENÇÃO! Antes de operar qualquer ferramenta elétrica, leia atentamente todas as instruções de segurança descritas
MANUAL DE INSTRUÇÕES APARADOR CABELO HSM/R 5673
 MANUAL DE INSTRUÇÕES APARADOR CABELO HSM/R 5673 INSTRUÇÕES DE SEGURANÇA Leia atentamente o manual de instruções do aparelho antes de colocá-lo em funcionamento. Mantenha o manual guardado em local seguro
ADVERTÊNCIA: LEIA ESTAS INSTRUÇÕES ANTES DE USAR O PRODUTO.
 Furadeira de Impacto MANUAL DE INSTRUÇÕES TM500/TM505 ADVERTÊNCIA: LEIA ESTAS INSTRUÇÕES ANTES DE USAR O PRODUTO. Aplicação Sua Furadeira de impacto Black & Decker foi projetada para perfurar madeira,
Suporte de Fácil Fixação Nokia HH-20 e CR-114/115
 Suporte de Fácil Fixação Nokia HH-20 e CR-114/115 B D C 1 A E Edição 2.0 A C D 2 G F E B 4 3 8 5 6 9 7 2010 Nokia. Todos os direitos reservados. Nokia, Nokia Connecting People e o logotipo Nokia Original